
How To Install Firefox on Ubuntu?
Installing Firefox on Linux devices is simple. Even if you are a beginner to Linux, you can install Firefox easily by running a few commands on your Ubuntu desktop or Ubuntu Server.
However, Firefox requires a graphical interface (GUI) to run. If you are using Ubuntu Server, you need to install Gnome on your server, which is a desktop environment that you can connect to using XRDP to use Firefox normally.
Install Firefox in Ubuntu Using Terminal
To start the installation process, you need to connect to your Linux server with root privileges, or if you are on a local machine, just open a new terminal using Ctrl + Alt + T.
In this method, you’ll learn how to install Firefox from Ubuntu’s built-in package manager, which is apt, which gives you access to the latest version of Firefox available for your Ubuntu system.
Update Ubuntu Repository List
As you may know, before installing any packages on a Linux system, you need to update its package list to get the latest version of the Firefox package.
sudo apt update
Install Firefox on Ubuntu
sudo apt install firefox
Following that, you’ll be asked to enter your password as you’re using sudo privileges. After entering your password, the terminal will request to confirm the Firefox installation. Type Y and press Enter to initiate the Firefox download and installation.
Wait until installation ends, then you can install xrdp on your Ubuntu server to connect your Ubuntu server with remote desktop and use your Firefox easily.
Install Firefox Tar File in Ubuntu
If you want a manual Firefox installation that allows you to install older versions too, you can use the Firefox tar file.
Download Firefox in Ubuntu
To download the latest version of Firefox from the Mozilla website, you need to use the wget command, which downloads any link you pass to it.
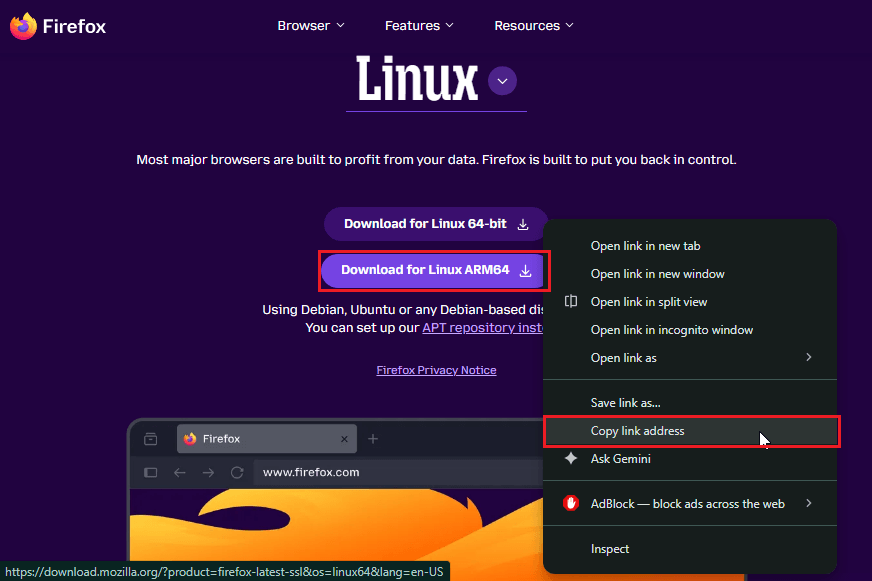
Go to the Mozilla Firefox website Linux page, right-click on the download button, and copy its link.
Or if you want to install older versions, you can go to Mozilla release archives to select and download each version you want.
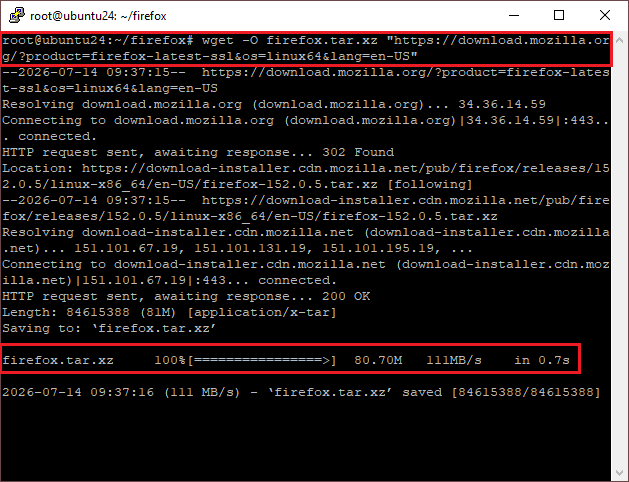
wget -O firefox.tar.xz "https://download.mozilla.org/?product=firefox-latest-ssl&os=linux64&lang=en-US"
Replace the link you copied with the link in the command above; it should be in double quotation marks.
Note: If you face the “wget not found” error, it means you don’t have wget installed on your system. Run the command below to install wget
sudo apt install wget
Extract Tar File in Linux
In this step, you need to extract the downloaded Firefox tar file using the tar command. Tar files are archive files that package multiple files together. The Firefox archive uses xz compression, which you can extract with the command below:
sudo tar xvf firefox.tar.xz
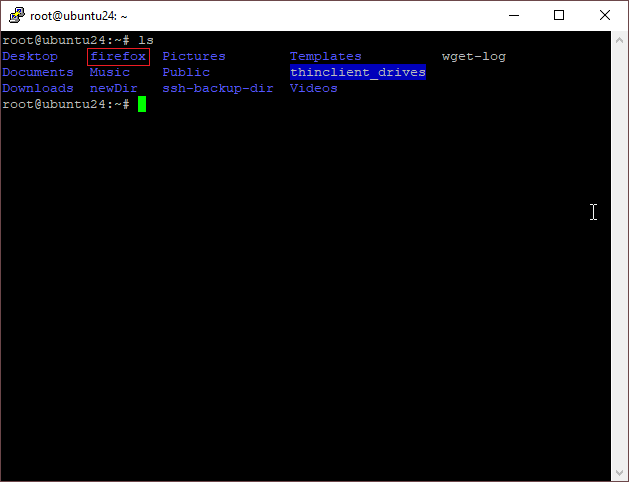
It will extract a folder named firefox that you can verify with the command below:
ls
Move Firefox to Installation Folder
In this step, you need to move the extracted software to the/opt directory, which is the directory to install third-party applications. Use the command below to move the Firefox directory to the/opt directory.
sudo mv firefox /opt/
Create Firefox Command Shortcut in Ubuntu
In this step, you will need to create a symbolic link to make Firefox availble as a normal system command. If you do not create a symbolic link, you need to run Firefox every time by specifying its location.
Symbolic name acts as a pointer to the original Firefox file or directory, allowing the command line to easily access it. To create a symbolic link, run:
sudo ln -s /opt/firefox/firefox /usr/local/bin/firefox
Verify Firefox installation in Ubuntu
After installation, you need to verify that wheather firefox installed on your system or not.
firefox --version
If you see your Firefox version as output, it means you’ve installed correctly, but if you are using Ubuntu server, you may face “cannot open shared object file: No such file or directory“.
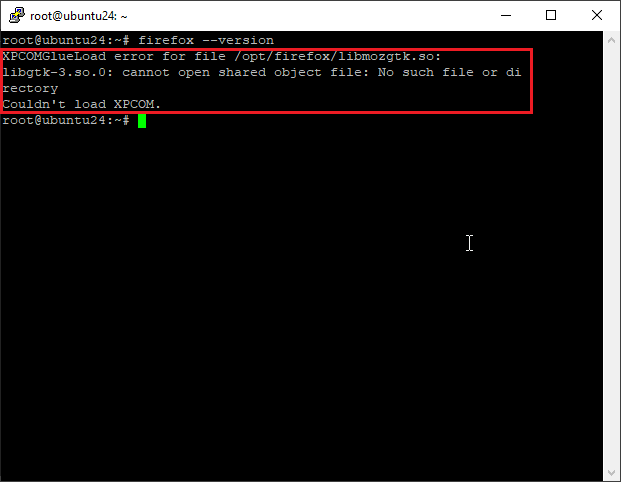
You can fix this problem by installing the GTX Library, which in most Ubuntu servers is not installed automatically.
Run the command below to install the GTX Library:
sudo apt install libgtk-3-0t64
Launch Firefox in Linux
Once the installation is done, you can launch Firefox by typing firefox in the terminal and pressing Enter. Alternatively, you can search for Firefox in your applications menu and launch it from there.
If you want an alternative lightweight browser on your Ubuntu server, you can install Google Chrome.
Conclusion
There are many methods to install Firefox on Ubuntu, and the easiest one is to install from the Ubuntu app store itself, but if you want more control over the installation, you can use terminal solutions, which we covered two of terminal solutions in this article.
If you want to just install the latest version, you can use the Ubuntu apt package installer method, but if you want to install older versions, you can use tar.gz files to be able to install the version you want.
Hope this article helped you! If you face any problems or questions, it will be plessure to use to help you!

The Author Richard.M
Richard started out as a member of the support team and is now a full-stack web developer and support team lead at VPS Makers. He is passionate about providing people with top-notch technical solutions based on his 5 years of experience in web hosting, but as much as he enjoys coding and creating new works, he secretly dreams of becoming a sports star.
More from Richard.M