How to Disable Ping Requests in Windows Firewall?
If you ever thought you didn’t want pinging your Windows Server, you better disable ping requests using the Windows Firewall with Advanced Security Console. By blocking ping requests, also known as ICMP echo requests, you can make your Windows VPS less visible to potential attackers such as DDOS. Follow the steps to stop pinging the server and not let it work.
How to block ping request in ICMP Windows Firewall?
The ping command is a common feature found in operating systems. It can be used to check how fast a device on your network responds and if it’s connected. When you use the ping command, it sends out Internet Control Message Protocol (ICMP) Echo Request messages to the specified computer.
Step 1: Open Windows Firewall
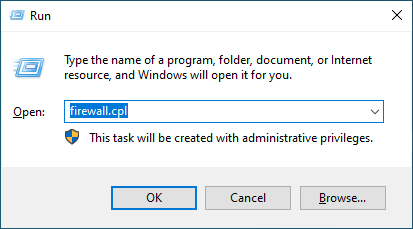
To kickstart Windows firewall, press the “Win+R” keys to open the Run box. Then type “firewall.cpl” and hit enter to get it going. Or type firewall in the search bar of the Start menu and then click on “Windows Firewall” from the search results to get it up and running.
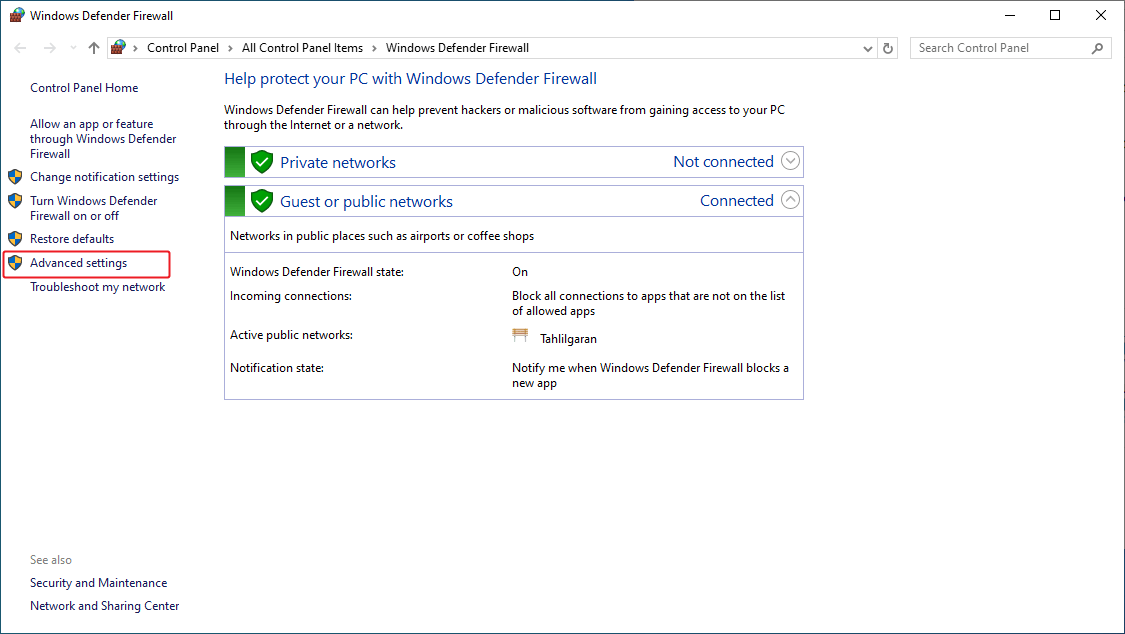
Now tap on “Advanced Settings” from the left menu and enter the “Windows Firewall with Advanced Security” environment.
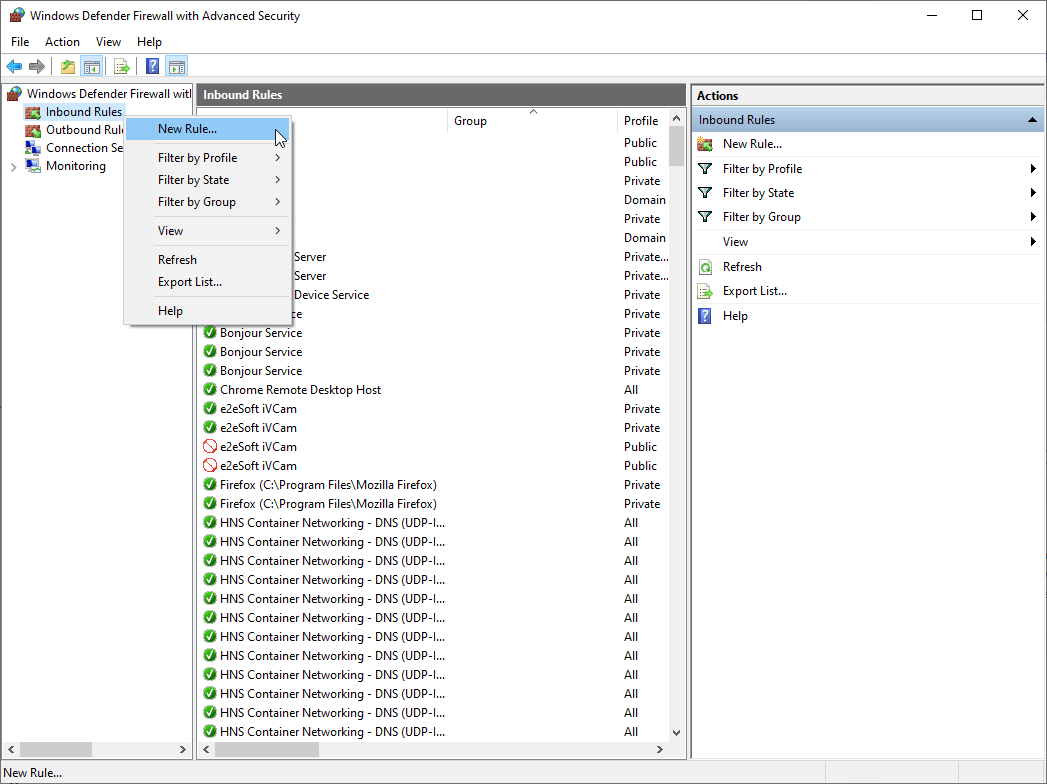
Step 2: Create New Rules
On the left hand side, “right-click” on “Inbound Rules” and select the “New Rule option” from the menu.
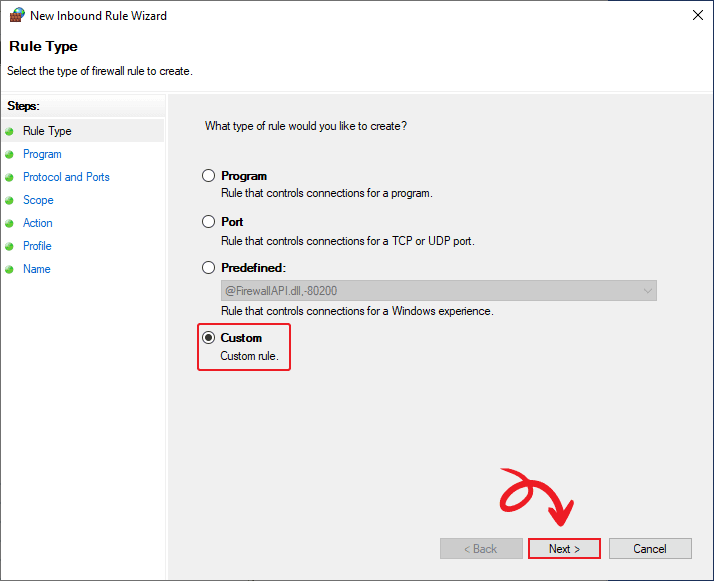
Once the New Inbound Rule Wizard window appears, select “Custom” and click “Next“.
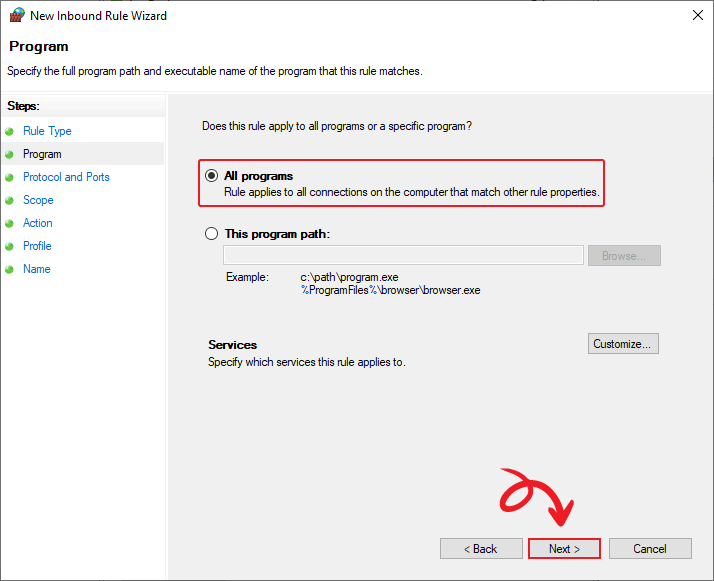
Step 3. Configure the Program Sections
Select “All programs” and click “Next” to apply this rule to all programs.
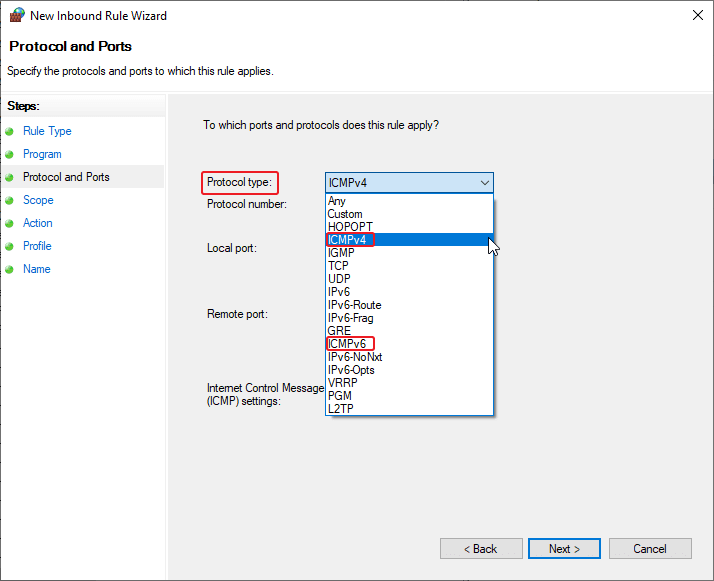
Step 4: Specify the Protocol and Ports
To disable IPv4 ping on Windows, you need to select the “Protocol type” option and set it to “ICMPv4“. If you’re aiming to block IPv6, opt for “ICMPv6” instead.
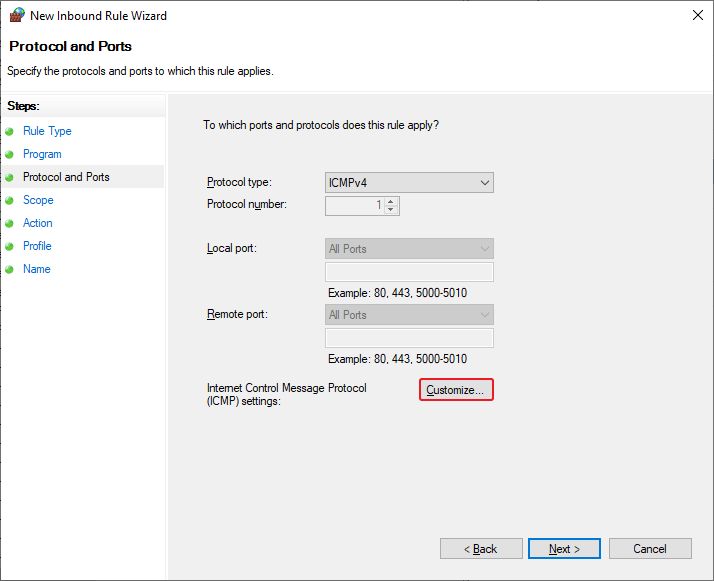
Next, click the “Customize” button at the bottom of the window.
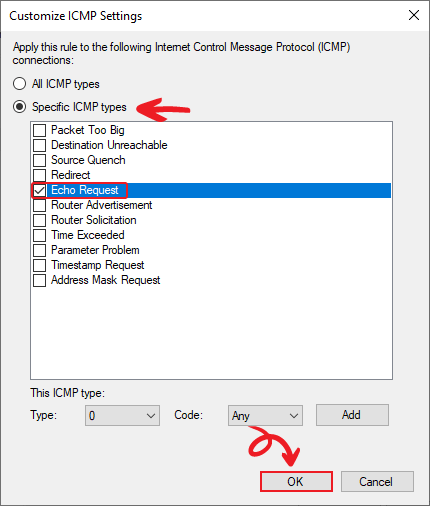
Go ahead and select “Specific ICMP types.” Then, all you have to do is check the box next to “Echo Request” and hit “OK“.
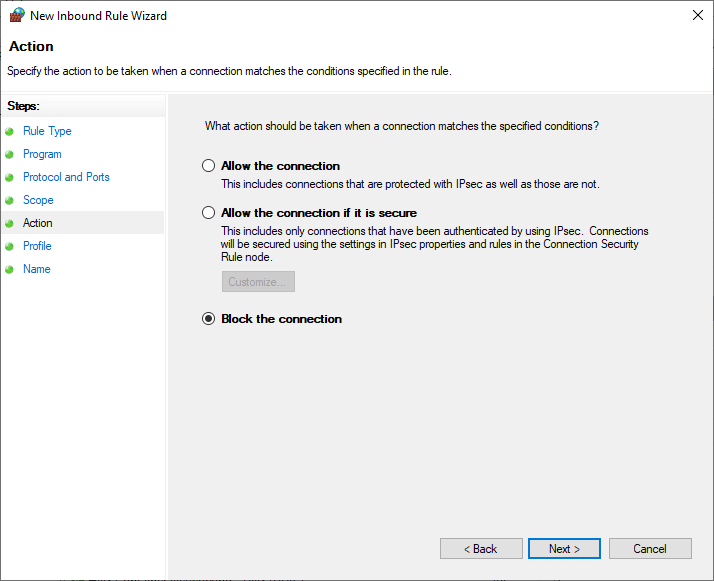
Step 5: Select the Rule Action
At this point, to close Windows ping requests choose “Block the connection” and tap “Next“.
Step 6: Profile Type
At the Profile tab, you’ll be asked ‘When does this rule apply?’ Continue with the default setting and leave all profiles checked and click “Next.”

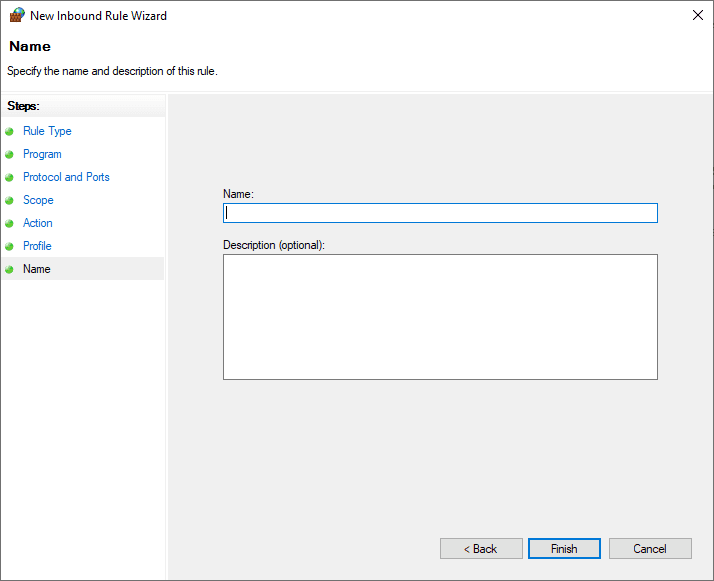
Step 7: Name the Rule
Now pick a “Name” for that role so you remember what it’s all about and then wrap it up by clicking “Finish.”
There you go! After doing these steps your windows server will no longer have ping and this is critical for the security of your server information, now you can only enable ping requests using windows firewall.
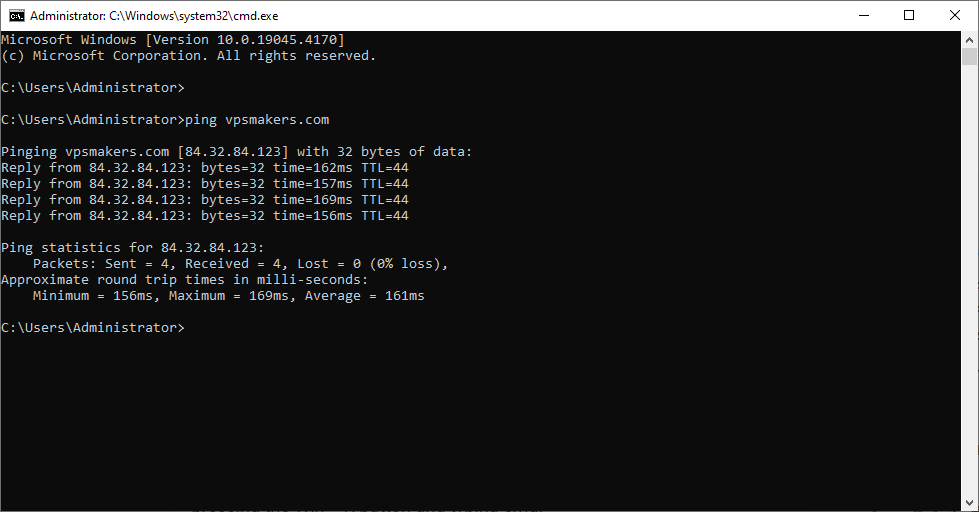
How to Use the Ping Command in Windows 10 or beyond?
When a ping request is made, the results show how many responses were returned and how long it took to receive them. To get a ping, just follow these steps in your operating system’s terminal or command line.
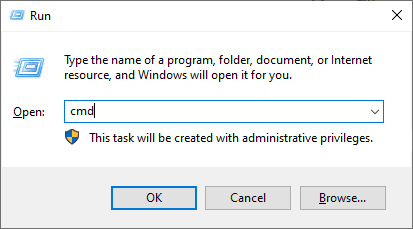
Open a Terminal or Command Prompt in your Windows system by pressing the Win + R button and typing cmd.
In the terminal, enter the ping command along with the IP address or domain name of the device you want to ping. For example, to ping VPSMakers, run the following command:
ping vpsmakers.com

ping 8.8.8.8
Conclusion
To sum up, by disabling ping requests in your Windows Firewall, you can enhance the security of your system. This simple measure can prevent potential attackers from using ping to identify and potentially target your device, and to further increase the security of connecting to Windows Server, it is better to change the RDP port of your server.
The Author Sally.M
Hey, I'm Sally, and I'm here to break down the world of virtual servers and web hosting in a way that's super easy to understand. Whether you're a tech guru or just starting out, I've got you covered.
More from Sally.M