How to Install Python on Windows Server 2019?
Before we explore how to install Python on a Windows server 2019, let’s simplify some points: There are many programming languages in the world, but Python stands out among the rest. Because Python is compatible with a wide range of platforms, including Linux servers, Windows, Macintosh, mobile systems, and yes, even PlayStation!
Whether your focus lies in web application development, artificial intelligence projects or game creation, Python is a great choice. The best thing you can do is take the first step and buy Windows VPS and then install Python on your Windows server.
Steps to Install Python on Windows Server for All Users
To install Python on any version of Windows Server, especially Windows Server 2019, follow these steps:
Step 1: Download Python Installer
First, go to the Python website and download the Windows installer for the appropriate software version (e.g., Python 3.12). The recommended version for the Windows installer is the 64-bit version of Python (depending on your server’s architecture, you can choose 32-bit as well).
If you’re not sure what operating system you’re running, just right-click on “This PC,” select “Properties” and scroll down to the “System type” section for all the info you need.

Step 2: Run Python Installer
When the downloading process is complete, give the .exe installer a click to open it. In the window that pops up, select the installation option that you prefer. Just don’t forget to check the box that says “Add Python 3.12 PATH to the operating system“. This feature will let you run Python commands from any directory in the command prompt.
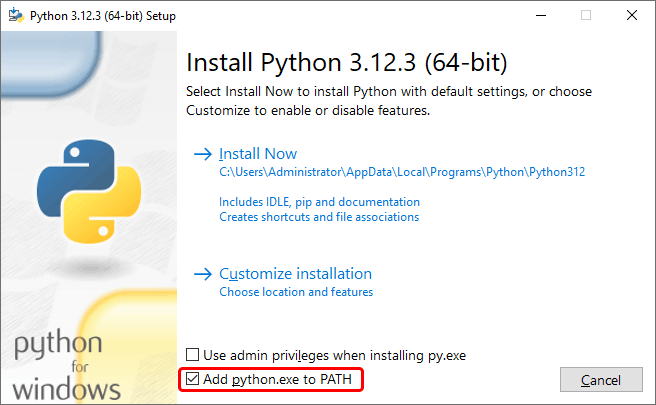
You also have the option to install Python for either the current user or for all users on the system. Just check the box that says “Admin privileges” or “Install the launcher for all users” in some versions to make Python available to all users.
Step 3: Install Python
As you see, there are two main choices for installation. Click one of them to start the process.
3-1 Install Now
This option is straightforward and quick. If you select “Install Now,” Python will be installed using the default settings. This means it can only be accessed by the user currently running the installation. Python will be installed in the default directory (usually C:\Users\<YourUsername>\AppData\Local\Programs\Python\Python<version>), and it will automatically add Python to the system PATH for the current user.
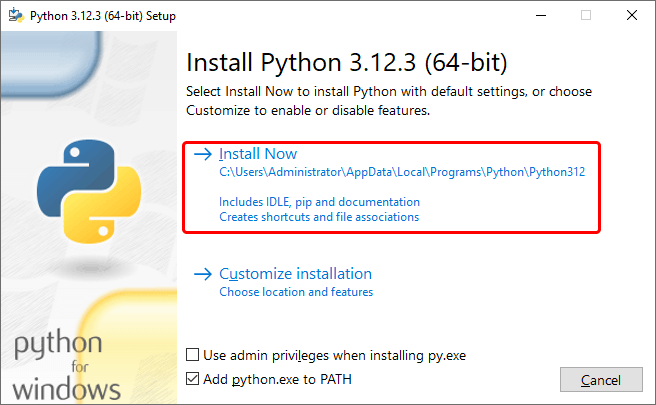
You should choose this option if you don’t need any customization and want to get Python up and running as quickly as possible.
3-2 Customize Installation
On the other hand, the “Customize installation” will give you more control over the installation process. This allows you to:
• Tap the browse box and select the exact installation location.
• Install optional features such as documentation, pip (Python package manager), IDLE (Integrated Development and Learning Environment) and shortcuts.
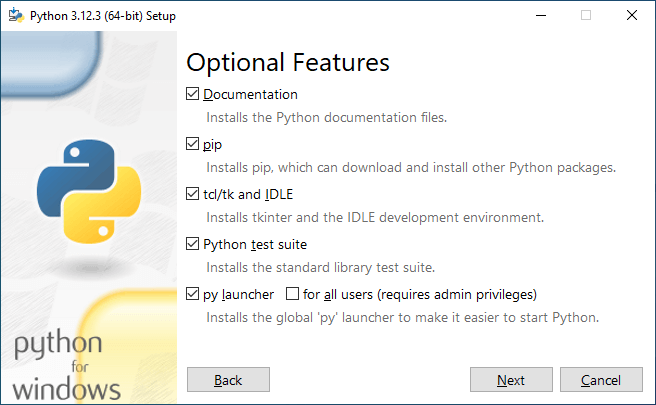
• Enable or disable advanced options like precompiling standard library files, adding Python to the system PATH and installing Python for all users. By selecting “Install for all users,” Python will be installed in a system-wide directory (typically C:\Program Files\Python<version>), making it accessible to all users on the system. This option requires administrative privileges.
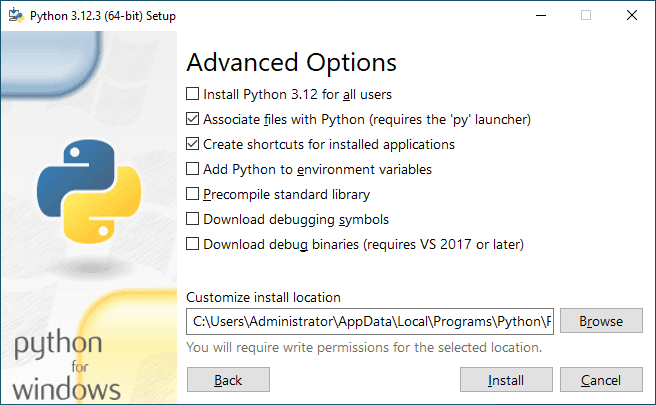
• Configure additional settings according to your requirements.
Step 4: Disable Installation Restrictions
Once the installation process is complete, a window will pop up saying that the setup was successful. At the bottom of the window, you may have the Disable Path Length Limit option.
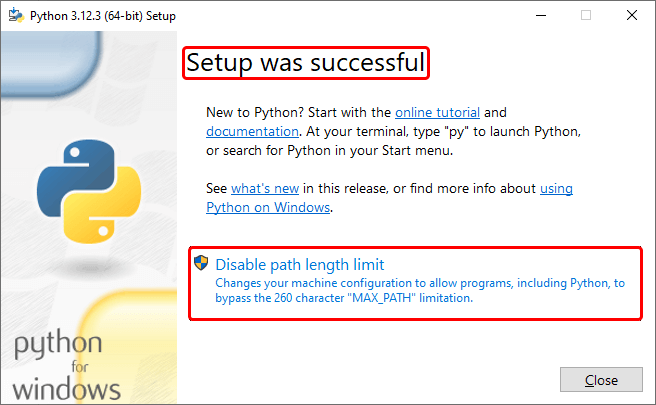
Activating this feature option removes the existing limits on the MAX_PATH variable. In this situation, longer names are used for the Path variable without causing issues for the operating system or other parts. As a result, the limitations of installing Python on a Windows server are removed. However, if you don’t want to remove this restriction, skip this step and click Close to complete the process of installing Python on the Windows server 2019.
Step 5: Confirm Installation
Open a command prompt on your Windows Server to verify Python was installed successfully. Start by typing “cmd” into the Windows search bar and then hit Enter. Next, run the following command to find out the exact version number of Python installed on your system:
python –v
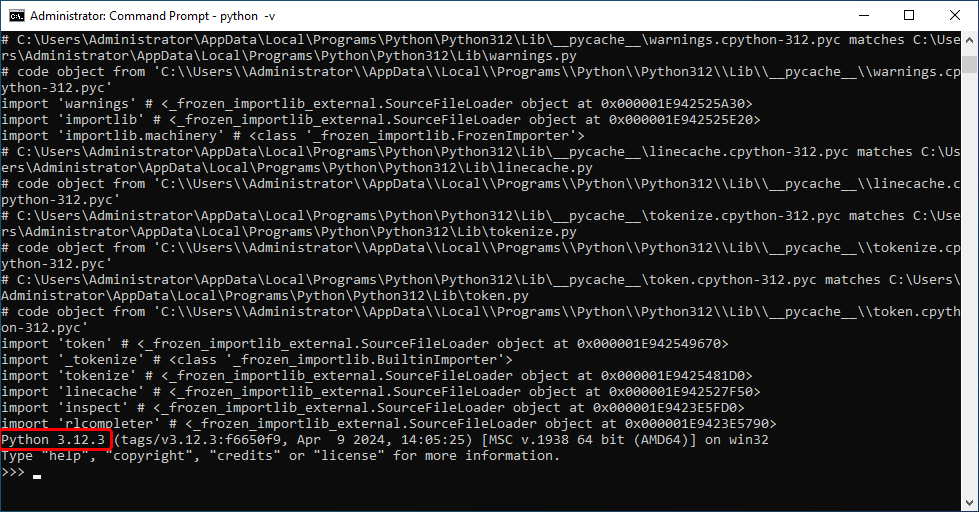
If you get an error message or the version number is not displayed, it may indicate that Python was not installed correctly or the PATH was not set properly.
Conclusion
Installing Python on Windows Server will significantly enhance your ability to manage and develop various projects. We covered the detailed steps on how to install Python on a Windows Server 2019, ensuring you have a smooth setup process.
Businesses looking to use Python on Windows Server require a stable and powerful server environment. This is where VPSMakers top-notch Windows virtual server (VPS) solutions come into play. Buy VPS now and enjoy a stable and efficient environment to achieve your goals.
The Author Sally.M
Hey, I'm Sally, and I'm here to break down the world of virtual servers and web hosting in a way that's super easy to understand. Whether you're a tech guru or just starting out, I've got you covered.
More from Sally.M