
How to Setup UFW on Ubuntu?
Uncomplicated Firewall (UFW) is a simple command-line firewall management tool commonly used on Ubuntu and Debian-based Linux systems. It provides an easier way to configure firewall rules without requiring you to work directly with lower-level firewall rules like iptables.
Using UFW, you can allow or block specific TCP and UDP ports, restrict connections to specific IP addresses, allow predefined services, and manage existing firewall rules.
In this guide, you will learn how you can set up UFW on your Ubuntu, what you should do before setup, and how you can disable UFW.
Before opening or blocking any ports, you should first verify that UFW is installed and enabled on your Linux server. UFW is commonly used in Ubuntu and Debian-based Linux distributions, but you can use it on other distros too.
If you are connected to your server via SSH, you should first allow SSH traffic to avoid locking yourself out of the server. Alternatively, make sure you have another method of accessing your server before enabling the firewall.
Install UFW on Ubuntu or Debian
UFW is commonly pre-installed on Ubuntu and Debian systems. However, depending on your server image or installation, it may not be installed. This can also vary when using a new Ubuntu VPS or Debian VPS.
The installation process is mostly the same on Ubuntu and other Debian-based Linux distributions. Therefore, when we refer to running a command on Ubuntu, the same command will generally work on other Debian-based distributions as well.
Update Linux Packages
First, update your Ubuntu repository list to ensure you are downloading the latest available ufw version in the Ubuntu repo:
You don’t need to perform a full system update here. However, if you encounter any issues during the installation, you can follow this guide to update your Linux server’s packages to the latest versions and help prevent potential installation problems.
sudo apt update
Install UFW with apt in Ubuntu
After updating the packages, use the command below to install the UFW firewall on your server.
sudo apt install ufw
Verify UFW installation on Ubuntu
After the installation is complete, you can verify that UFW is installed by checking its version:
sudo ufw version
Check Current UFW Status
Before enabling or adding firewall rules, check the current status of UFW by running this command:
sudo ufw status
If UFW has not been enabled yet, the output will show:
Status: inactive
If it is already active, the command displays the current firewall rules.
You can also use the following command to view the active rules with their rule numbers:
sudo ufw status numbered
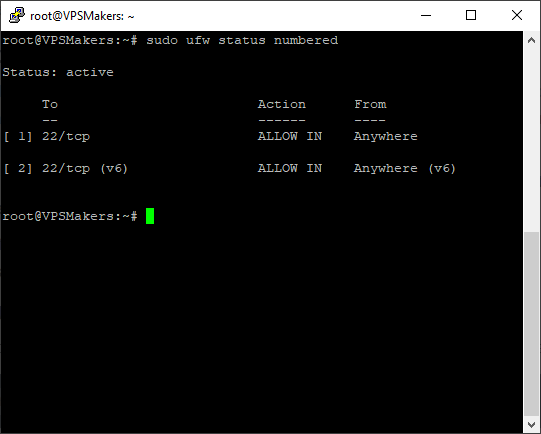
Allow SSH Before Enabling UFW
If you are connected to your server remotely through SSH, enabling the firewall without allowing the SSH connection will lock you out of the server and prevent access to the server.
If your server uses the default SSH port, which is port 22, allow SSH using the following command:
sudo ufw allow OpenSSH
Or you can open port 22 directly
sudo ufw allow 22/tcp
If your SSH port is a custom port, replace 22 with the port configured for your SSH connection.
After adding the rule, check the UFW configuration to verify it’s added correctly:
sudo ufw status numbered
Warning: Make sure the SSH rule exists before continuing to the next step.
Check the Default UFW Policies
Before enabling UFW, you can check its default firewall policies to understand how incoming and outgoing connections will be handled.
Run the following command:
sudo ufw status verbose
On a typical ufw setup, you will get output like this:
Default: deny (incoming), allow (outgoing), disabled (routed)
This means incoming connections are denied by default (blocked), while outgoing connections from your server are allowed.
Because all incoming connections are blocked, you should make sure that services you need, like SSH or any other services that you use for web hosting, or other things, are allowed.
So you should open the ports you need in UFW after setting up UFW itself. But first, you should open SSH before enabling it.
Check Whether Another Firewall Is Active
Before enabling UFW, make sure you don’t have any other firewall or firewall management tool already active on your server. Using multiple firewall management tools on one server can make firewall management and configuration hard and cause unexpected issues.
By running the command below, you can check whether other common firewall services are active:
sudo systemctl --type=service --state=running | grep -E 'ufw|firewalld|nftables|iptables'
This command checks the systemd list for running firewalls.
If, after running the command, you don’t get any output, it means nothing is running; otherwise, you should disable or uninstall other firewalls and keep only UFW.
Enable UFW
After allowing SSH and configuring any other firewall rules you need, you can enable UFW using the following command:
sudo ufw enable
You may face a warning that this command may disrupt existing SSH connections; if you’ve set the ssh allow rule type y, press Enter to continue.
If UFW enables successfully, you will see this output:
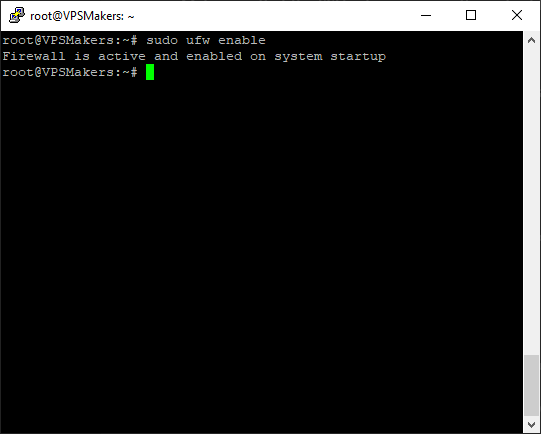
After enabling UFW, the firewall will automatically start on server boot. Now you can safely add additional UFW rules to allow or block the ports and services required by your applications.
Verify SSH Access After Enabling UFW
After enabling UFW, you should verify that you can still access your server through SSH.
Do not close your current SSH session immediately. Instead, open a new terminal or SSH session and try connecting to your server again
Do not close your current SSH session immediately. Instead, if you are using PuTTY to connect to your Linux VPS, open a new PuTTY session and establish a second connection to the server.
If you are connecting from Linux, open a new terminal and establish another SSH connection to the server.
ssh username@your_server_ip
Replace username with your server username and your_server_ip with your server’s IP or domain name.
If the new SSH connection works, your firewall configuration is allowing SSH traffic correctly. You can then safely close the previous session.
If you cannot establish a new SSH connection, keep your existing session open so you can check and correct the UFW configuration without losing access to the server.
Enable UFW Logging
UFW logging can help you monitor firewall activity and troubleshoot connection problems. For example, logs can help you identify traffic that is being blocked by your firewall.
To enable UFW logging, run this command:
sudo ufw logging on
You can verify logging status with this command and see if it got enabled or not?
sudo ufw status verbose
You can locate the logs in this location:
/var/log/ufw.log
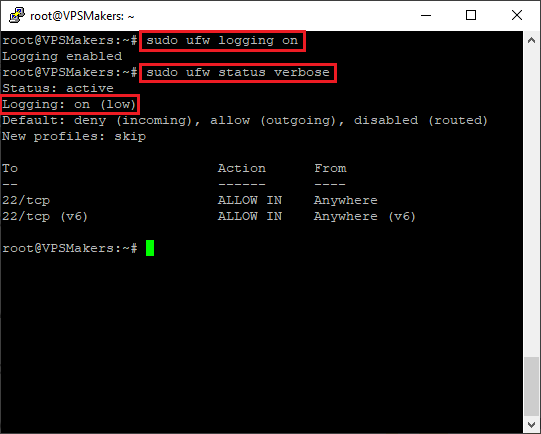
You can view recent logs too by running this command:
sudo tail -f /var/log/ufw.log
You will see logs like this:
Aug 27 14:03:10 VPSMakers kernel: [UFW BLOCK] IN=enp0s3 OUT= MAC=08:00:27:c4:bc:57:88:82:79:1b:92:2c:08:00 SRC=192.168.1.226 DST=192.168.1.209 LEN=1257 TOS=0x00 PREC=0x00 TTL=128 ID=41530 PROTO=UDP SPT=3702 DPT=36289 LEN=1237
Conclusion
Setting up UFW on Ubuntu is a straightforward way to add a basic firewall to your Linux server without manually managing complex iptables or nftables rules.
In this guide, you learned how to install UFW, check its status and default policies, make sure another firewall is not active, allow SSH access, enable UFW, verify your SSH connection, and enable firewall logging.
After UFW is enabled, you can configure additional rules based on the services running on your server.
You can either block a port or IP with UFW or open a port or IP with UFW.
FAQ
How to Disable UFW in Ubuntu?
If you need to temporarily stop the UFW firewall, you can disable it without removing UFW from your server.
To disable UFW, run:
sudo ufw disable
After running this command, UFW stops enforcing its firewall rules. You can verify its status with:
sudo ufw status
But later, it’s better to enable it again to keep your Linux Server always secure.
How to Reset UFW to Its Default Configuration?
If you want to completely remove your existing UFW configuration and return it to its default state, you can use:
sudo ufw reset
UFW will ask you to confirm the action. Type y and press Enter to continue.
Warning: Resetting UFW removes all existing firewall rules and disables the firewall. Make sure you understand the current firewall configuration before using this command, especially on a remote server.
After resetting UFW, you can check its status with:
sudo ufw status
It should be disabled.

The Author Richard.M
Richard started out as a member of the support team and is now a full-stack web developer and support team lead at VPS Makers. He is passionate about providing people with top-notch technical solutions based on his 5 years of experience in web hosting, but as much as he enjoys coding and creating new works, he secretly dreams of becoming a sports star.
More from Richard.M