How to Open a Port or IP With UFW in Ubuntu?
If you are using UFW as your firewall on Ubuntu, Debian, or any other Linux distribution, this guide will show you how to open a port and allow access from a specific port, IP address, or network using the UFW firewall.
Before starting to open a port or allow an IP address connection to your Ubuntu, you should verify that you have UFW installed and configured on your Linux VPS.
Check UFW Status on Linux Server
To check the UFW status on your server, you can run the command below:
sudo ufw status
If you get status: active or status: inactive, it means you have UFW installed on your server, but if you get the ufw command not found, you should install and configure it from scratch.
To learn how to set up UFW on your Ubuntu server, you can read our dedicated article for it:
How to Setup UFW on a Linux Server?
Open a Port With UFW in Ubuntu
After installing and enabling UFW on your Ubuntu or any other Linux distribution, you can now set up firewall rules like opening a port.
Opening a port means telling the firewall to allow connections through this port to the server; you can set a filter for this connection to allow connections from a specific IP or from a specific subnet.

In the following steps, you can learn each method of opening a port using UFW.
Allow TCP Port With UFW
To allow incoming connections to a TCP port, use the following syntax:
sudo ufw allow 8080/tcp
In this example, 8080 is the port number, and tcp specifies the network protocol. UFW creates a rule that allows incoming connections to TCP port 8080.
You can replace the port number and protocol with any number you want.
Allow a UDP Port With UFW
If an application uses UDP instead of TCP, specify UDP in the command instead of tcp when creating the rule:
sudo ufw allow 27015/udp
This command allows incoming connections to UDP port 27015, which can be used in game servers or other applications.
Allow Both TCP and UDP With UFW
TCP and UDP are separate protocols, so allowing TCP traffic on a specific port does not automatically allow UDP traffic on the same port. You should only allow the protocol required by your application. However, if you need to allow both TCP and UDP traffic, follow the steps below.
Some applications require both TCP and UDP connections on the same port. In this situation, you can create separate rules:
sudo ufw allow 8080/tcp

sudo ufw allow 8080/udp
Avoid allowing both protocols if your application requires only one of them. Unnecessary firewall rules can increase your server’s attack surface.
Allow a Port Range in UFW
Some applications require multiple consecutive ports instead of a single port. UFW allows you to open a range of ports using the following command:
sudo ufw allow 3000:3010/tcp
This command allows TCP connections to ports 3000 through 3010.
You can also specify a UDP range by replacing tcp with udp in the command.
sudo ufw allow 3000:3010/upd
Note: Open only the ports the application actually requires. Otherwise, opening a range of ports can make your server vulnerable to attacks.
Allow Port for Specific IP With UFW
By default, opening a port with the previous commands allows connections to that port from any source. However, in some cases, you may need to restrict access to a specific IP address.
For services that should only be accessible from a specific server or by an administrator, you can restrict the source IP address using the command below:
sudo ufw allow from IP_Address to any port 3306 proto tcp
Replace IP_Address with your IP address, 3306, and tcp with the protocol and port you want.
Restricting access by source IP is particularly useful for SSH, databases, administration panels, and private applications that do not need to accept connections from the entire Internet.
Allow Port to a Specific Subnet With UFW
Instead of allowing only one IP or setting up a rule for each IP address, you can create a firewall rule for the IP subnet you want and allow the connection from the entire subnet. This is useful for private networks, VPNs, internal applications, and services that should only be accessible by trusted servers.
You can use the example below by replacing the IP subnet, port, and protocol you want to set a rule for:
sudo ufw allow from 192.168.1.0/24 to any port 8080 proto tcp
This approach is more restrictive than allowing connections from anywhere because only devices within the specified subnet can connect to the server.
It can be useful for limiting access to local users with IP addresses within a specific subnet. You can also configure a VPN on your Ubuntu server to allow authorized users to securely access services on your server’s private network.
Allow Common Services With UFW
UFW includes predefined application profiles for some commonly used services, such as SSH. Instead of specifying a port number manually, you can use these profiles to allow the ports required by a specific service.
You can list the available application profiles using the command below:
sudo ufw app list
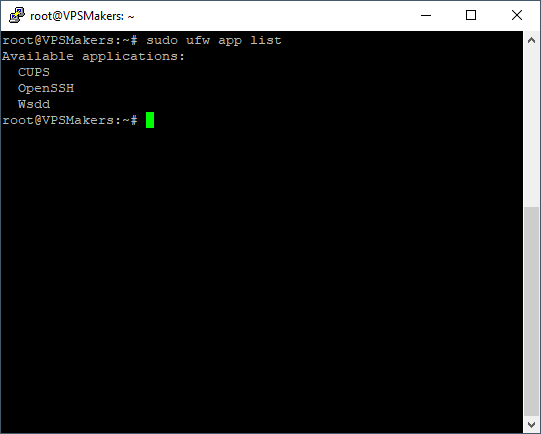
After listing the available application profiles, you can use the command below to open the ports required by a specific application. For example, the following command allows the ports required for the OpenSSH service:
sudo ufw allow OpenSSH
You can replace OpenSSH with any application profile name that is available in your Ubuntu or Debian server that is using UFW.
This method can be useful because they allow UFW to use the ports defined for the application instead of requiring you to open them manually.
Allow Connection from Specific IP Address with UFW
If you want to allow connection from a specific IP address, you can create a UFW rule that permits traffic from that IP. This is useful when you want to allow access only from a trusted server, office, or other specific device.

This approach is not like opening only one port and gives access to all ports for this specific IP.
By replacing the desired IP address in the command below, you can allow access to this IP on your server:
sudo ufw allow from 192.168.1.100
If you want to allow access to your server from another device, you first need to find the device’s IP address and replace 192.168.1.100 with that IP address.
If you don’t know how to find the IP address on Windows or Linux, you can follow the guides below:
How to Find IP Address in Windows
How to Find IP Address in Linux
Allow Connection from Specific Subnet with UFW
If you need to allow connection from multiple devices in the same network instead of setting a rule for each one, you can specify their entire subnet.
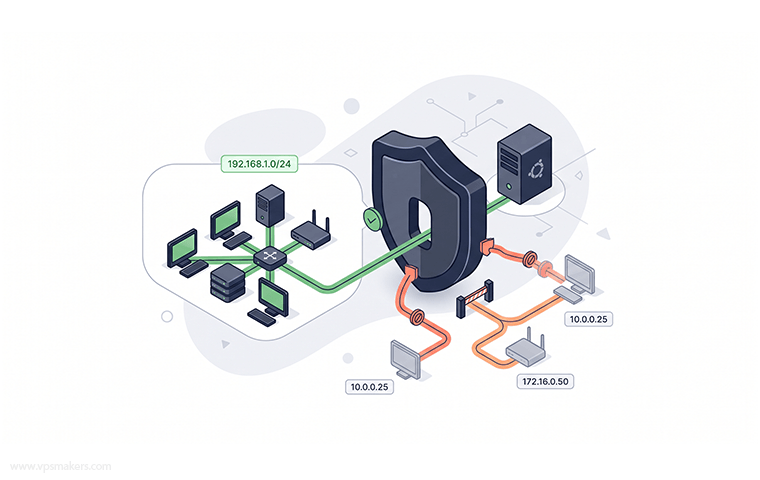
For example, the following rule allows connections from the 192.168.1.0/24 subnet:
sudo ufw allow from 192.168.1.0/24
The /24 subnet includes IP addresses from 192.168.1.1 through 192.168.1.254. Replace
Finding the correct subnet may not be straightforward, especially if you are not familiar with subnetting. You can follow the article below to learn what a subnet is and how subnetting works.
Although it is an advanced networking topic, understanding subnets can be useful when configuring firewall rules for an entire network.
Introduction to Subnetting from the GeeksforGeeks website.
Verify UFW Rule
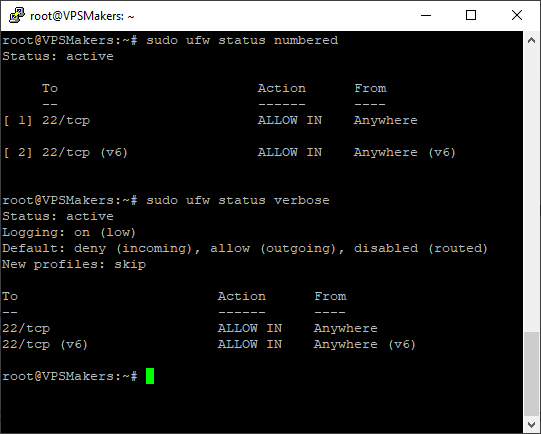
After adding any rule, check the ufw configuration again to verify the new rule was added successfully.
You can use these two commands to check the active rules in UFW:
sudo ufw status numbered
sudo ufw status verbose
Conclusion
Using Uncomplicated Firewall (UFW), you can manage access to your Linux server by creating rules for specific ports, IP addresses, and subnets.
In this guide, you learned how to allow TCP and UDP ports, open a range of ports, restrict access to a specific IP address or subnet, and use predefined application profiles.
When configuring a firewall, it’s important to allow only the ports and connections your applications actually require. Restricting access to specific IP addresses and subnets whenever possible can help reduce your server’s attack surface and the risk of unauthorized access or attacks.

The Author Jacob R
i am Jacob a developer and cybersecurity enthusiast with strong skills in web development and a passion for building practical digital solutions,Working on web development for 4 years. Hope my guides be helpful
More from Jacob R