
How to Install Nginx on Ubuntu Server?
Nginx can be installed by various methods, including using the apt repo and adding the Nginx repo itself, which you’ll learn to install on Ubuntu Server, install its dependencies, configure the firewall, and test the installation of Nginx.
To install Nginx on Ubuntu, the recommended method is to use the Ubuntu apt package manager, because it uses the latest release for your current Ubuntu Noble 24.04.
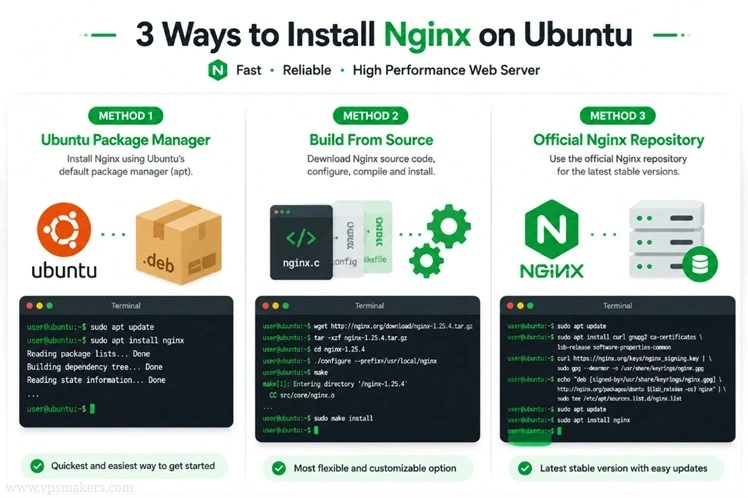
We have 3 methods for installing Nginx:
Install Nginx with the Ubuntu package manager.
Add the Nginx repository to the Ubuntu package manager.
Install Nginx From Source Code on Ubuntu.
Install Prerequisites for Nginx
To start, connect to your server via SSH using PuTTY, Bitvise, or your OS CLI, and enter your credentials to connect.
Nginx Hardware Requirements:
- Ubuntu OS 20.04 up to 26.04
- CPU 1 Core
- 512MB RAM
- 100MB Storage
Updating the repo list is needed because you have to install the latest packages and bug-fixed packages. To update Ubuntu packages, use the command below:
sudo apt update
Nginx needs these packages to work correctly without bugs and crashes. So you have to install some packages before starting the main installation.
Run the command below to install Nginx dependencies:
sudo apt install curl gnupg2 ca-certificates lsb-release ubuntu-keyring net-tools -y
Install Nginx with Ubuntu Package Manager
To install Nginx on your Ubuntu server, you can use Ubuntu’s built-in apt package manager to install it simply and straightforwardly.
This method installs the latest Nginx version available in the APT package manager list, so use the command below:
sudo apt install nginx -y
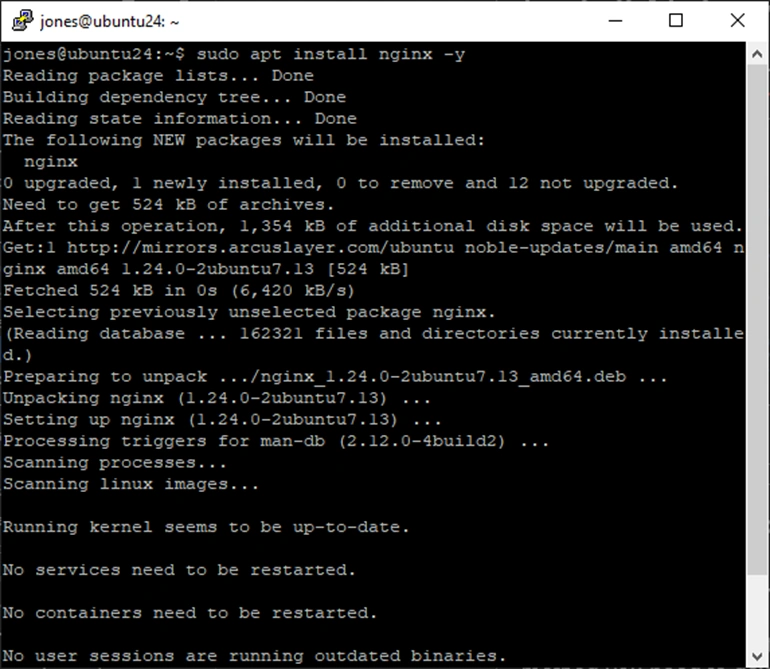
Note: Using -y at the end of your command answers yes to all prompts that you will be asked
Install Nginx from Official Nginx Repo on Ubuntu
APT has provided different versions of Nginx for Ubuntu versions. For Ubuntu Noble 24.04, the version is 1.28, so if you want to install another version or the latest version of Nginx with APT, you need to use the Nginx repository itself.
Import Official Nginx Signing Key to Ubuntu Repository
It is necessary to download the Nginx repo key for the APT repo because it is a trusted repo.
This command downloads the Nginx key and fetches the key:
curl https://nginx.org/keys/nginx_signing.key | gpg --dearmor \

| sudo tee /usr/share/keyrings/nginx-archive-keyring.gpg >/dev/null
Verify Nginx Repository Key Content
In this step, you need to verify the key you’ve downloaded isn’t corrupted, because if the key is corrupted, Nginx won’t install.
gpg --dry-run --quiet --no-keyring --import --import-options import-show /usr/share/keyrings/nginx-archive-keyring.gpg
Check Nginx Repository Key Fingerprint
The output of the previous command has to be like the text below:
pub rsa2048 2011-08-19 [SC] [expires: 2027-05-24]

573BFD6B3D8FBC641079A6ABABF5BD827BD9BF62

uid nginx signing key signing-key@nginx.com
Note: The output may contain more than three lines because there could be additional keys downloaded alongside it. Make sure to keep them as well.
Setup Apt Repository for Stable Nginx Packages
Run the command below to add the verified Nginx repo to your Ubuntu server’s repository list and set the key of the Nginx repository.
echo "deb [signed-by=/usr/share/keyrings/nginx-archive-keyring.gpg] \

https://nginx.org/packages/ubuntu `lsb_release -cs` nginx" \

| sudo tee /etc/apt/sources.list.d/nginx.list
Use Mainline Version of Nginx (Additional)
By default, the installed version is the stable version; you can change it to mainline with the command below:
echo "deb [signed-by=/usr/share/keyrings/nginx-archive-keyring.gpg] \

https://nginx.org/packages/mainline/ubuntu `lsb_release -cs` nginx" \

| sudo tee /etc/apt/sources.list.d/nginx.list
Set Nginx Repository as Default Repo
This command configures apt repository pinning, which tells Ubuntu’s package manager which repository to prefer when the same package is available from multiple sources.
echo -e "Package: *\nPin: origin nginx.org\nPin: release o=nginx\nPin-Priority: 900\n" \

| sudo tee /etc/apt/preferences.d/99nginx
Install Nginx from Official Nginx Repo
First, update the apt package list, then install Nginx using the updated repository list:
sudo apt update

sudo apt install nginx
Install Nginx From Source Code on Ubuntu
For installing Nginx manually, you have to build Nginx from source on an Ubuntu server, which requires installing prerequisites like build-essential and necessary libraries.
Next, you must download and extract the Nginx tarball, set custom configuration paths, and compile the source code using the make command.
Once the software is compiled and installed, a custom systemd service file has to be manually created to allow the operating system to manage and run the Nginx daemon.
Verify Installation of Nginx on Ubuntu
By getting the version of Nginx that has been installed on the server, we can verify that our Nginx server has been installed successfully using the command below:
nginx -v
The output will be like:
Nginx version: nginx/1.24.0 (Ubuntu)
For testing the installation, you have to find VPS IP address, then open your browser and go to: http://YOUR-VPS-IP.
You will see the Nginx welcome page:
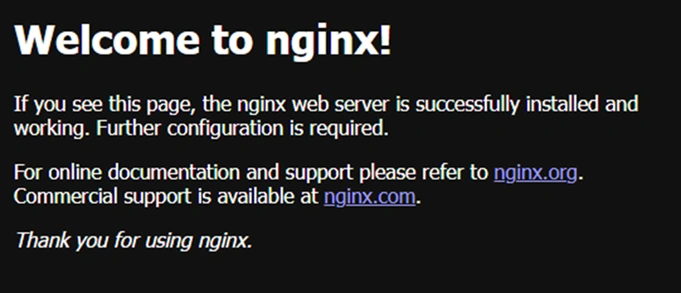
You’ve completed the installation of Nginx. Now you need to configure firewalls to accept Nginx connections.
Configure Ubuntu Firewall
If you are not using a firewall and running a web server on your Linux server, it’s recommended to setup firewall on Ubuntu server for better security.
Nginx uses default ports http/80 and https/443 by default; you need to open ports on Linux firewall to allow user connections to your web server. Run the command below to open the needed ports:
sudo ufw allow ‘Nginx Full’

sudo ufw reload
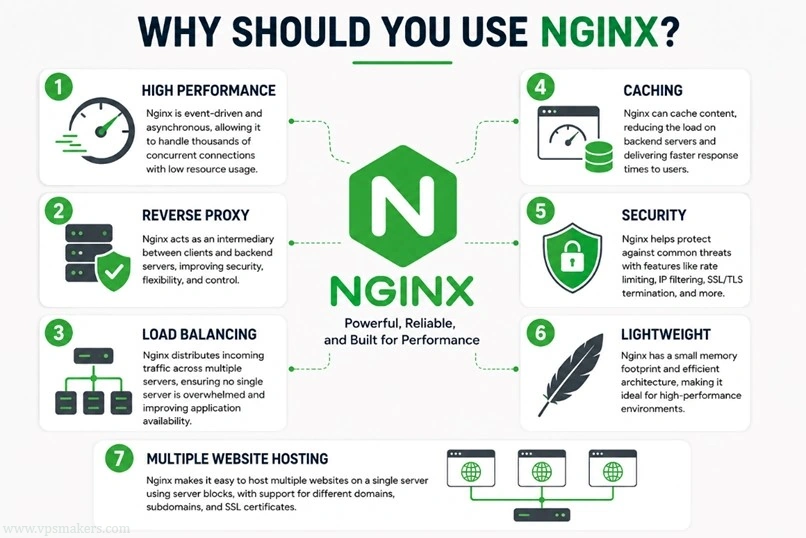
Why Should You Use Nginx?
1. High Performance: Handles thousands of connections with low resource usage
2. Reverse Proxy: Nginx acts as a primary server between the client and backend servers
3. Load Balancing: Nginx distributes incoming traffic across multiple servers
4. Caching: Nginx caches content, reducing the load on backend servers
5. Security: Nginx helps protect against common threats with features like rate limiting, IP filtering, and SSL/TLS termination.
6. Lightweight: Nginx has a small memory footprint and efficient architecture, making it ideal for high-performance environments
7. Multiple Website Hosting: Nginx makes it easy to run multiple web servers on a single server with support for different domains
Usage of Nginx in other apps
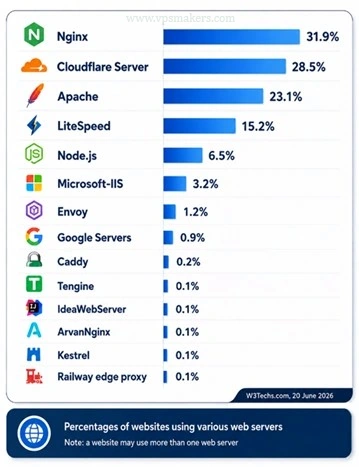
Nginx by itself does not provide a graphical user interface as a web server, but there are other content management systems (CMS) that use Nginx as their core web server to run the control panel on it.
If you want to manage your websites through a better user interface and have more control, you can install Plesk on Ubuntu Server for a user-friendly interface with a wide range of server and website management features, or you can install CPanel on Ubuntu Server to manage your hosting environment through WHM and cPanel.
Common Issues while Installing Nginx
The website is not accessible
It can happen if you don’t open a port on the Ubuntu firewall; the firewall won’t allow a connection between the client and your server, or if you don’t start or stop the Nginx service, you can face connection problems, or the Nginx welcome page doesn’t load.
Nginx is installed, but the terminal doesn’t recognize Nginx
If the terminal says it doesn’t recognize the Nginx command, it’s more likely that Nginx is not installed correctly or its binary is not in the system’s PATH.
You need to add the application to the Linux binary list.
Summary
When you are done installing Nginx, you are all set up to create websites and configure them using Nginx.
Installing Nginx from the Ubuntu repository is generally recommended because it is tested, optimized, and fully compatible with your Ubuntu version.
The packages are integrated with Ubuntu’s libraries, security updates, and package management, resulting in a more stable and reliable installation.
FAQ
1. Does Nginx Have a GUI for Configuration?
No, by default Nginx doesn’t have a GUI, but you can install Nginx GUI open-source package, which gives you a lightweight and small control panel to manage your Nginx Server.
2. How to Remove Nginx From Ubuntu?
Removing Nginx is irreversible. But if you remove Nginx, your configuration, logs, and website contents usually won’t get deleted.
With purge, it removes the Nginx package binaries and configuration files in /etc/nginx:
sudo apt purge nginx
You can find logs and website contents in these locations:
website contents: /var/www
log files: /var/log/nginx/
Use the command below:
sudo apt remove nginx
3. How to Start Nginx on Ubuntu 24.04?
When you install Nginx with the apt package manager, it automatically starts the Nginx service, but if you face any problems, you can start it with systemctl by running the command below:
sudo systemctl start nginx
4. Difference between Stable and Mainline Versions?
NGINX binaries are built and distributed in two versions: stable and mainline. Stable binaries are built from stable branches and only contain critical fixes backported from the mainline version.
Mainline binaries are built from the master branch and contain the latest features and bug fixes.

The Author Robert Smite
Hello! I'm Robert, specializing in virtual servers and cloud technology. With expertise in managing and optimizing virtual servers, my focus is on delivering understandable and practical content in this field. My goal is to enhance knowledge and assist individuals in selecting the best virtual services for their needs.
More from Robert Smite