How to Install Plesk on Ubuntu 24.04
Plesk is a simple control panel that allows you to manage your server files, domain, emails, and run web hosting and many more things to do easily from its dashboard.
It gives you a simple and practical UI instead of typing commands for doing every single thing.
Methods for install Plesk on Ubuntu Server
Installing Plesk has many different ways on Ubuntu; we are covering:
- Install Plesk in One Click
- Install Plesk via CLI
Requirements for installing Plesk
- A Linux server OS with root access.
- At least 1GB of RAM and 10GB of free space are needed
- A valid license key or a trial key for Plesk.
Install Plesk with One-Click on Ubuntu Server
Installing Plesk is possible with one click and by running a single command to download and install it automatically from the Internet. There is no difference in the installation method on Ubuntu Desktop or Ubuntu Server, and you can install it from the terminal section.
This command can also be run on your own operating system, but we recommend purchasing an Ubuntu VPS so that you can enjoy the benefits of VPS server.
When you run this command, all the dependencies needed for hosting and other things are installed automatically. Like (Nginx, MySQL, PHP, …)
Log in to the server via SSH as the “root” user and run the following command:
sudo apt-get update

sudo apt-get upgrade
After updating the Ubuntu server packages, install Plesk with the following command:
sh <(curl https://autoinstall.plesk.com/one-click-installer || wget -O - https://autoinstall.plesk.com/one-click-installer)
The Plesk installation will proceed automatically. It takes, on average, around 15 minutes. The exact time can vary depending on the network bandwidth, the network speed, the server OS version, and so on.
The installer will download the latest stable Plesk release, install it with the default set of components and features designed to suit the needs of the majority of users, and apply all available patches and updates for maximum security and performance.
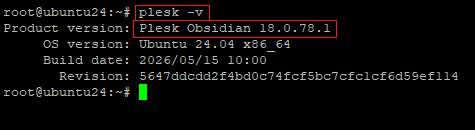
After the installation is complete, verify the correct installation and installed Plesk version with the following command:
plesk -v
login to Plesk Panel
To connect to your Plesk panel, you can easily connect with port 8443 to it using your browser as follows:
https://your-server-ip:8443
Install Plesk with CLI on Ubuntu Server 24
If you want to select specific Plesk components for installation, install Plesk using the interactive console. Follow these steps to begin:
Download the Plesk installation script:
wget https://autoinstall.plesk.com/plesk-installer
Make the downloaded installer script executable:
chmod +x ./plesk-installer
Optional: During the installation, Plesk configures the firewall; at this time, some of the firewall rules that are going to be used in Plesk may be modified or recreated with the needed ports. To prevent this action, run this command.
env PLESK_INSTALLER_SKIP_FIREWALLD=1
However, in this case, you must manually open the ports in Linux required for Plesk to operate. You can do it via a Linux firewall or the Plesk Firewall extension.
Optional: When you install Plesk on a server with very low memory, around 512 MB or less, the installation is going to create a swap file to prevent memory-related issues during installation and processing. If you don’t want this to happen, run the command below.
env PLESK_SWAP=disable
Now launch the interactive installation of Plesk with the following command:
sh ./plesk-installer
Select the type of product you want to install on your server:

- recommended
- It will install the components typically used, like Nginx, PHP, and other needed things
- Full
- It will install all of the components related to Plesk
- custom
- You can select the components you want
easily write the number or letter of the action you want to do and hit the Enter button
After installation is done, you can run it by entering https://your-server-ip:8443 in your browser
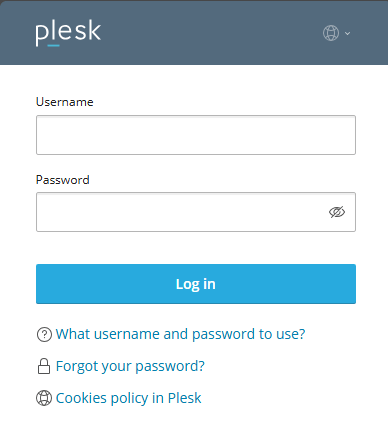
Here, you need to enter your server’s username and password. If you are using the root account, enter root as the username along with its password.
If you prefer not to use the root account, you can either create user on your Ubuntu server or add a new user directly from the Plesk panel.
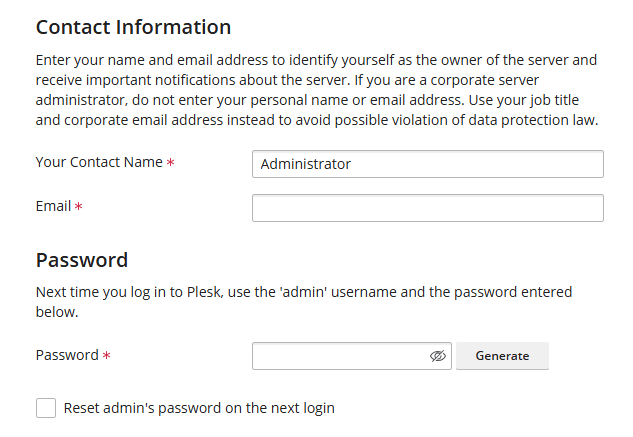
After logging in to the Plesk control panel with your server’s root user, you will see a page that Plesk requires a license and contact information.
Contact information
Here, you should enter your name and email to identify you as the server administrator and receive important messages about the server and choose a password for your next login.
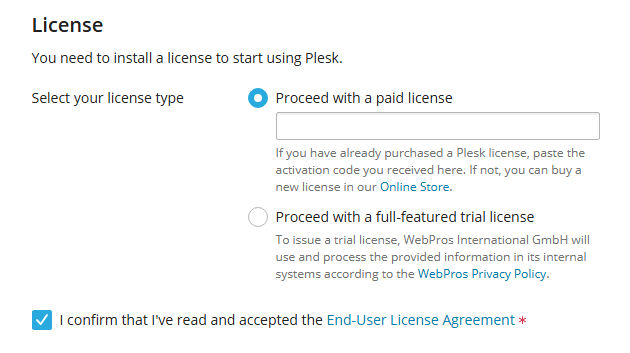
License
In the next section, you will see the license requirement. If you already have a licence key, enter it and click “Enter Plesk”. If you don’t have a licence, you can purchase a Plesk license from the official Plesk website.
There are several plans available; you can choose the one that best fits your needs, starting from $16.99 per month up to $62.99 per month.
Or you can use a 14-day free trial by selecting “Proceed with a full-featured trial license”, which gives you access to all premium features of Plesk.
After 14 days if you don’t activate the license, Plesk keeps running but becomes limited, and you may lose access to some features, and it will constantly show a license alert.
After selecting your licence mode, you will enter the main control panel page.
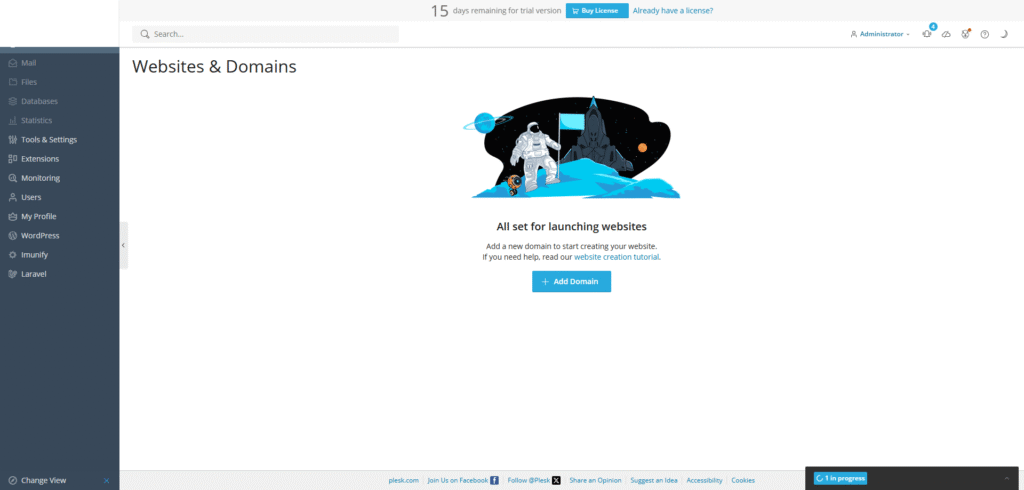
Plesk features
Beginner and user-friendly UI
- Very clean and modern interface
- Easier than most competitors (especially compared to Webmin or raw CLI)
Supports both Linux and Windows
It works on:
- Linux(Ubuntu, CentOS, AlmaLinux, etc.)
- Windows server (2019, 2022)
Built-in WordPress management
- one click install
- staging & cloning
- security hardening
Built-in security tools
- Fail2Ban
- Firewall management
- SSL
Extensions & flexibility
- Supports Docker, Git, Node.js, etc…
- Has an extension marketplace
All in one
- Web server (Apache, Nginx)
- Mail server
- DNS management
- Database
Summery
Installing Plesk is so easy with 2 methods of installing via CLI and one click. If you are a new user of Plesk, installing with one click is basic and recommended. But it installs full components and requires more space.
With Plesk, you can run a simple but powerful control panel to manage your website hosting, and it’s considered one of the best among its competitors.
We hope this article has provided you with a useful guide on install Plesk on a Ubuntu VPS.
If you encounter any problems, you can contact us via comments. Also, if you plan to run Plesk on a Windows VPS, you can read the article install Plesk on Windows Server?
FAQ
1- What is Plesk? Why should I install Plesk?
Plesk is a web hosting control panel that simplifies server management. It allows you to manage all services related to a website, like databases, emails, domains, etc., with a user-friendly interface instead of using the command line for everything.
2- Which Linux distributions are supported by Plesk?
Plesk supports major Linux distributions:
- Ubuntu (18.04 – 24.04)
- AlmaLinux(8,9,10)
- Debian (12,13)
3- Should I update my system before installing Plesk?
Yes, it is strongly recommended to update your system before installation:
sudo apt-get update && apt upgrade
or yum / dnf depending on your OS.
4- Can I install Plesk on a server that already has a web server installed?
Yes, you can, but not recommended because when installing Plesk, it automatically installs Nginx, MySQL, PHP, …
Installing another web server may cause a conflict.
4- Can I install Plesk on a Windows server?
Yes, you can install Plesk on Windows VPS Server 2019, 2022, and many other Linux VPS servers.
5- Is Plesk better than managing a server manually?
For most uses, yes, it is easier
- Saves time
- Reduce error
- Provides a GUI for easier management
However, advanced users may prefer using CLI for full control.
The Author Jacob R
i am Jacob a developer and cybersecurity enthusiast with strong skills in web development and a passion for building practical digital solutions,Working on web development for 4 years. Hope my guides be helpful
More from Jacob R