How to Install Active Directory Certificate Services on Windows Server?
Windows Server provides Active Directory Certificate Services (AD CS) for creating and managing certificates. It can be used to issue certificates for internal services, including AD FS, web servers, VPNs, and other applications.
Generating SSL certificates on Windows Server has multiple methods; one of them is using AD CS, which generates a self-signed SSL certificate that you can use for internal services on your Windows server.
To generate SSL certificates with other methods, you need to use public CA’s like Let’s Encrypt and others. But here you will learn how you can install AD CS, which you will need for generating SSL certificates.
Install Active Directory Certificate Services Roles
AD CS installation on Windows Server is straightforward using Server Manager. Like any other service on Windows, you should first add its role and features.
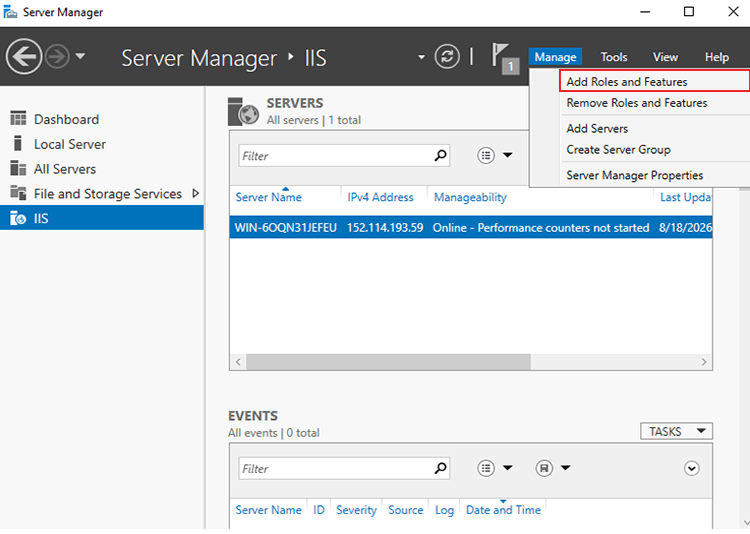
Click on Manage > Add Roles and Features to open the Add Role wizard.
Then you will see the introductory page, which gives information about the Add Roles and Features wizard. If you want to get more information, read it; otherwise, click Next to continue.
On the next page, you will be asked for installation type; select role-based installation and click Next. Then, on another page, you will be asked for the destination server that you want to install the role on. From the server pool, select the one you want and click Next.
Add ADCS Roles on Windows Server
On this page, it shows services that you can install. Find Active Directory Certificate Services and select it. If you want to install other services, you can select them too. Then click Next.
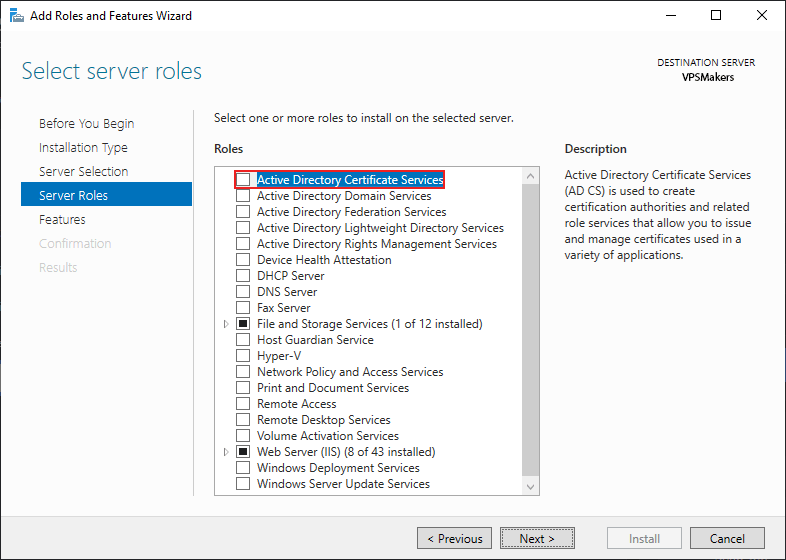
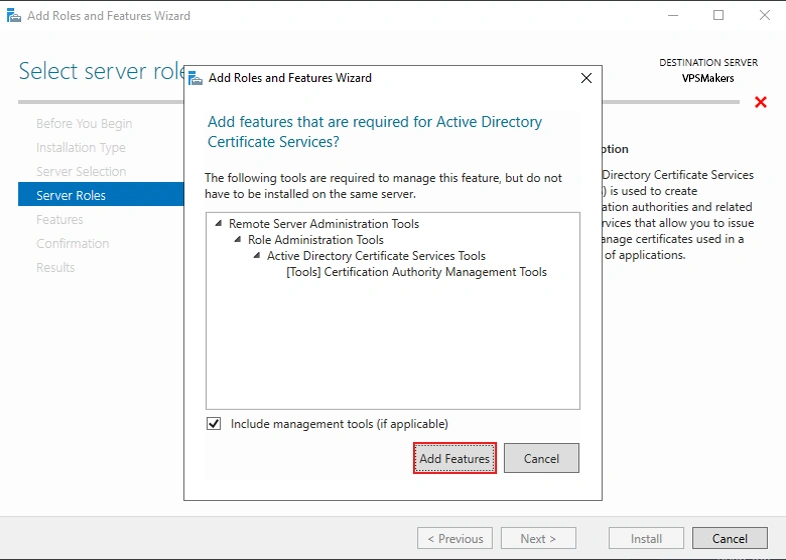
When you click on AD CS, You’ll be prompted to accept needed features beyond AD CS; also accept them for AD CS required to run.
The other pages will cover an introduction to AD CS and some additional information you may want to know. Read them and click Next.
Install AD CS Role Service on Windows Server
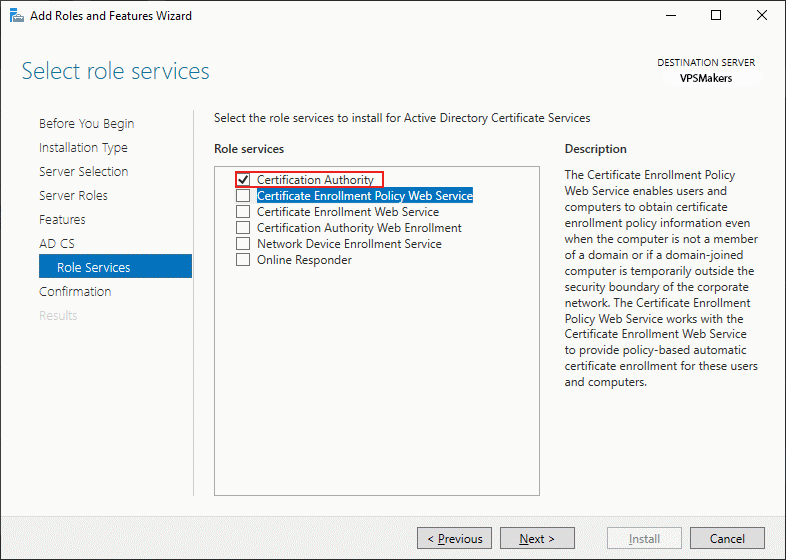
In Role services, the Certificate Authority is required because you only need the Certificate Authority to issue certificates; the other options are additional, and you can avoid them:
ADCS Installation Progress
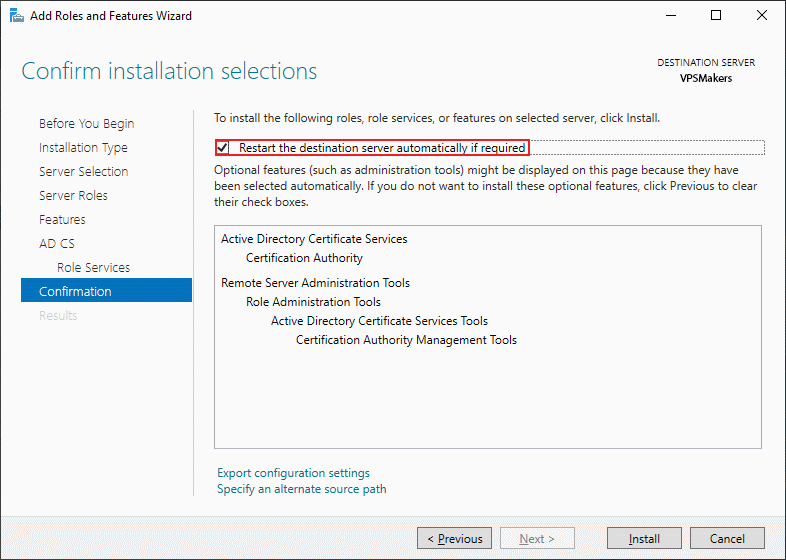
Then, you have to check the required restart box so that if the server needs to be restarted, you’ll encounter a warning; click Yes, and then click Install to start installing ADCS roles:
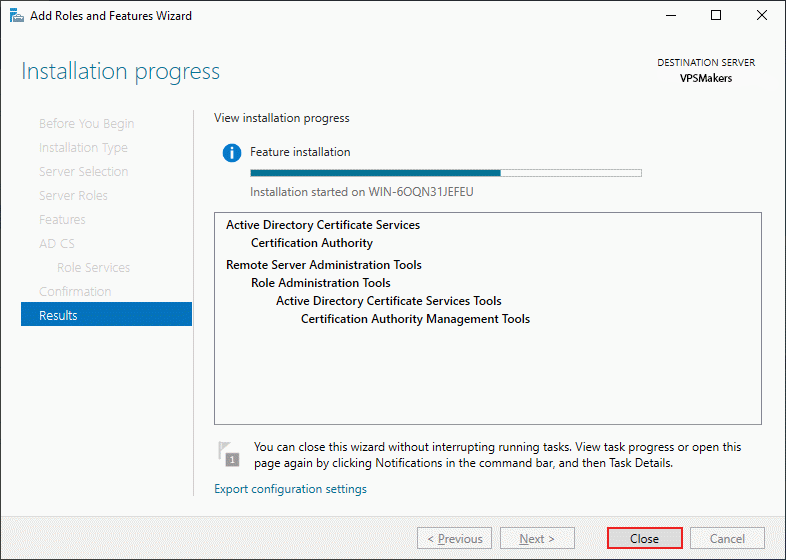
In the end, you can see the results of adding roles. Once the AD CS role is installed, you have to configure it on your server and wait for it to finish installing the AD CS roles.
Configure CA Role on Windows Server
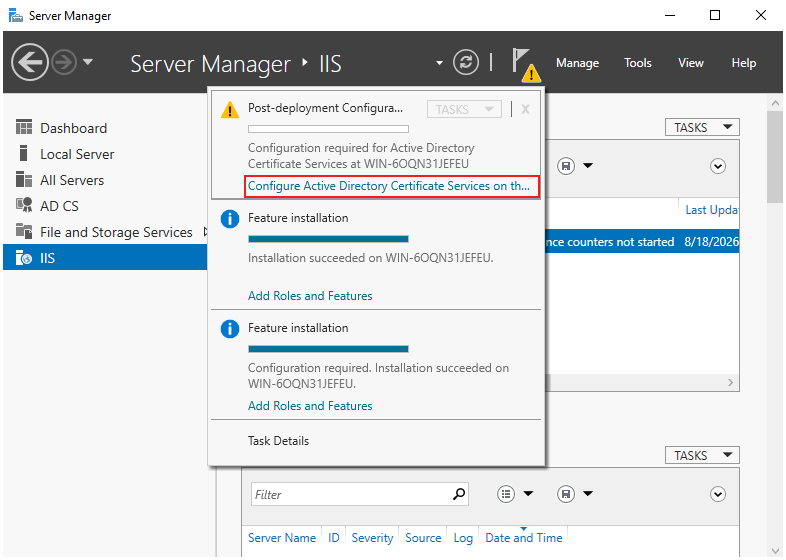
Go to Server Manager. You should see the warning under the flags. You have to click on that and select Configure Active Directory Certificate Services:
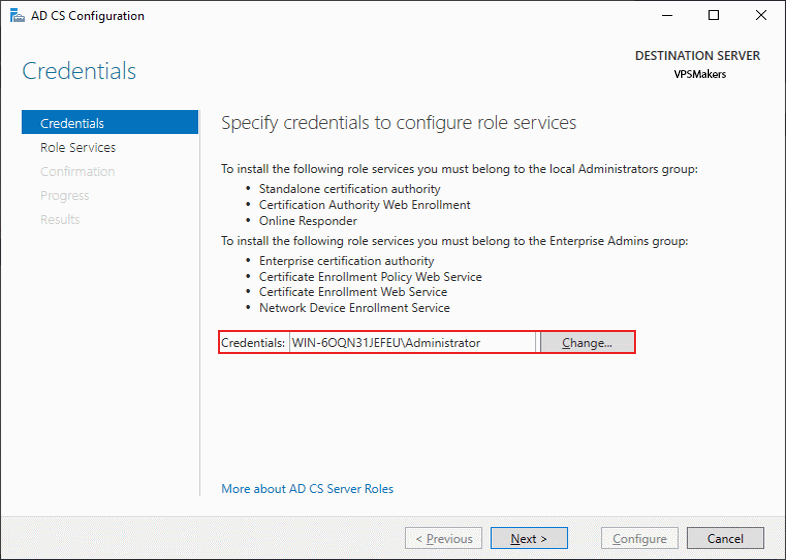
ADCS Installation Credentials
Next, you see an introduction that you have to be in the Administrators group to install ADCS roles; enter an administrator user in the Credentials box:
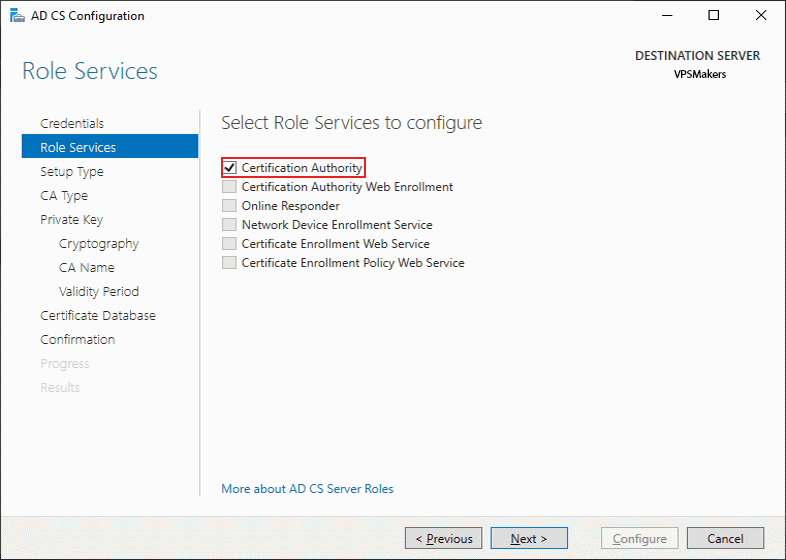
Select AD CS Role Services for Configuration
Because only the CA service is installed during the ADCS roles installation, you have to select Certificate Authority to continue the required service installation. After you select Certificate Authority, more options will be revealed to you for configuration.
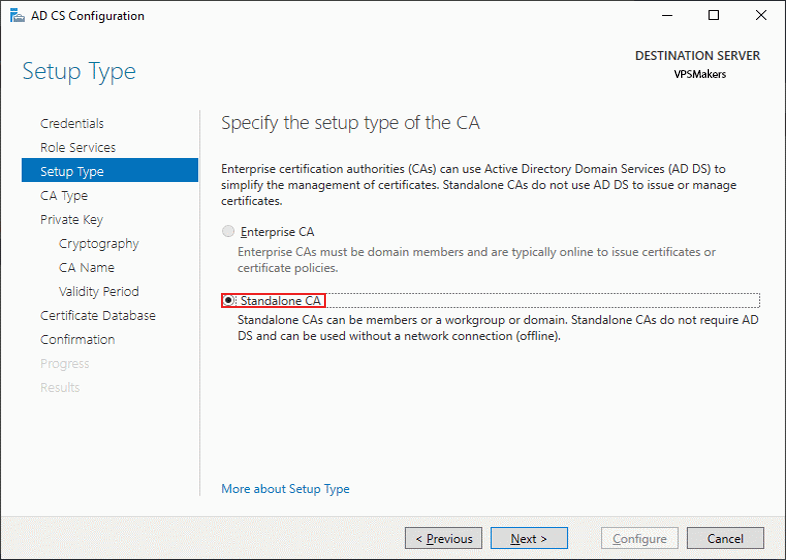
Specify CA Type
For installing an Enterprise CA that automates everything, first, you have to install Active Directory Domain Services on your server, but if you are not on a Domain, you can only have a Standalone CA, which we’ll cover:
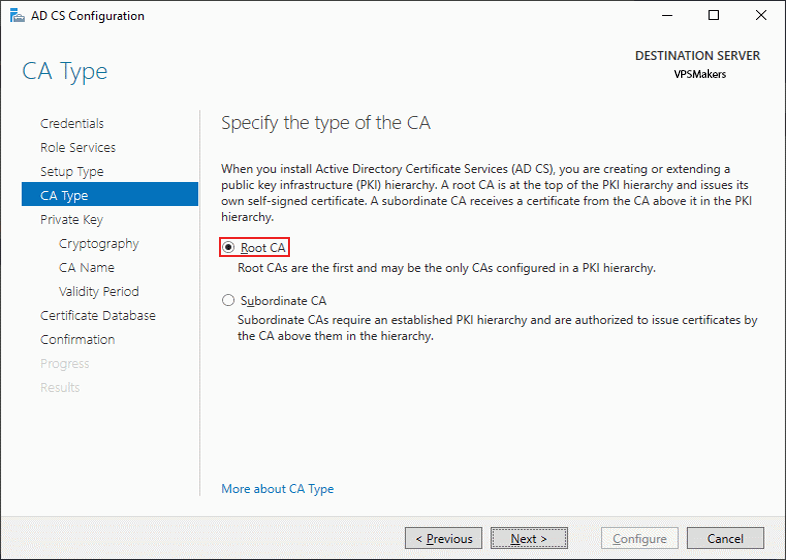
Select Root CA in AD CS Configuration
A Root CA is the main Certificate Authority and is the highest level of trust in a PKI. It is self-signed and can give out certificates or sign the certificates of subordinate CAs.
A Subordinate CA gets its CA certificate from a Root CA and usually issues certificates for servers, computers, and users. This helps keep the Root CA safe and offline.
For a small internal setup where you just need to give out certificates, a Root CA is enough. A Subordinate CA is better for larger or more secure setups where you want to keep the trusted Root CA separate from regular certificate work.
So select Root CA:
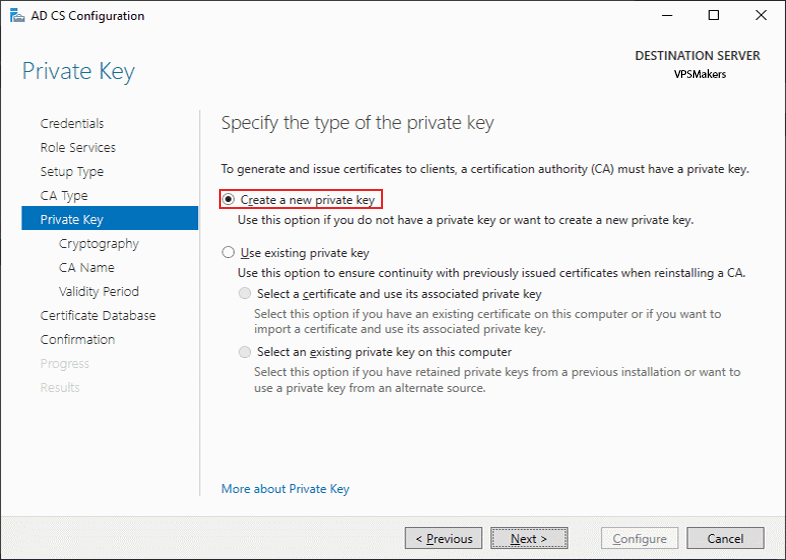
Provide Private Key for ADCS
CA needs a private key for issuing certificates, so provide a private key by creating a new private key or selecting an existing private key on your server. In this step, because we don’t have any private key, we generate a new private key. After selecting Generate, new options will appear:
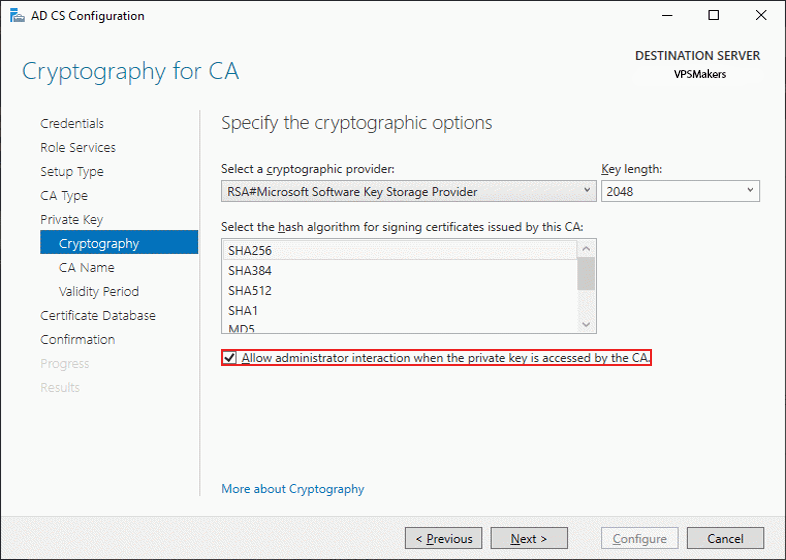
Select Cryptography Method For CA
In this step, you have to select the CA’s private key cryptography provider and hash algorithm. Don’t change anything; also check the Allow administrator interaction box, keep the other default settings, then continue:
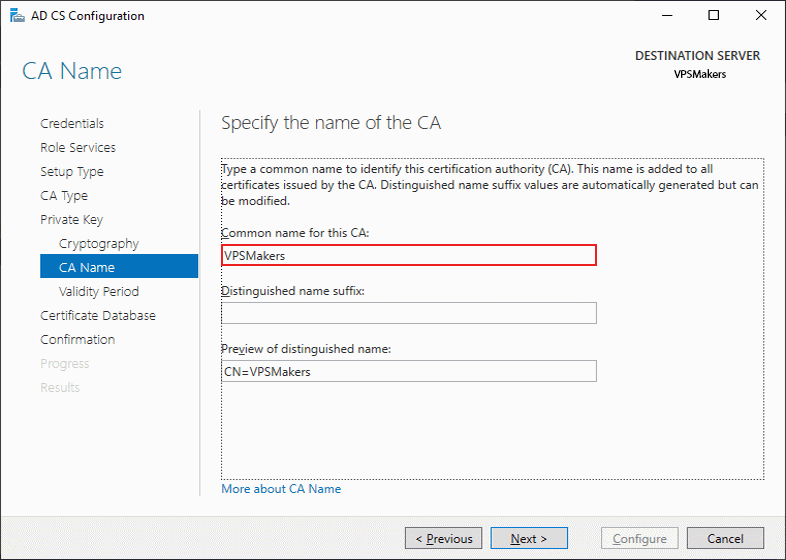
Specify CA Name
Then, provide the CA name so you can identify it in front of your other CAs; only change the common name:
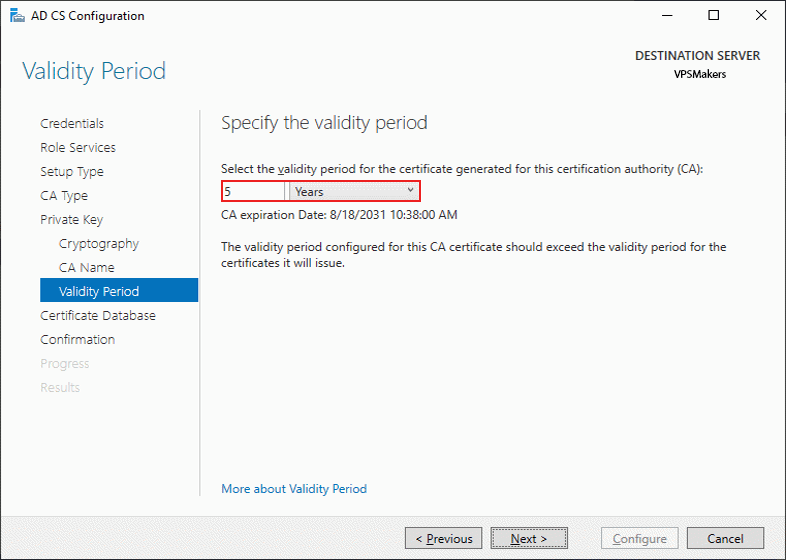
Set CA Validity Duration
The duration of the CA’s private key validation must exceed the certificate validity period it will issue, so you have to select a duration that is longer than the generated certificate. Its value by default is 5 years, so continue with this value:
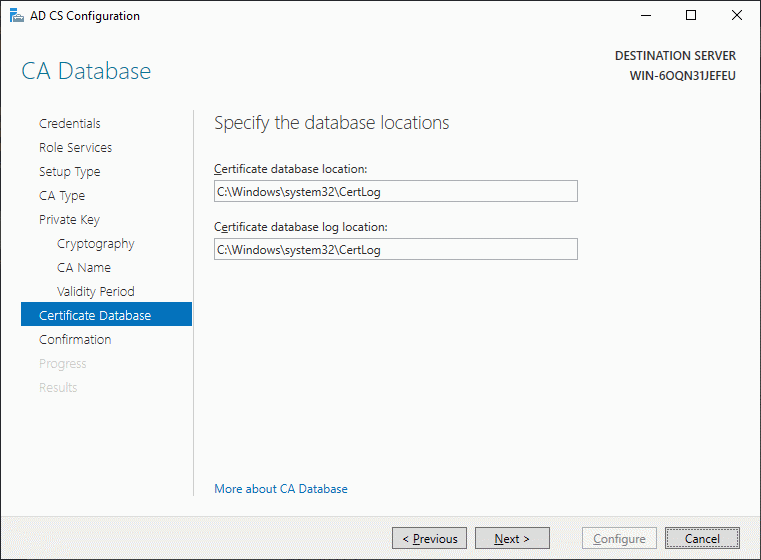
Specify CA Database Location on Windows Server
CA stores the data and logs of the certificates in a local database. You can change their location here and set them where you want to store them, but it’s recommended to use the default location.
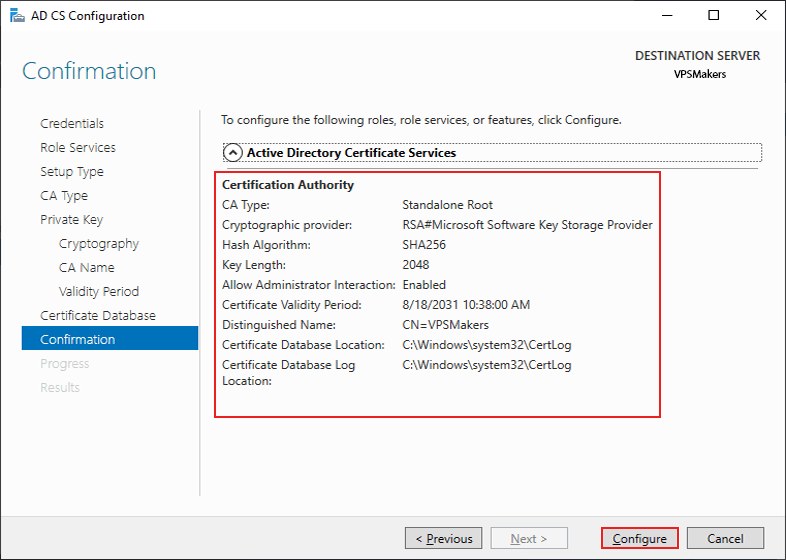
CA Configuration Confirmation
In the configuration section, compare your settings with the picture below and make sure they are the same, so you select the right options and finally click Configure.
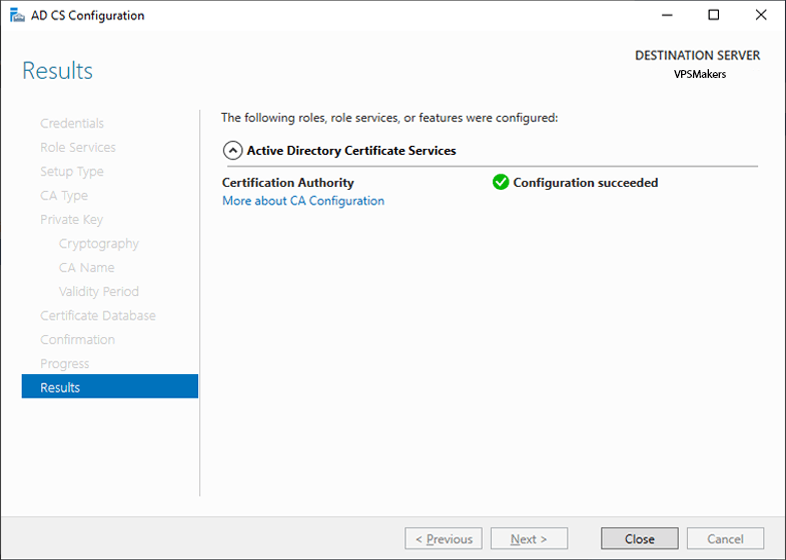
Result of CA Installation on Windows Server
The progress of CA configuration starts, and you have to see the green check box that shows Configuration succeeded and the configuration succesful.
Verify CA Service
Open PowerShell and run the command below to ensure AD CS is installed and can be called through PowerShell, or you can go to Server Manager and see the Active Directory Certificate Service:
Get-Service certsvc
You should see the output like this:
Status Name DisplayName

------ ---- -----------

Running certsvc Active Directory Certificate Services
After verifying the certificates, you can use them with services such as the IIS web server, AD FS SSO, and other services that require encrypted connections to securely transfer data.
Summary
Whether you want an Enterprise or Standalone CA to generate self-signed certificates on your Windows Server, you have to install the ADCS CA Role Service first, then configure that CA. Make sure that if your Server doesn’t on a domain, you cannot install an Enterprise CA.
At the end, to verify the ADCS installation, you have to use PowerShell to ensure the certsvc is running.

The Author Robert Smite
Hello! I'm Robert, specializing in virtual servers and cloud technology. With expertise in managing and optimizing virtual servers, my focus is on delivering understandable and practical content in this field. My goal is to enhance knowledge and assist individuals in selecting the best virtual services for their needs.
More from Robert Smite