How to redirect a domain to another website?
Redirecting a domain to another website is an important task that every website owner may need to do at some point. Whether you are switching domains, consolidating duplicate content, or renovating your site, being able to redirect traffic from one URL to the next seamlessly is essential.
This post will cover redirect kinds and show how to put one up using your hosting control panel or a WordPress redirect plugin. A correctly implemented redirect is crucial for any website transition or restructure to avoid traffic disruptions and maintain visibility in search results. Let’s get started!
Domain redirect types
A domain redirect works by mapping your original domain name or URL to a new destination on the web. When someone types in or clicks a link to your old domain, they will automatically be forwarded to the new site without any broken links or 404 errors. This ensures your audience reaches the correct updated content without interruptions.
Description of redirect typescript:
| redirect types | details |
|---|---|
| 301 Permanent Redirect | A 301 permanent redirect passes along 100% of the link equity and ranking power from the old page to the new page. It also tells search engines that the URL has changed permanently. This is the best option for changing domains long-term as it preserves your SEO. |
| 302 Temporary Redirect | A 302 temporary redirect signals to search engines that the URL change is temporary. It should be used for a while, as search engines may stop associating SEO value with the original URL. The 302 redirect is best for maintenance periods like site redesigns before switching to a permanent 301 redirect. |
| Masked Redirect | A masked redirect disguises the redirected URL from visitors. The original URL remains in the browser's address bar even though the content comes from another domain. Masked redirects don't pass SEO value and can be problematic for search engines trying to crawl sites properly. In general, a 301 or 302 redirect is preferred for SEO purposes |
How to redirect a subdomain in cpanel hosting?
Many hosting control panels provide a simple interface to set up domain redirects directly from your account. This allows you to configure redirects without touching code files or hiring a developer. Most hosting providers will have a ‘Redirects’ or ‘Domains’ section in the cPanel or account dashboard area to facilitate this.
To get started, first, log into your hosting provider’s account or you can get your own Linux server and start your own hosting.. From here, you will need to navigate to the Redirects or Domains menu option. This is usually found by browsing through the left-side navigation or under an ‘Advanced’ tab. Once there, you will see options to directly map your domain to a new URL destination with just a few selections.
The process typically involves:
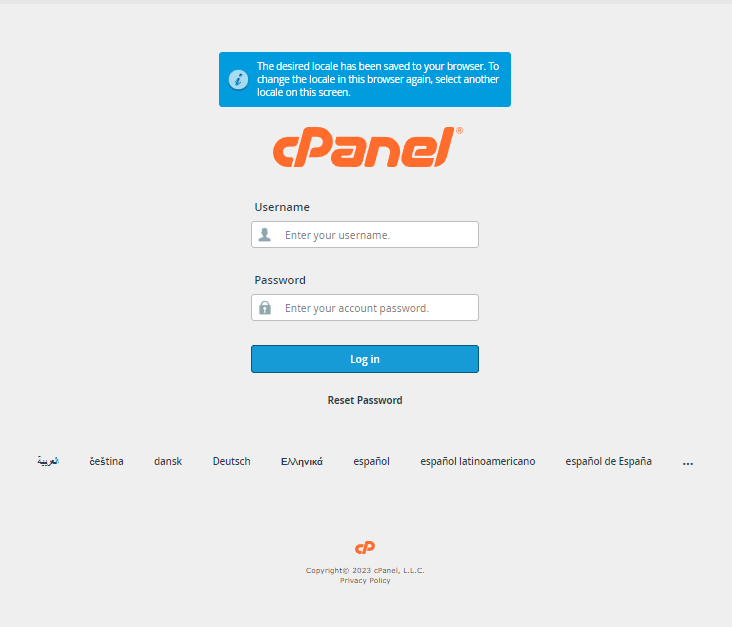
Step 1- Log into the hosting account.
Login to your hosting account control panel using your username and password. This is usually located at a URL like cpanel.yourdomain.com or login.yourhostingcompany.com.
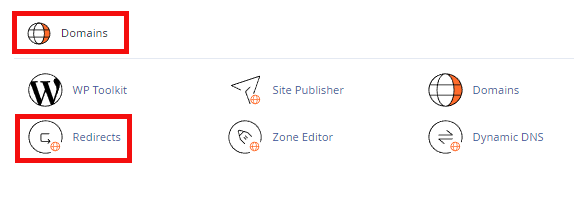
Step 2- Find the Redirects/Domains section.
Once logged in, look for the “Redirects” or “Domains” section in the cPanel menu. It may be located under “Advanced” or near other domain management tools.
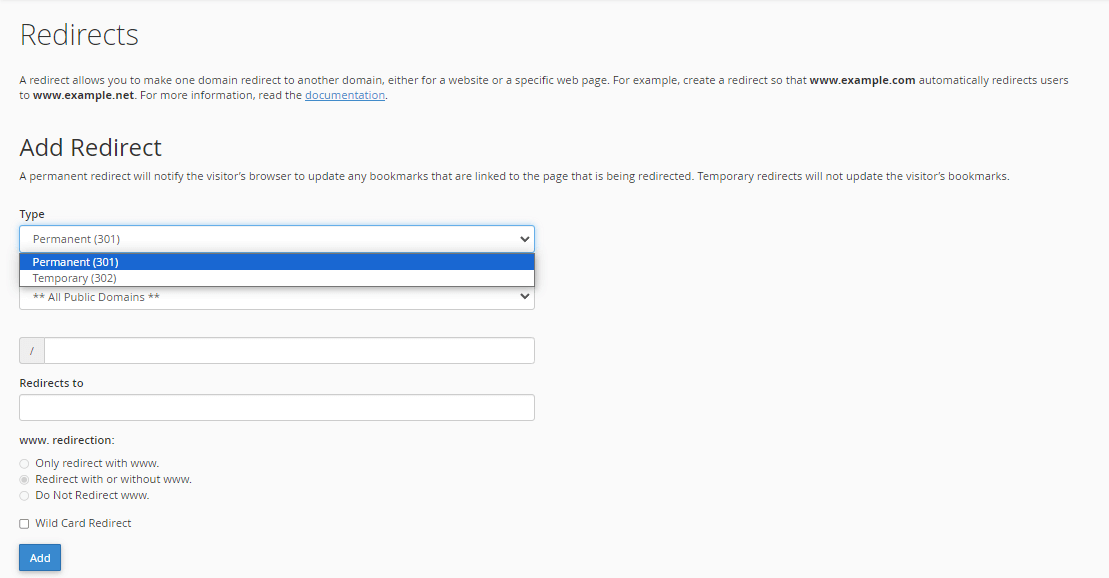
Step 3- Select 301 Redirect type.
Choose the Permanent(301) Redirect from the type options provided, usually a dropdown menu.
Step 4- Choose the domain to redirect from the dropdown.
You’ll see a dropdown list of all domains associated with your account in the “https:?//(www.)?” options provided. Select the one you want to redirect.
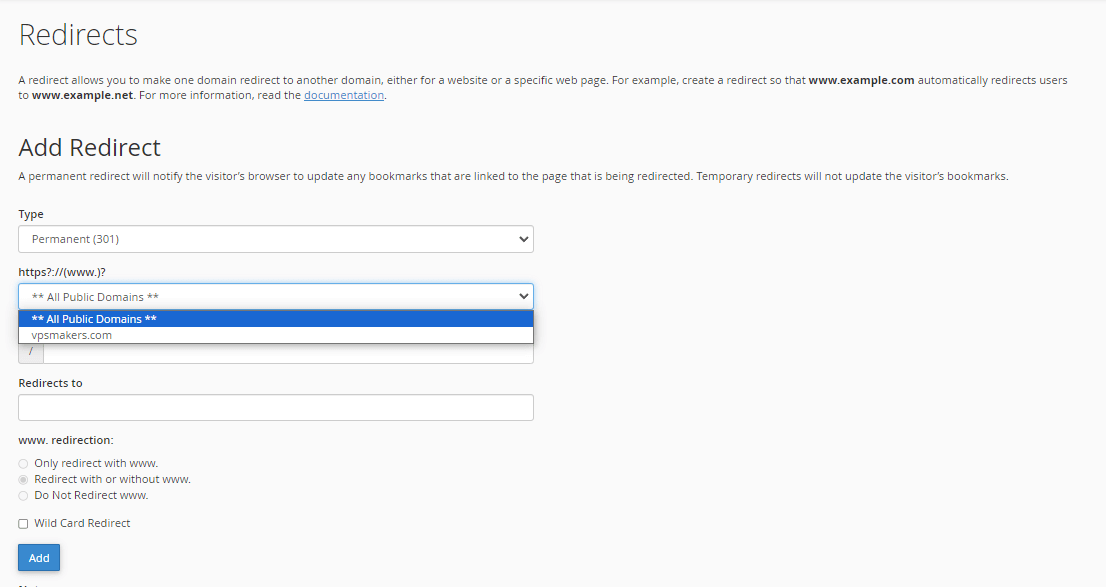
Note: This path is for complete redirection of the domain and if you want to redirect a property path of the domain, enter it in the “/” box.
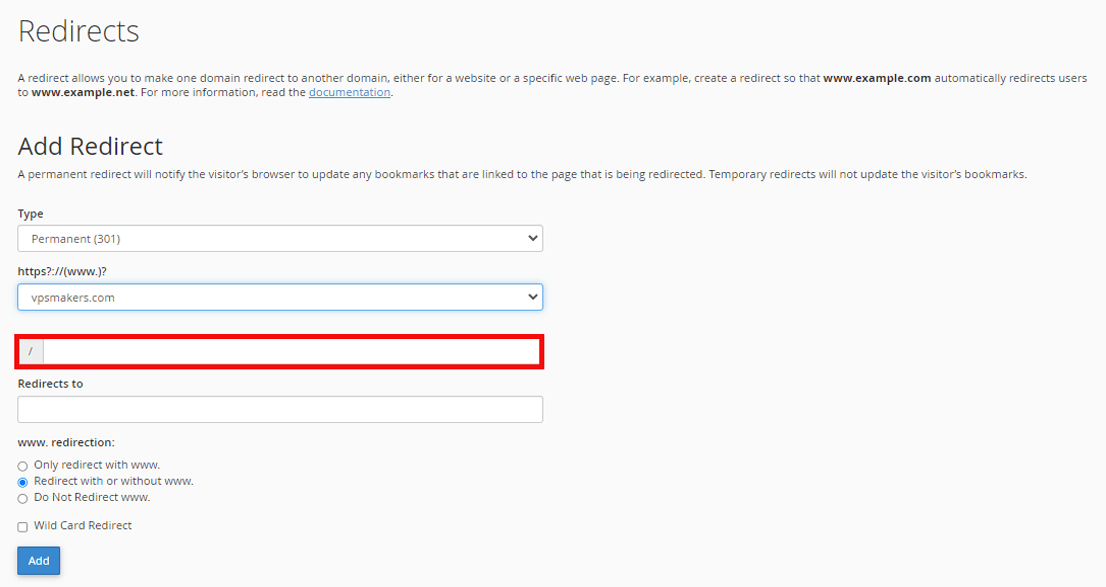
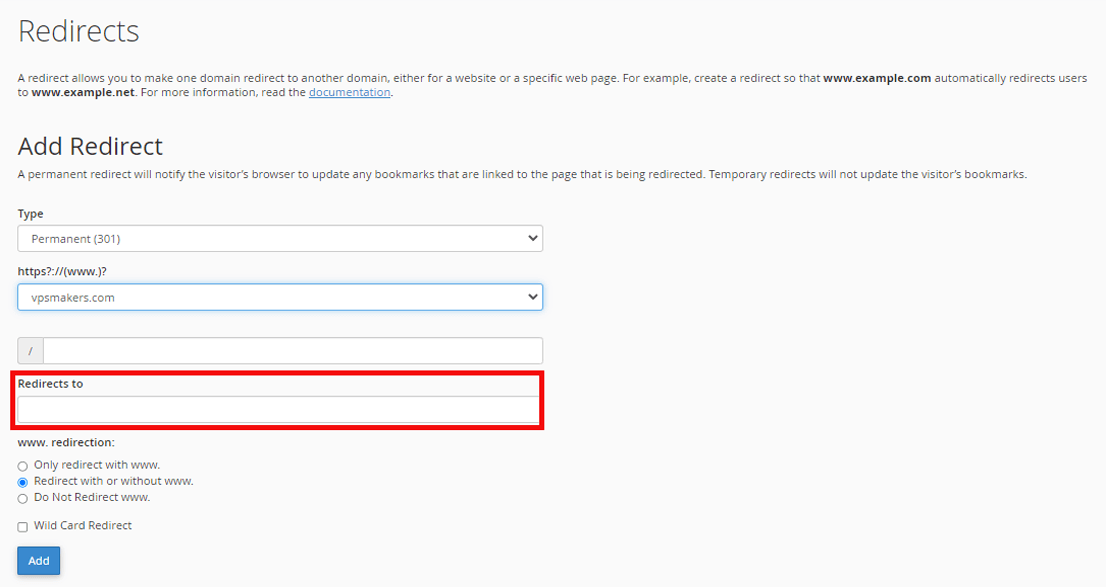
Step 5- Enter New URL Redirects to.
Input the full URL path of the website you want visitors redirected to, including http:// or https:// and any subdomains or folders.
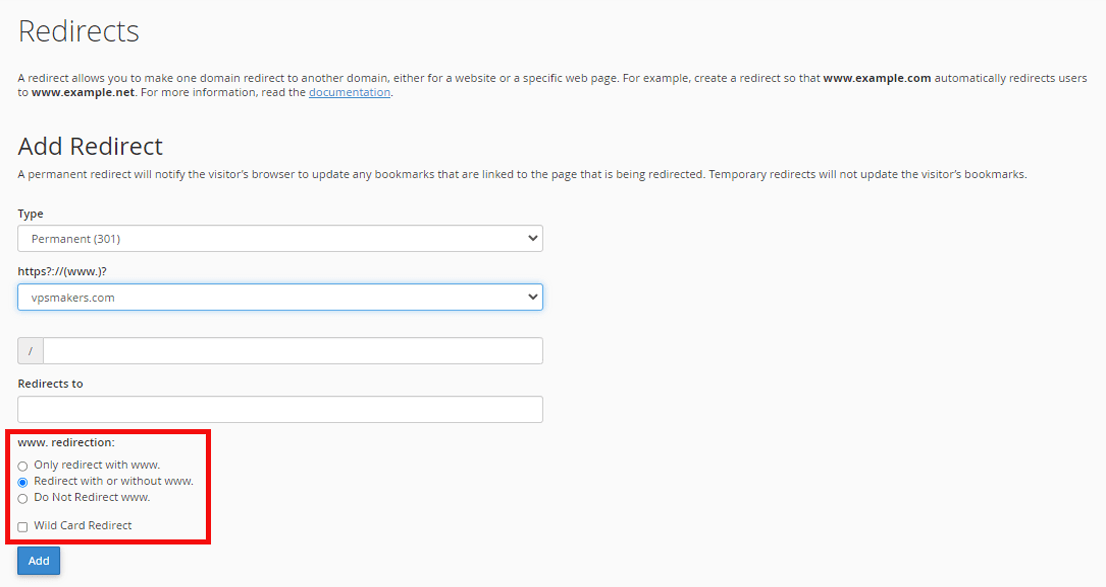
Step 6- Choose the Redirect method.
You can control the redirection from the section below and select parts of it such as “only www” for redirection.
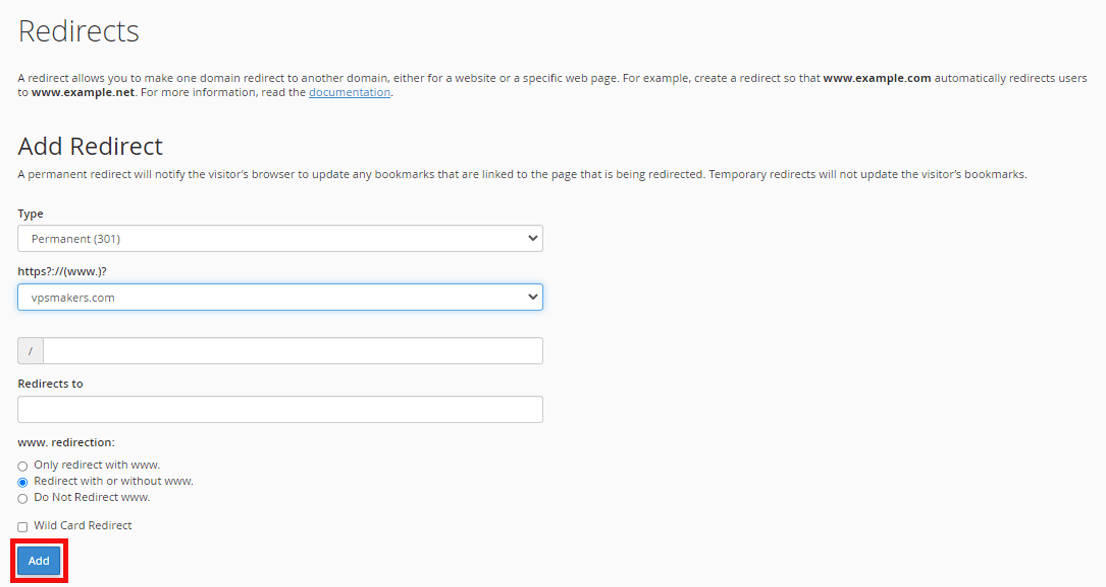
Final Step- Save changes.
Click the Add button to finalize the redirect setup. It may take 30 minutes to propagate globally. Always double-check that the redirect is working as intended.
Redirect Domain to another Domain without hosting (using WordPress)
Suppose your website is built on the WordPress platform. In this case, you can use redirect plugins to manage your domain redirects directly in the WordPress admin interface. This provides an easy solution without requiring code-level changes.

To set redirects, first, install and activate the Redirects plugin from the WordPress plugin directory. This can be done from the “Add New” section of the plugins page.
This process usually involves the following:
- Step 1- Install/enable the Redirects plugin.
- Step 2- Enter the original and destination
- Step 3- Click on Add New Redirect.
- Step 4- Select the 301 Redirect type.
- Step 5- Add additional redirects.
- Final Step- Save changes.
Once installed, the Redirects plugin adds a new “Redirects” menu item under “Tools” where you can manage all your redirect rules. Setting one up is as simple as specifying the URL you want to redirect to, where you want it to point, and selecting the 301 type to make it permanent. It allows redirecting pages, posts, or other common URL structures directly in WordPress.
Other Platform Methods:
Research redirect tools for other platforms like Wix, Squarespace, etc.
While common website builders offer built-in redirect management, it’s important to research the specific process for your chosen platform:
- Wix: Wix uses “Forwarding” rules located under “Settings”. You can map old pages or your entire domain here.
- Squarespace: Redirects are configured via Code Injection. You’ll add HTML redirects or write .htaccess rules depending on your needs.
- Weebly: Their interface has “Forwarding and Redirecting” options underneath the domain settings. Input the destination URL.
- Shopify: Redirects are set via themes Liquid code or a Shopify app like Redirects & SEO.
Being aware of each platform or CMS approach will save troubleshooting later. Their support sites often have step-by-step video guides, too.
summary
the proper configuration of domain redirects has significant importance in enhancing both user experience and search engine optimization. The appropriate implementation of redirects ensures that anyone accessing original pages and domains will seamlessly reach updated new content locations without disruption. I hope this overview of redirects, their functions and implemented methods provides a helpful primer for any domain or URL transition needs. Please feel free to reach out if any part of planning or executing such a strategy would benefit from further detail or discussion.
You can also read the tutorial: How to install cPanel/WHM in Linux?

