
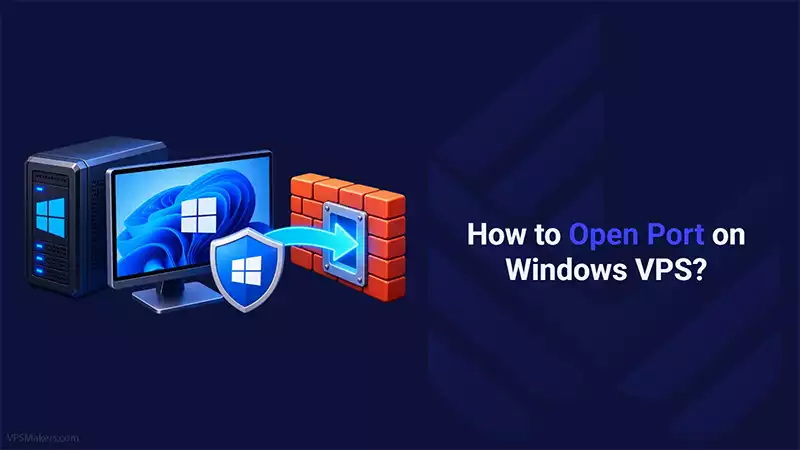
Opening a port on a Windows VPS can be done in several ways, depending on your preference. You can use the Windows GUI through Windows Defender Firewall or run PowerShell commands to manage firewall rules and allow traffic through your desired port.
To open a port, you need to create a new inbound or outbound rule in Windows Defender Firewall, specify the port number and protocol (TCP or UDP), and set the action to Allow the connection. This allows the firewall to permit traffic through the specified port for your application or service.
In this guide, you’ll learn how to allow incoming connections to your Windows VPS by opening a port using both Windows Defender Firewall and PowerShell. We’ll also cover how to check open ports and troubleshoot common issues you may encounter during the process.
Note:
All steps and solutions in this guide have been tested and verified by the VPSMakers technical team on Windows 10 Desktop and Windows Server 2019 running on VPS Server. However, the port-opening process is largely the same across Windows client and server editions, with only minor differences between versions.
Before Opening a Port on Windows VPS
Before opening a port on your Windows VPS, make sure you are logging in with administrator access to Windows and know which port number and protocol (TCP or UDP) your application or service requires.
You also need to identify whether you need to allow incoming or outgoing connections. Inbound rules control connections coming into the VPS, while outbound rules manage connections initiated from your server.
Keep in mind that if you open a port on your Windows VPS but the port is still unavailable, Windows Defender Firewall only allows traffic through Windows Firewall. If your VPS provider or network has additional firewall restrictions, you may also need to request to allow the port there.
Open a Port Using Windows Defender Firewall
Windows Defender Firewall with Advanced Security allows you to control incoming and outgoing network traffic by creating firewall rules. To open your desired port on Windows, you should create new rules, specify protocol and port numbers, and adjust connection permissions.
Open Windows Defender With Advanced Security
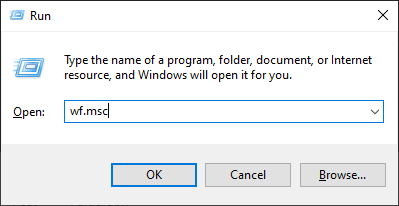
First, after logging in to your Windows VPS, search for Windows Defender with Advanced Security in the Start menu or press Win + R to open the Run dialog, type wf.msc and press Enter to open it.
Create New Inbound Rule on Windows Firewall
After opening the advanced firewall settings, you need to create a new rule to allow incoming or outgoing connections through your desired port.
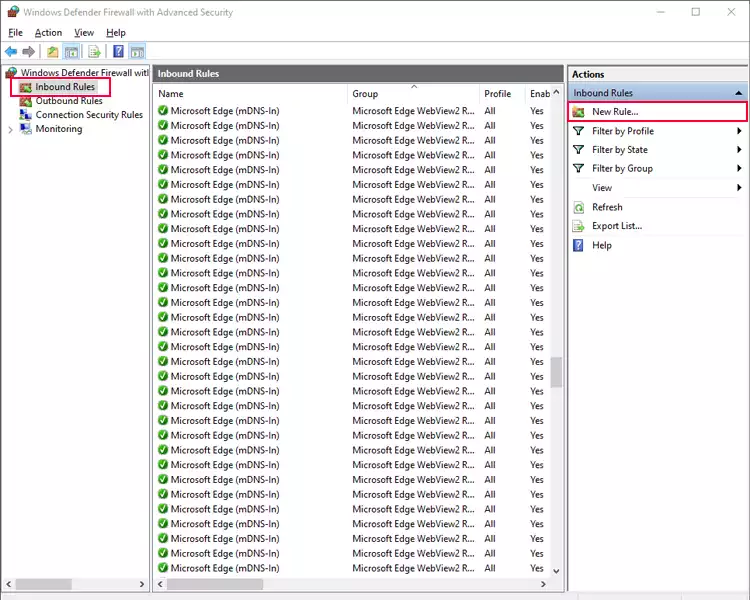
On the left sidebar, click on Inbound Rules, and then on the right sidebar, click on New to open the Inbound Rule Creation Wizard.
Note:
To open an outbound port, select Outbound Rules instead of Inbound Rules in the first step, then create a new rule. The rest of the process is the same.
Select Rule Type
On the wizard’s first page, select the type of rule you want to create. Windows Firewall provides four different options, each of which lets you control different traffic based on different criteria. Here, we want to open a port, so select Port and click Next.
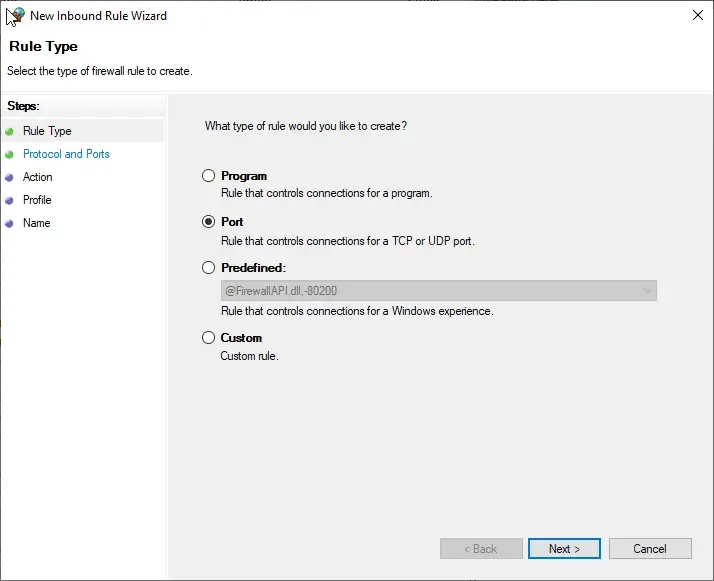
The other options, including Program, Predefined, and Custom, are useful for more specific firewall rules. Choose Program to allow access for a particular application, Predefined to apply a rule for a predefined protocol or service, or Custom to have more control over settings such as source and destination IP addresses, ports, and protocols.
Specify Port Number and Protocol
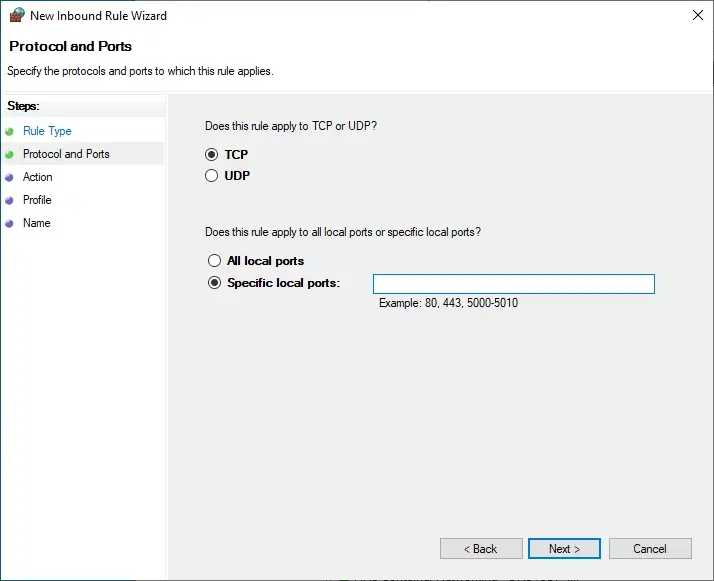
In this step, you can select TCP or UDP depending on the type of traffic you want to open, or if you want to open a port for both protocols, you will need to create separate rules for each protocol.
Specify the Firewall Rule Action in Windows
On the action page, you should specify what this rule does with incoming connections for this port; to allow connections, select “Allow the connection“.
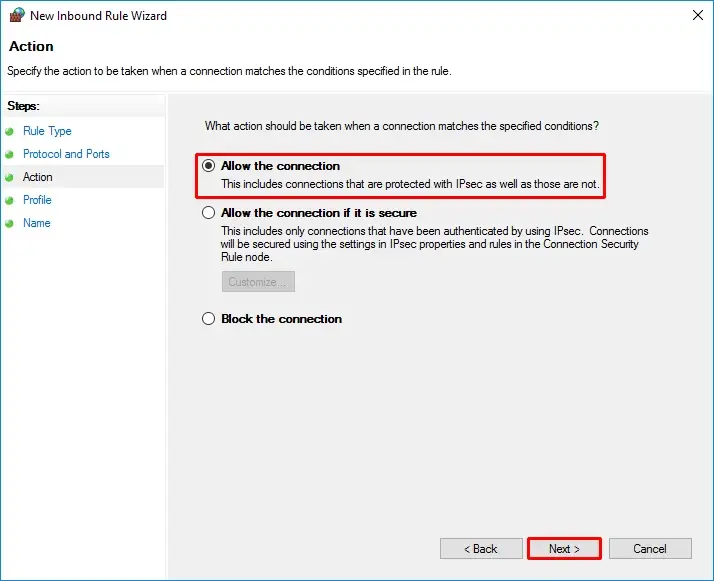
If you are in a domain environment and using IPsec policies to authenticate your connections, you can select “Allow connections if Secure“. For a normal Windows VPS or home Windows, you generally don’t need this option.
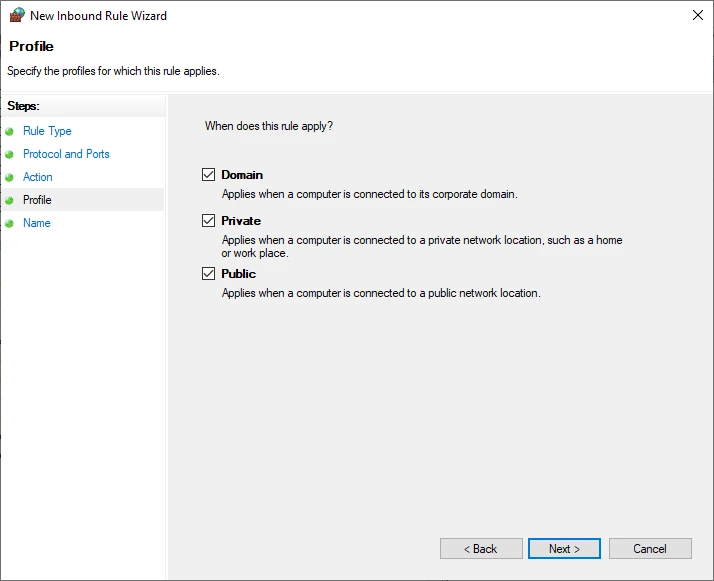
Specify Network Profile to apply rule to
In this page you need to select the network profiles to apply the rule too, its better to keep all checked if you don’t want to change anything however you can uncheck the ones you don’t need.
- Domain: applies the firewall rule when your VPS is domain-joined and managed by an organization
- Private: applies the rule when connected to a trusted private network.
- Public: Applies the rule when connected to an untrusted public network such as Wi-Fi in an airport.
On a VPS, it’s better to keep all checked and click Next to Continue.
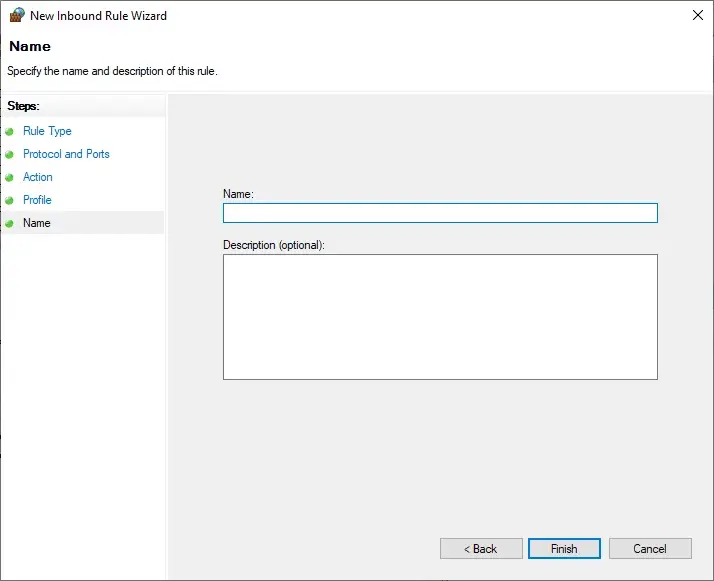
Specify a name and description for the firewall rule
In this step, you will need to specify a name and a description for your firewall rule; make sure you write a name and description that, when you later want to disable or remove this rule, you recognize the rule. After setting the name and description, click Finish to create the rule.
Open a Port Using PowerShell
You can also use PowerShell to open a port on Windows. This can be used when you prefer to manage your Windows server via the command line or in automation tasks. To open a port using PowerShell, you need to create a new rule using New-NetFirewallRule
First, open PowerShell as an administrator. Search for PowerShell in the Start menu, right-click, and select Run as administrator. Then, depending on your connection, use the command below by replacing your values with examples.
Use the following table as a reference when replacing the values in the commands below.
| Parameter | Example value | Description |
|---|---|---|
-DisplayName | “Allow TCP Port 8080” | Sets a recognizable name for the firewall rule. |
-Direction | Inbound / Outbound | Specifies whether the rule controls incoming or outgoing traffic. |
-Protocol | TCP / UDP | Defines the network protocol used by the application. |
-LocalPort | 8080 | Specifies the local port on your Windows VPS that accepts incoming connections. |
-RemotePort | 8080 | Specifies the destination port for outgoing connections. |
-RemoteAddress | 192.168.1.100 | Restricts the rule to connections from a specific remote IP address. |
-LocalAddress | 192.168.1.10 | Specifies the local IP address to which the rule applies. |
-Action | Allow / Block | Determines whether matching traffic is allowed or blocked. |
-Profile | Any / Domain / Private / Public | Specifies the network profiles where the rule applies. |
Allow an Incoming Connection to a Port
These commands allow an inbound (incoming) connection to your Windows machine; choose either TCP or UDP and run the command, or, if you want to open both, run both.
Allow an Incoming TCP Connection to a Port
This command allows connections through the port 8080 with tcp protocol.
New-NetFirewallRule -DisplayName "Allow TCP Port 8080" -Direction Inbound -Protocol TCP -LocalPort 8080 -Action AllowAllow an Incoming UPD Connection to a Port
This command allows connections through the port 8080 with udp protocol.
New-NetFirewallRule -DisplayName "Allow UDP Port 8080" -Direction Inbound -Protocol UDP -LocalPort 8080 -Action AllowAllow an Outgoing Connection to a Port
If you also need to allow outgoing connections through a specific port, run the commands below depending on your required protocol.
Allow outgoing TCP Connection to a port
New-NetFirewallRule -DisplayName "Allow Outbound TCP Port 8080" -Direction Outbound -Protocol TCP -RemotePort 8080 -Action AllowAllow outgoing UDP Connection to Port
New-NetFirewallRule -DisplayName "Allow UDP Port 8080" -Direction Inbound -Protocol UDP -LocalPort 8080 -Action Allow -Profile AnyAllow Connections From a Specific IP Address
You can also restrict access to a particular remote IP address by specifying the IP address in the command using the -RemoteAddress option in the command; in the example below, replace 192.168.1.100 with your desired IP.
New-NetFirewallRule -DisplayName "Allow TCP Port 8080 from Specific IP" -Direction Inbound -Protocol TCP -LocalPort 8080 -RemoteAddress 192.168.1.100 -Action AllowVerify the Firewall Rule
After creating the rules to allow connections, you can check whether it was added successfully using the Get-NetFirewallRule command:
Get-NetFirewallRuleThe command above shows all firewall rules. To search for your desired firewall rule, use the command below by replacing your port instead of 8080:
Search for rules using a specific local port:
Get-NetFirewallPortFilter -LocalPort 8080 | Get-NetFirewallRuleSearch for rules using a specific remote port:
Get-NetFirewallPortFilter -RemotePort 8080 | Get-NetFirewallRuleHow to Close an Open Port on Windows VPS
After opening a port on a Windows VPS server, to block it or close the port, you should remove or disable the rules you’ve created for the port, or if you want to fully block this port, you can follow our dedicated guide for this action:
Instead of blocking a port, you can forward incoming connections to another port. This is useful when you want to prevent direct access to a service on its original port while keeping the service accessible through a different port. To learn how, follow this guide:
Port forwarding on Windows involves two steps: creating a new firewall rule for the port and configuring port forwarding using CMD.
Read the full articleSummary
Opening a port on Windows allows incoming or outgoing network traffic through Windows Defender Firewall, making your applications and services accessible over the required ports. You can create firewall rules using either the Windows graphical interface or PowerShell, depending on your preference.
In this guide, we covered how to create inbound and outbound rules, specify TCP or UDP protocols, restrict connections to specific IP addresses, and verify existing firewall rules. Choosing the method depends on you and your requirements, but the GUI version for beginners can be a lot easier.
If a port is still inaccessible after creating the rule, check whether another firewall or your VPS provider’s network restrictions are blocking the connection.