How to Create New User in Ubuntu Server?
User management in Ubuntu server is one of the first basic things you need to do as an administrator to control each user’s access and give them access according to their role and job, because it directly affects security and system organization.
Instead of everyone using the root account, you should create a separate account for each user and assign only the permissions they actually need, which also helps with better security and makes it easier to manage users permissions.
Here in this article, we are going to walk through creating a user with two system commands, adduser – useradd, and verify them.
Create a new user in Ubuntu VPS server
First, you need to connect to a personal or purchased Ubuntu virtual server. To connect via SSH, you can use Windows CMD or available software.
If necessary, you can read the article How to connect to a Linux VPS with SSH.
A simple way to use Ubuntu server on Windows OS, you can easily connect to your server with Putty, if you do not have Putty, you can easily download it from the official Putty website.
You need to log in to your server as Root or with a user with admin access.
Create User with useradd Command in Ubuntu Server
The “useradd” command is a low-level system command, and when using it, it doesn’t automatically configure needed things like creating a home directory for the user, setting a password, and doesn’t configure shell. You need to do all of them manually.
Method 1- Create a user and its home directory and configuration automatically (Recommended):
You can run a single line of command for both creating the Home directory and the login shell:
sudo useradd -m -s /bin/bash testuser
Method 2- Create a user and its home directory and configuration manually:
If you want to create a user on Ubuntu Server with limited access so that you can manage the access yourself, you can create a new user as follows:
1- Run this command to create a user:
sudo useradd testuser
This command will create a user without any home directory or SSH login configurations. To create a home directory and login shell, run the commands below.
2- create home directory:
sudo mkdir /home/testuser
3- Set its ownership to the user:
sudo chown testuser:testuser /home/testuser
4- set login shell for the user
sudo usermod -s /bin/bash testuser
Important: Set home directory in user record
sudo usermod -d /home/testuser testuser
Create User with adduser Command in Ubuntu Server
The “adduser” command is a high-level command that automatically creates a home directory, sets permissions correctly, asks for a password, assigns a default login shell, and asks for some more information about the user.
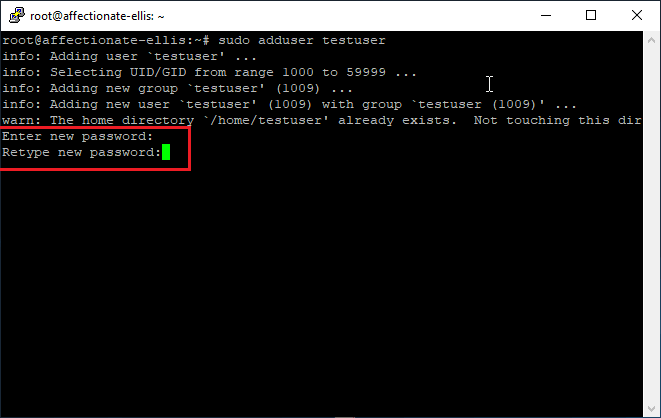
sudo adduser testuser
After creating a new user using the “adduser” method in Ubuntu, it will ask you for a password for the created user.
Enter the password you want to set to new user.
After entering and confirming your password, you will be prompted to provide additional information about the user, such as full name, phone number, and other details. You can fill in these fields or leave them empty and press Enter to continue.
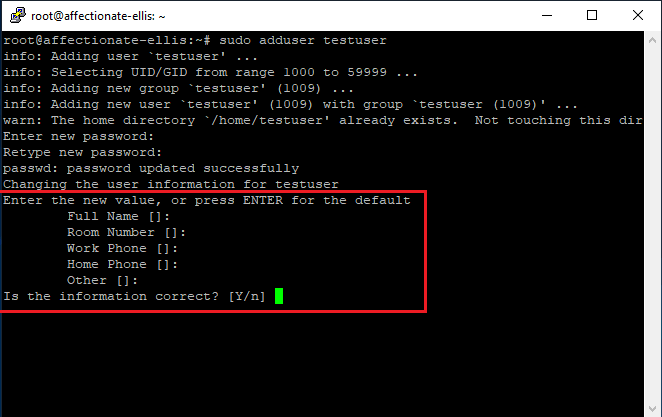
Then enter Y to add your users.
Check all users and group lists in Ubuntu server
To verify a user, you need to check whether the user exists on your server and confirm that their home directory has been created correctly.
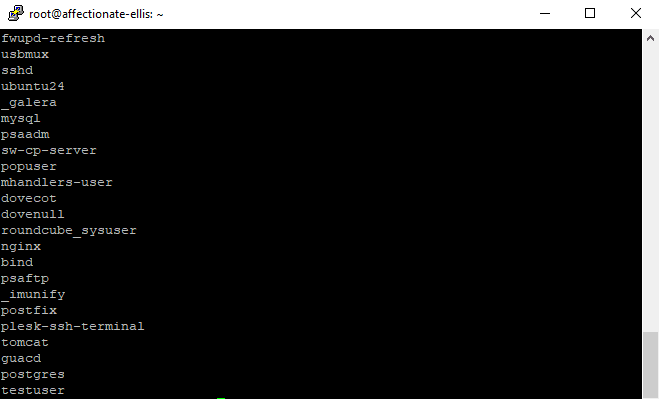
List all users
List all users to check whether your user has been added.
cut -d: -f1 /etc/passwd
After listing the users, if you see extra or unused accounts, or if you created a user incorrectly, you can easily delete users in Ubuntu just as simply as you added them.
Check user information individually:
You can check only one user with the following command:
id testuser
If you get output like this, it means the user creation was successful. When you create a new user, by default, it’s a Normal user, for whom you can change user permissions and give them admin access.
uid=1009(testuser) gid=1009(testuser) groups=1009(testuser),100(users)
Check the /home/ directory for your user folder. If you see your username there, the home directory was created successfully.
ls /home/
Try switching the user to the new one you’ve created.
su - User Name
Check your user with whoami

Conclusion
Adding users on Linux servers is a basic but important task for managing system access. Tools like adduser and useradd allow you to create accounts with the right settings and permissions.
The Author Jacob R
i am Jacob a developer and cybersecurity enthusiast with strong skills in web development and a passion for building practical digital solutions,Working on web development for 4 years. Hope my guides be helpful
More from Jacob R