
How to Generate SSH Key on Windows Server and Client?
To securely connect to a server, git repositories, or other remote services from your Windows device, or connect to another Windows device, you need to create SSH keys to connect without a password by using key authentication instead of user credentials.
In this article, you will learn how you can create SSH private and public keys on Windows Server and Windows 10 / 11.
There are many methods to create SSH keys on Windows: one with PowerShell and one with the PuTTYGen application.
Check SSH on Windows Server and Client
Open your computer or, if you are using it remotely, connect to your Windows to start the process.
In most of the modern Windows devices, OpenSSH is installed by default, which is needed to use an SSH connection and key generation. But you can verify it from Windows PowerShell by following the steps below:
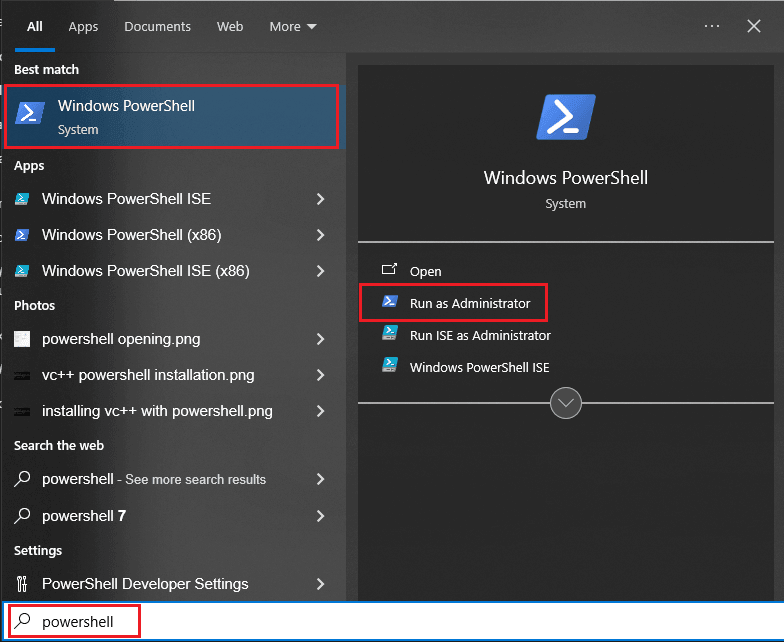
1- Press the Windows button on your keyboard or click on the Start menu button and search for PowerShell and run it as Administrator.
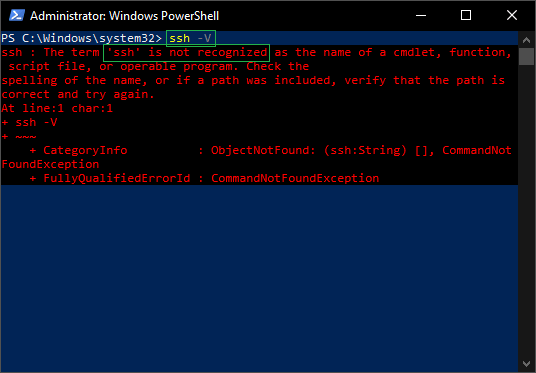
2- You can verify it by checking its version or connecting to another Linux Server using SSH.
ssh -V
If you see an error like “ssh is not recognized as an internal or external command”, it means OpenSSH is not installed or not properly enabled on your system.
Generate SSH key in Windows PowerShell
Using Windows PowerShell, you can generate SSH key pairs (public and private) both on Windows Server and on Windows Client.
Run PowerShell as Administrator
Click on the Start menu or press the Windows key on your keyboard and search for PowerShell. Then run it as Administrator.
Generate SSH Key Using SSH Keygen in Windows
To create SSH key pairs, you need to use the ssh-keygen command in Windows PowerShell. SSH keys have many types that you can choose from, but the most used and modern standard is ed25519 that we will use in the following steps.
Run the commands below to create the SSH key on your Windows:
Create SSH Keys With ed25519 Type in Windows PowerShell:
ssh-keygen
Also, you can create a key with older compatible types using this command:
ssh-keygen -t rsa -b 4096
Specify SSH Key Path in Windows PowerShell
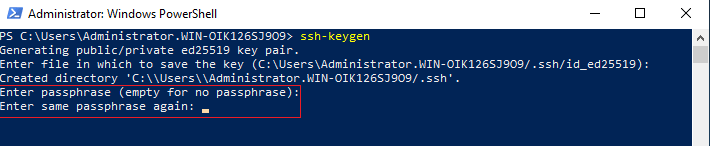
You will be asked to specify a location where the keys will be saved. You can choose a custom path if you want, or simply press Enter to accept the default location and continue.

In this image, it shows that you are creating two keys: a public and a private key with the ed25519 type, which is the default type, and it shows the default location where it will store the files.
Set SSH Key Passphrase Windows
In this step, you will be asked to specify a password for your keys. If you want, you can press Enter to leave it empty. But it is recommended to set a password for better security.
Check SSH Key in Windows PowerShell
After setting the password for your keys, you will see your SSH key fingerprint and the locations where the files are saved. You can go to these locations on your computer and check whether the files have been created.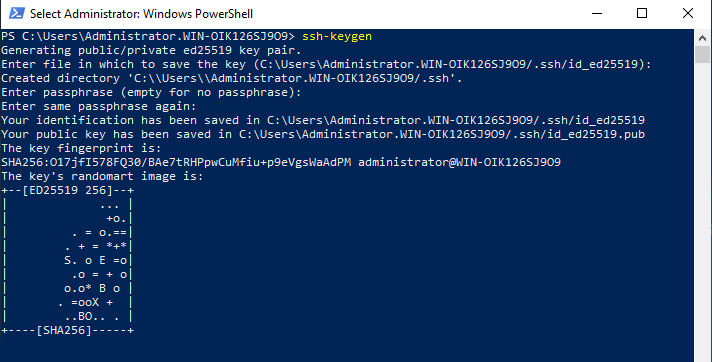
You will see two files: your public key and your private key:

Your public key can be shared, but don’t share your private key.
Generate SSH Key With PuTTY in Windows
To create an SSH key in a Windows environment, you can use PuTTY software, which is designed to communicate with servers in Windows. PuTTY comes with several helper programs, one of which is PuTTY Key Generator, which is used to generate keys. Here you can download Putty.
Run PuTTYgen on Windows
Click on the Start menu or press the Windows key on your keyboard and search for “PuTTYgen“. You can use Putty to connect to every server that allows connection with the SSH protocol, such as MikroTik VPS Server or Linux VPS server.
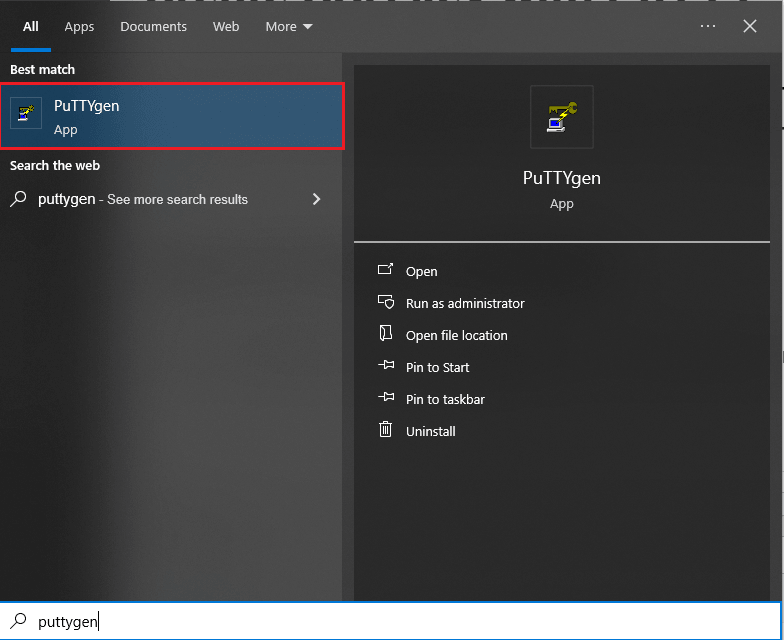
If you don’t know how to use PuTTY to connect to servers, you can learn by following this article:
How to Connect to a Linux Server using SSH with PuTTY.
Select Key Type in PuTTYgen Windows
Using PuTTYgen, you can create SSH keys with multiple types supported by SSH keys, but it’s recommended to use the most commonly used ones like ed25519 or RSA.
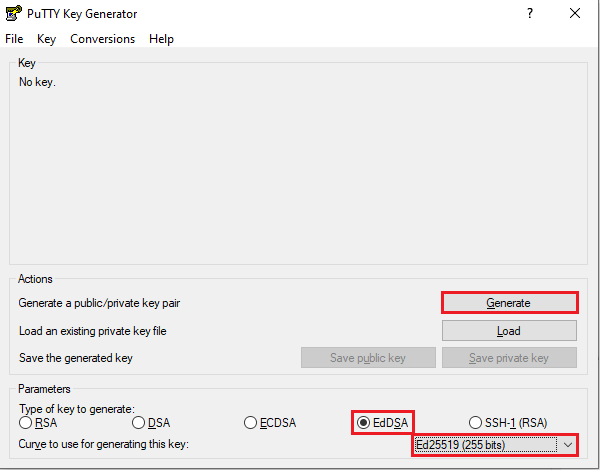
1- Select the EdDSA key type > then select Ed25519 type > Click on Generate.
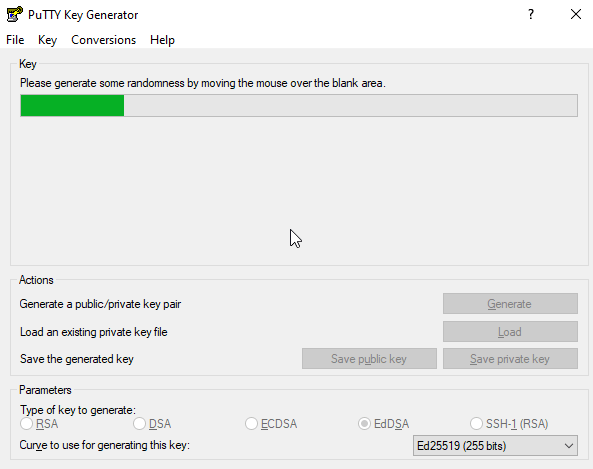
2- You will be asked to move your mouse randomly on the screen to create a random pattern for your SSH key to make it more secure. Move the mouse randomly till the progress bar ends.
3- Specify a password for your SSH keys and save both the public and private key files in the location you want.
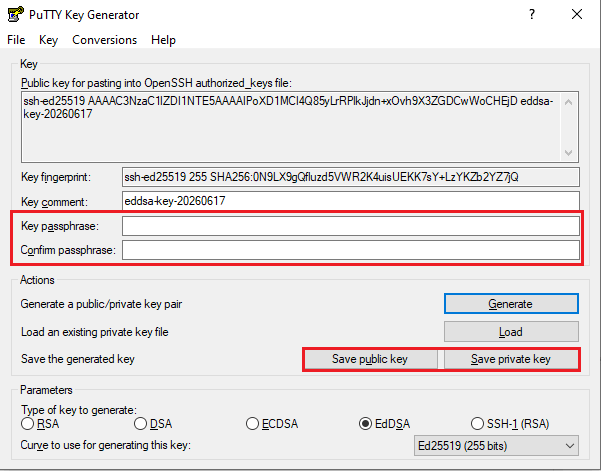
Now that you have your keys generated, you can use them to connect to your servers.
Note: If you face connection issues, it may be from blocked ports on your Windows firewall. You can fix it by opening port in Windows.
Connect to Linux Server Using SSH Keys
To connect to a Linux Server with SSH Key or other servers that support the SSH protocol from Windows, you can use the PuTTY application itself, or you need to copy your public key content to the destination server and add it to authorized_keys to accept your connection from Windows by key.
To connect to your Linux server, you need to create SSH key on your Linux server too to use SSH key authentication instead of user authentication.
Conclusion
In this article, we walked through how you can create SSH key on your Windows using the PuTTY application or the ssh-keygen command.
Now you are all done with creating SSH key on your Windows side. just need to copy your SSH public key to your Linux server and add it to the authorized keys to accept connections with your key.
Hope this article helped you to establish secure connection to your server!

The Author Jacob R
i am Jacob a developer and cybersecurity enthusiast with strong skills in web development and a passion for building practical digital solutions,Working on web development for 4 years. Hope my guides be helpful
More from Jacob R