How to open port on Windows VPS?
Open a port in Windows VPS can be done for various reasons, including hosting online games, sharing a specific program, accessing some networks or services that must be used from a particular port, and sharing specific protocols. For all these services, opening the Windows VPS port is considered vital.
First, we will teach you how to open the port step by step using several methods along with the image.
How to add a port in a firewall?
If you are using Windows Firewall to open the Windows VPS port, you need to open the Port Number you selected in that firewall. Then the firewall accepts the connection to the port you want.
Note: The firewall can control ingress and egress and only allow inbound ports that you approve.
Different operating systems use different firewalls to manage ports. This is done by the built-in Windows firewall in the case of Windows VPS.
We have 3 ways to do this in the Windows VPS firewall:
1.Windows Firewall GUI (Graphical User Interface)
2.CMD (Command Line)
3.Windows PowerShell
How to open port with firewall GUI?
To access the newly added port in Windows Firewall, follow these steps:
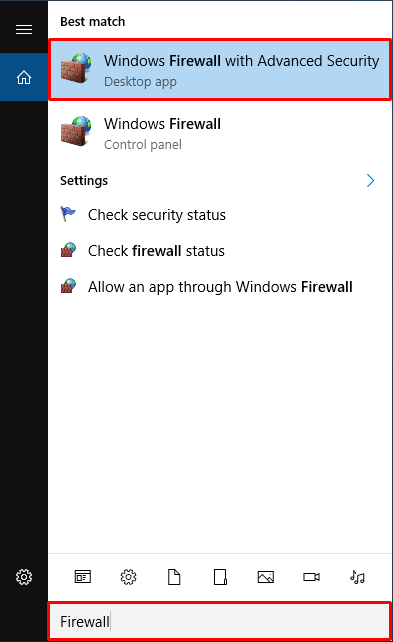
Step 1- Accessing Firewall Settings:
First, execute the Run with “Windows key + R” keys, type “wf.msc” and press OK.
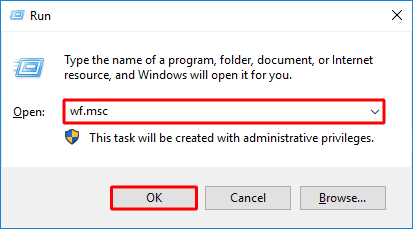
or you can Search for “Firewall” in the Start menu’s search box.
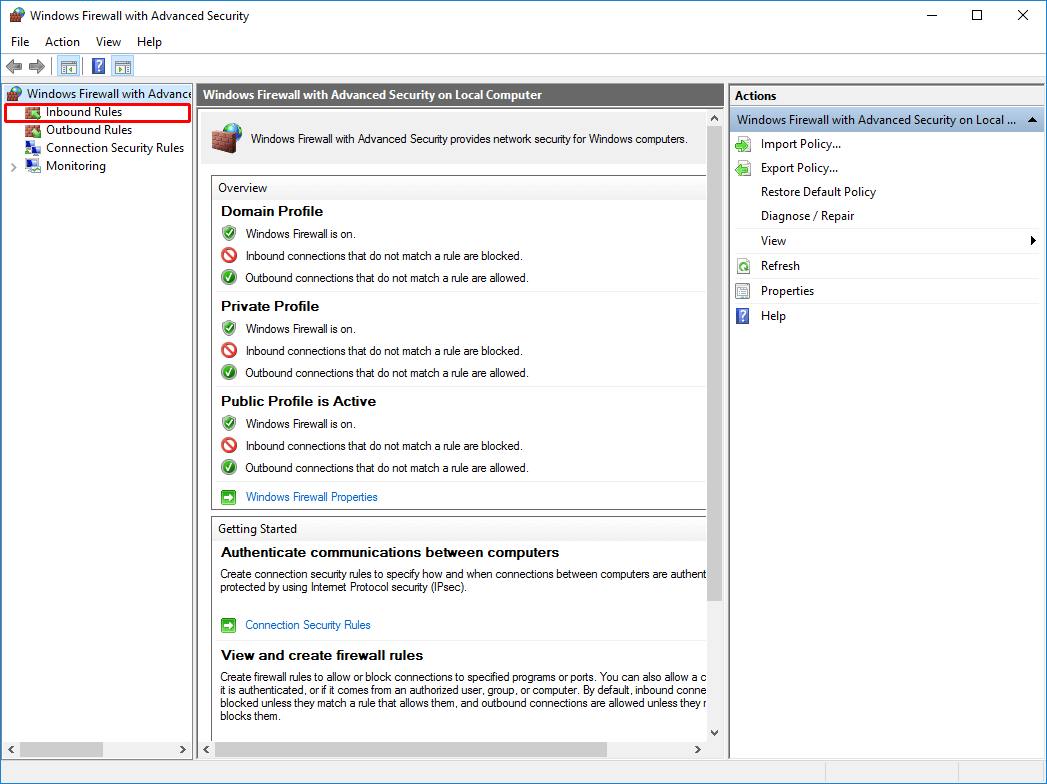
Step 2- Navigating to Inbound Rules:
Find “Inbound Rules” on the left side of the Windows Defender Firewall box and click on it.
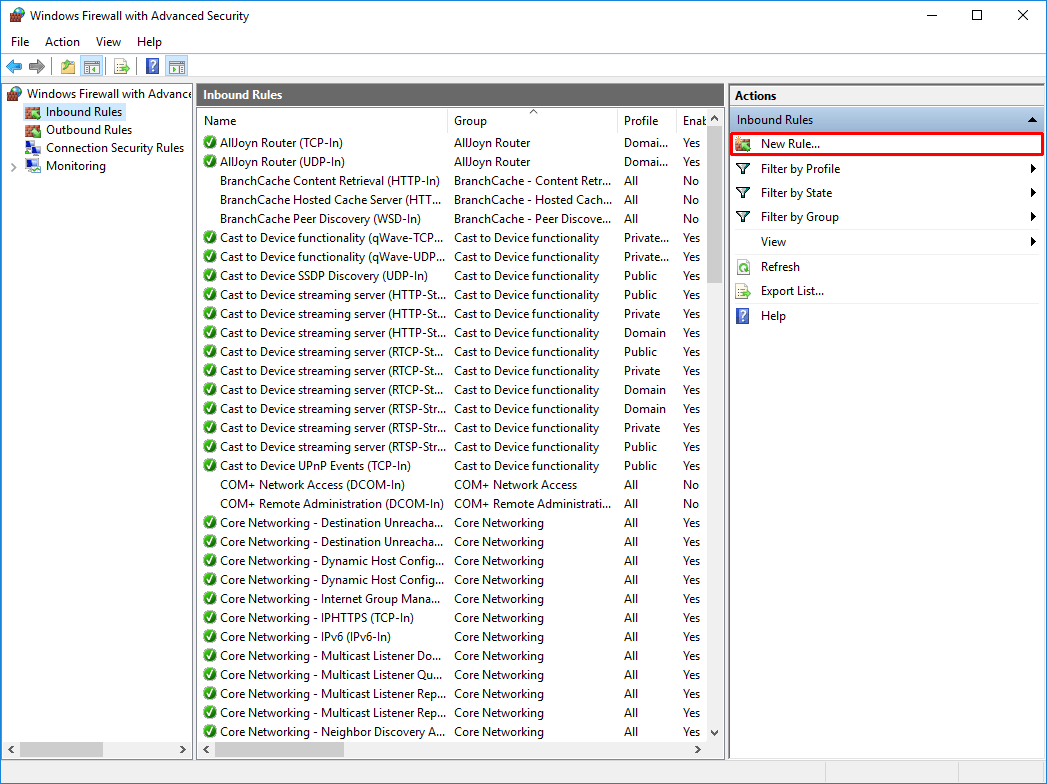
Step 3- Creating a New Inbound Rule:
Click “New Rule…” in the right-hand window to access the New Inbound Rule Wizard.
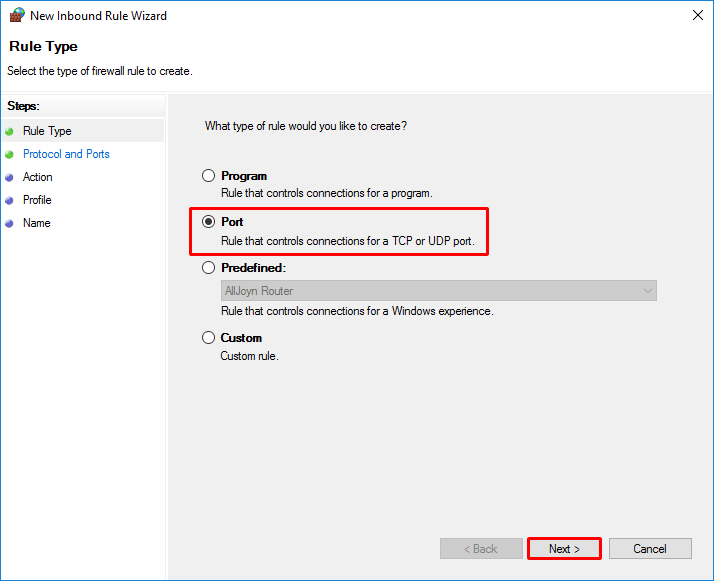
Step 4- Selecting Rule Type:
Choose “Port” under Rule Type and then go to the Next step.
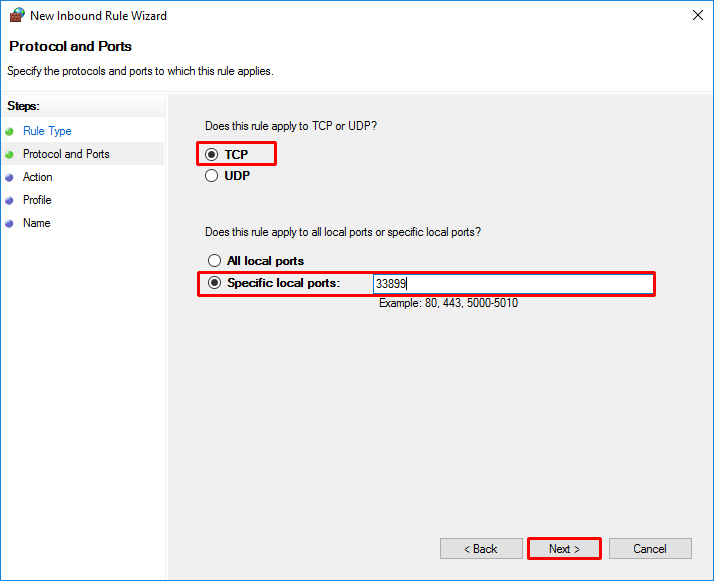
Step 5- Specifying Protocol and Port Number:
Select “TCP” as the protocol type; Remote Desktop Protocol uses TCP.
Select “Specific local ports” and enter the new port number. Go ahead and click Next.
(For example: 33899)
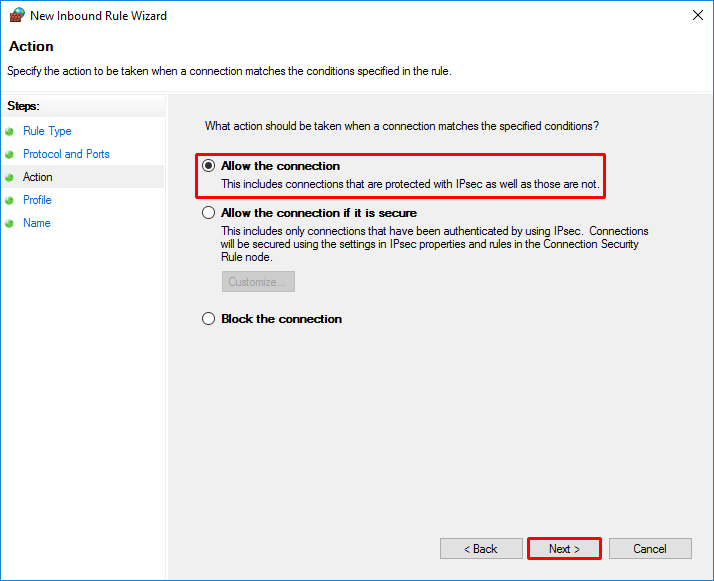
Step 6- Setting Action for the Rule:
Pick “Allow the connection” and then hit the Next button.
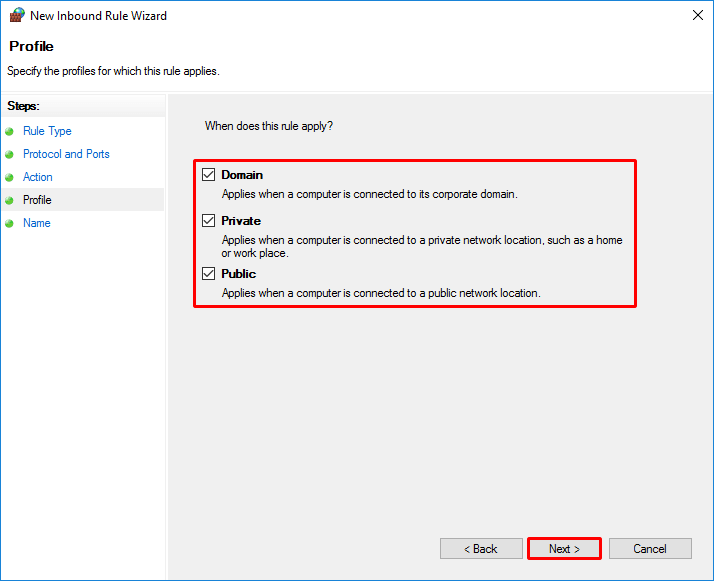
Step 7- Selecting Profile:
Choose the relevant option (e.g., Domain, Private, Public) to ensure this rule applies to the right network locations. Click Next.
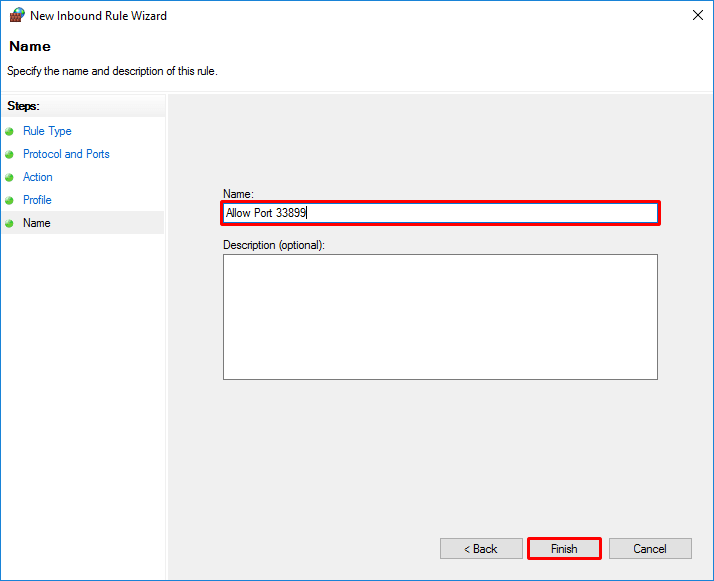
Step 8- Naming and Completing the Rule:
Name the rule (such as “Allow Port 33899“) and Specify the rule’s purpose, if desired. Make the new incoming rule by clicking Finish.
How to open port with firewall CMD?
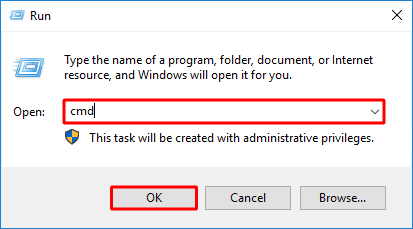
Step 1- This time, use the Windows key + R and type CMD and press OK.
Step 2- Type this code.
netsh advfirewall firewall add rule name="Port 33899" dir=in action=allow protocol=TCP localport=33899

Note: The name section is your custom name, and the local port section, is the number of the port you want to open.
Step 3- Reboot the server to apply the settings changes.
How to open port with firewall Powershell?
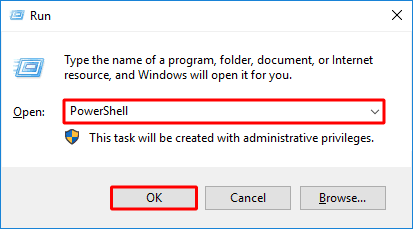
Step 1: execute the run using the (Windows key + R), type PowerShell, and then press OK.
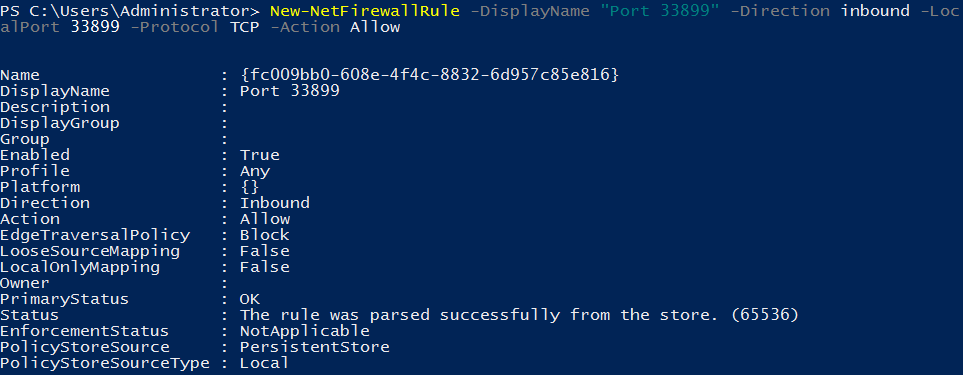
Step 2- you should type this command on Powershell :
New-NetFirewallRule -DisplayName "Port 33899" -Direction inbound -LocalPort 33899 -Protocol TCP -Action Allow
Step 3- Reboot your server to apply changes.
Note: In the “DisplayName” field, you must write the name of the port you want, and in the “LocalPort” field, you must write the number of the port you want to open.
Conclusion
Finally, according to the above methods, you can open the new port. Configure the firewall to control ingress. Be sure to make the settings and changes in such a way that it has the necessary security when using the VPS remotely. Port security includes (opening necessary ports, updating software, monitoring and management, using encrypted protocols, recording events, and finally using a firewall).
After opening a new port, you need an IP address to host. If you want to find the IP address of your server, use this article: How to find VPS IP Address in Windows Server?
We hope this article is useful for you.
The Author Robert Smite
Hello! I'm Robert, specializing in virtual servers and cloud technology. With expertise in managing and optimizing virtual servers, my focus is on delivering understandable and practical content in this field. My goal is to enhance knowledge and assist individuals in selecting the best virtual services for their needs.
More from Robert Smite