How To Change the Default RDP Port?
Using PowerShell scripts or altering the port number settings in the Windows Registry are the two ways to change the default RDP port (3389) to another port. Users may avoid brute-force attacks and other illegal access by following this procedure and using a non-default port to increase security.
To successfully install the new port, you must create matching firewall rules that allow connections from the outside. When you’re done making adjustments, restarting Remote Desktop Services will ensure they take effect and provide remote access via the new port.
In this article, we’ll go over the basics of changing the RDP port, how to do it, and why it’s important for improving system security and reducing vulnerabilities.
How To Change Default RDP Port (3389) to Another Port
Changing the default Remote Desktop Protocol (RDP) port from 3389 to another involves a few steps. Here’s a step-by-step guide:
Methode 1: Change the RDP Port by Modifying the Registry Manually
Here is a step-by-step guide to changing the RDP port by modifying the registry:
First Way: Changing the port through the registry editor
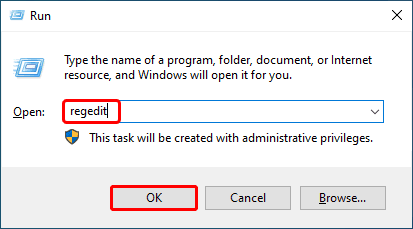
1. Accessing the Registry Editor
Click the Run dialog box by pressing the “Windows + R” keys simultaneously. Press the Enter key after typing “regedit” into the Run box. By doing this, you may open the Windows Registry Editor.
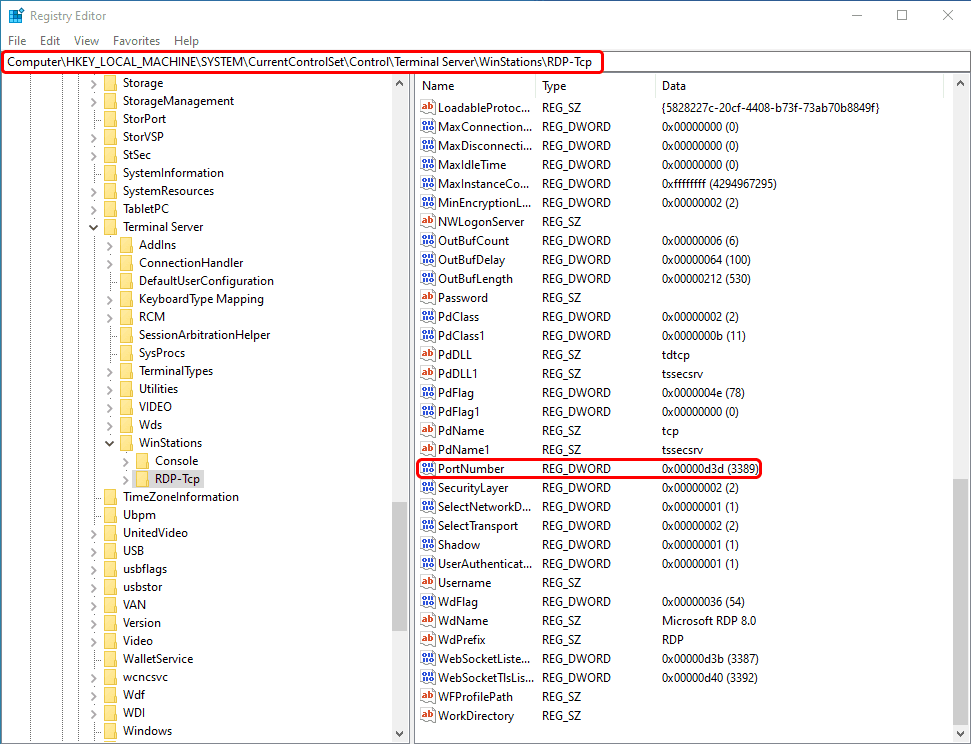
2. Navigating to the RDP-Tcp Subkey
Find the following route in the Registry Editor: HKEY_LOCAL_MACHINE\System\CurrentControlSet\Control\Terminal Server\WinStations\RDP-Tcp and look for the “PortNumber” directory on the right side of the window.
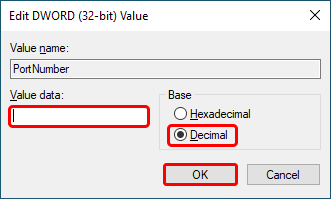
3.Modifying the PortNumber:
Select Decimal as the Base Number System. Ensure the port number you want to enter is between 1024 and 655355. Save your changes by clicking “OK”.
Second Way: Changing the RDP port through PowerShell Command
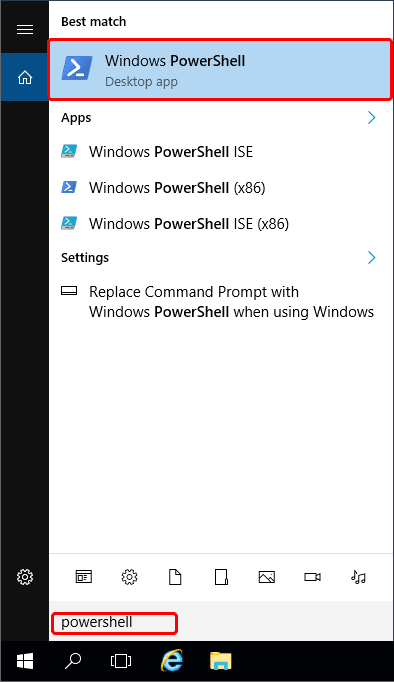
1. Launching PowerShell on RDP VPS:
Find the PowerShell program by typing “PowerShell” into the search box.
2. Checking Current Port and Adding New RDP Port with PowerShell Command:
You can see the information about your port number through the following command:
Get-ItemProperty -Path ‘HKLM:\SYSTEM\CurrentControlSet\Control\Terminal Server\WinStations\RDP-Tcp’ -name “PortNumber”

Then you can change it to your desired port through the following command, for example we change it to 3399:
$portvalue = 3399
Set-ItemProperty -Path ‘HKLM:\SYSTEM\CurrentControlSet\Control\Terminal Server\WinStations\RDP-Tcp’ -name “PortNumber” -Value $portvalue
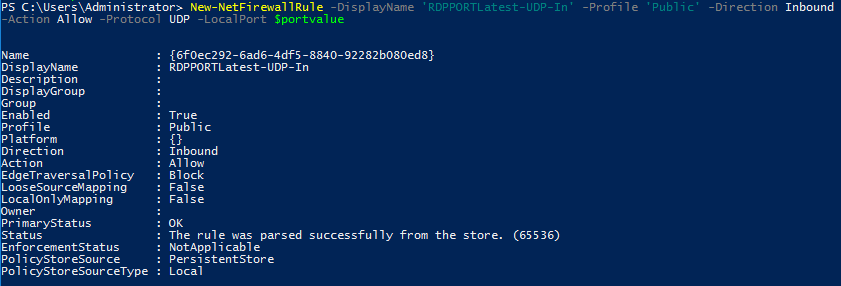
3. Add New RDP port on windows server firewall:
Now, through the following command, we must issue the necessary permissions to access the new port through TCP and UDP in the firewall
New-NetFirewallRule -DisplayName ‘RDPPORTLatest-TCP-In’ -Profile ‘Public’ -Direction Inbound -Action Allow -Protocol TCP -LocalPort $portvalue
New-NetFirewallRule -DisplayName ‘RDPPORTLatest-UDP-In’ -Profile ‘Public’ -Direction Inbound -Action Allow -Protocol UDP -LocalPort $portvalue
You may successfully change the RDP port manually in the Registry Editor or with PowerShell by following these procedures and using the supplied commands. Pick a port number within the suggested range and hit “Confirm” to make the changes permanent.
Method 2: Open the New RDP Port in Windows Firewall
Open a port in the RDP firewall requires a deep understanding of network security and network access control.
RDP is one of the most popular tools for connecting to remote servers.
Opening the port means opening a new gate to the network, and the firewall is the first defense wall against hacker attacks. The firewall controls incoming and outgoing traffic and allows access to authorized requests.
The main purpose of opening ports in the RDP firewall is to balance fast and easy access while maintaining security.
If you need more detailed and practical steps, this complete guide to opening an RDP port in a firewall can help.
You can read this article to learn more about the difference between VPS and RDP and which is best for your needs.
What To Do After Changing Default RDP Port (3389) to Another Port?
When you’ve changed the default RDP port (3389) to another port, there are a few more things you need to do to keep your system safe and the transition going smoothly:
Step 1: Restart the RDP Service
If you need to restart the RDP service, follow these steps:
1- Getting to the Services:
- Choose “Windows” from the Start menu or press the Windows key on your keyboard.
- In the search field, type “services” and press Enter.
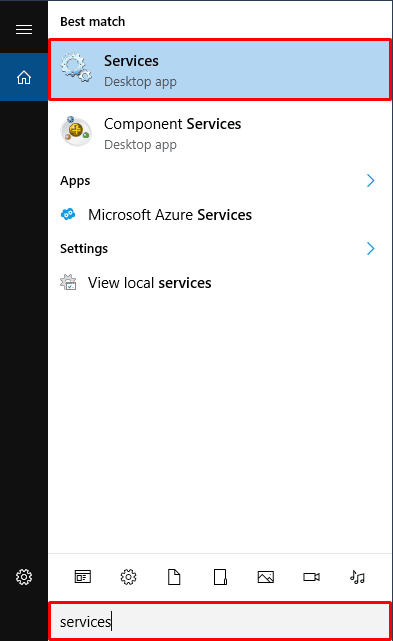
- Your Services window will open when you accomplish this.
2- Finding Computer Services for Remote Desktop:
- Scroll down or use the search bar to find “Remote Desktop Services” in the Services panel.
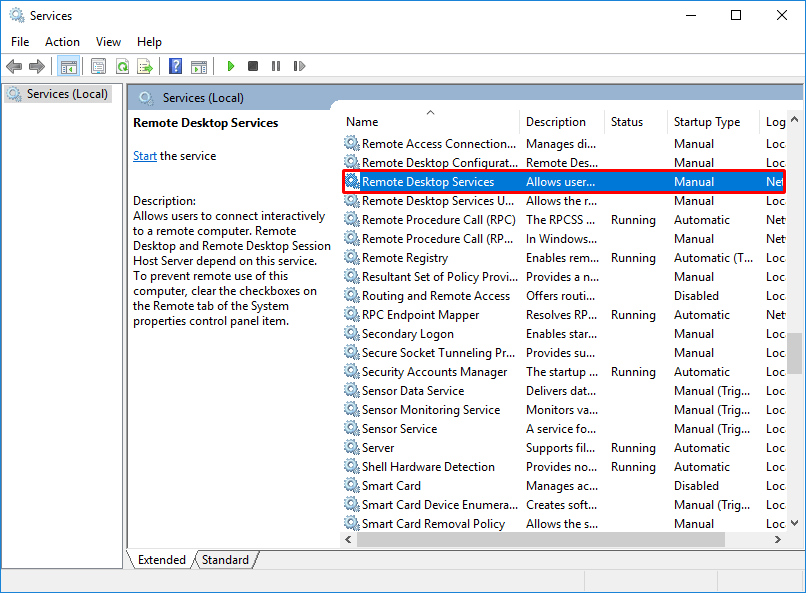
3- Remote Desktop Service Restart:
- Get the “Restart” option by right-clicking “Remote Desktop Services” in the context menu.
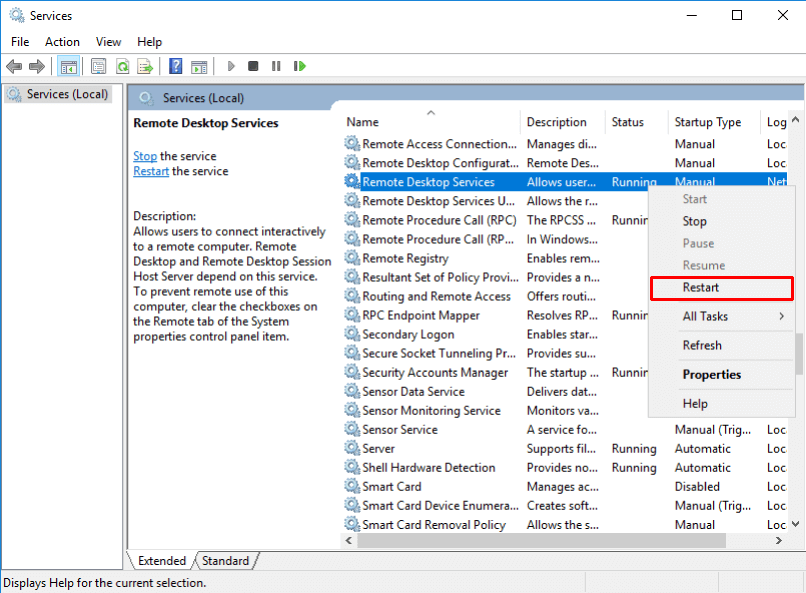
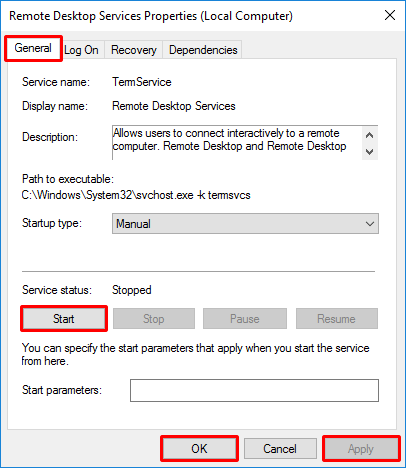
- Another option is to enter the “Remote Desktop Services” properties by double-clicking on it. Then, go to the “General” tab and find the “start” button.
- Give it a little while longer to restart. There may be a slight interruption as the service pauses and starts up again.
4- Verification:
- You can exit the Services window after the service has properly restarted.
- As an extra precaution, check their status to see if the Remote Desktop Services are up and functioning.
Step 2: Do a Test
After changing the default RDP port to another port, it’s crucial to conduct a test to ensure the Remote Desktop connection functions correctly. Follow these steps to perform the test:
1- Confirmation Testing:
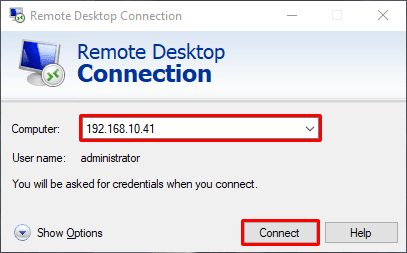
- Open the Remote Desktop Connection app on your local machine.
- Like this: 10.10.XX.XX:5343. After the colon, type in the IP address or hostname of the Windows server you’ve set up with the new RDP port.
- Send a connection request by clicking the “Connect” button.
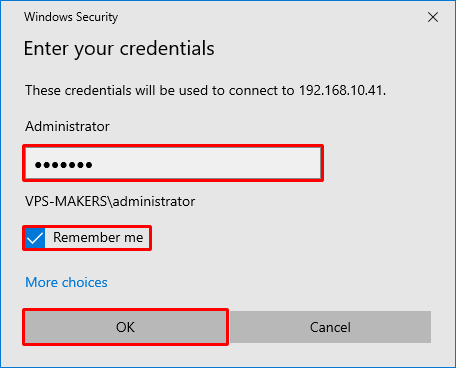
2- Providing Login Information:
- The window for Remote Desktop Connection will ask you to type in your Windows server username and password.
- You can remember your credentials for future connections by checking the “Remember me” box.
- Proceed by clicking the “OK” button.
3- Setting Up the Connection:
- Following the authentication process, Remote Desktop Connection will try to connect to the Windows server using the IP address and port you provided.
- Permit the connecting procedure to finish. A status message or indication of progress could appear during this period.
4 Common RDP Port Change Problems
Several typical issues might arise when changing the RDP port, impacting system accessibility and connection. Problems with changing RDP ports are common and include the following:
1- Problems with Connections:
- Problem: If the user’s firewall or port forwarding settings are incorrect, they may have trouble connecting to the remote desktop.
- Fix: Check the router’s port forwarding settings for the new port and modify the firewall rules to accept connections via the new port.
2- Trouble with Security Software
- Problem: Some security programs may mistakenly block RDP communication on the new port because they believe it to be malicious behaviour.
- Fix: Create a security software configuration exception for the new RDP port to allow communication over the designated port.
3- Permissions and Policy Concerns in the Network
- Problem: Modifying the RDP port can mess with your network’s rules and ACLs.
- Fix: Update network rules and ACLs to incorporate the new RDP port, guaranteeing network security compliance and accessibility.
4- Configuration of the Remote Desktop Client:
- Problem: When users connect to the remote desktop, they may not remember to give the updated port number.
- Fix: Make sure you know the new connection format requires the IP address, a colon, and the port number (e.g., 192.168.1.1:3390) to connect successfully.
5- Port-related problems:
- Problem: If another program already uses the new RDP port you picked, conflicts and connection concerns can arise.
- Fix: Check for active port traffic using a tool like Netstat before choosing a new port. If problems develop, select a different, unoccupied RDP port.
7 Tips to Chang Remote Desktop Port
Changing the Remote Desktop port can enhance security by making it harder for unauthorized users to find and access your system. Here are some tips to keep in mind when changing the Remote Desktop port:
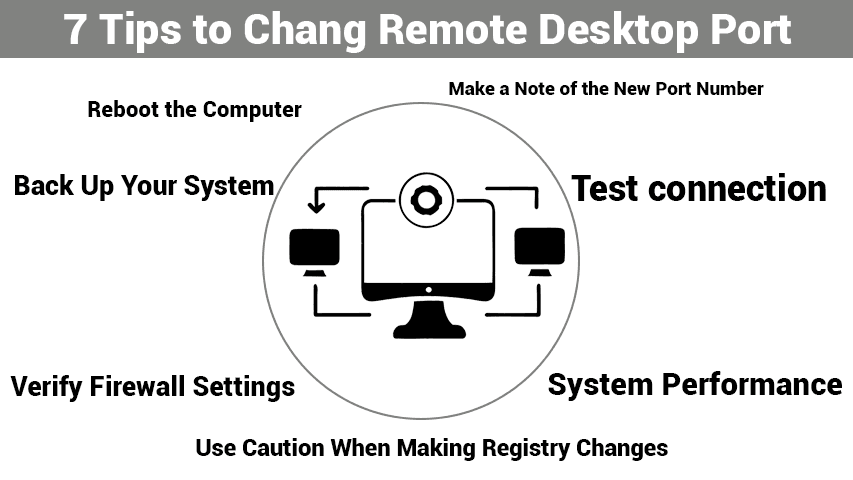
1- Reboot the Computer
After you change the Remote Desktop port, you must reboot the computer for the changes to take effect. This will ensure that the new port settings are applied correctly and that remote access works without problems.
2- Use Caution When Making Registry Changes
Changing the Windows registry may be dangerous and lead to system instability. Do not attempt this action without the guidance of a seasoned administrator who is well-versed in registry adjustments.
3- Back Up Your System
You must back up your system before changing the registry settings. This safety step ensures you have a backup in case something goes wrong with the changes or the restoration itself.
4- Make a Note of the New Port Number
After you change the RDP port, you’ll need to enter the new number the next time you want to connect remotely to your system. To create a connection, the hostname, IP address, and port number must be preceded by a colon in the Remote Desktop client.
5- Verify Firewall Settings
Revise your firewall settings to accept connections on the newly added RDP port. Adjust the firewall rules to enable connections to the specific port to keep your network secure while letting distant users in.
6- Test connection
Extensive testing after any modifications will ensure that the remote desktop connection is operating properly if you encounter problems when testing, check that you can connect using the new port and fix them.
7- System Performance
After changing the RDP port, monitor the system’s performance for irregularities or strange behaviour. Check CPU use, system responsiveness, and network traffic to ensure the change isn’t slowing down.
What is an RDP Port?
Remote Desktop Protocol (RDP) connections enable users to remotely access desktop computers over the RDP port, sometimes called port 3389. The RDP protocol, created by Microsoft, is a popular choice for remote desktop software and is compatible with Windows and macOS.
Its graphical user interface makes connecting to remote desktops over the web easy. Remote Desktop Protocol (RDP) uses Transmission Control Protocol/Internet Protocol (TCP/IP) as its transport protocol to provide an encrypted channel across a network that allows two computers to share their desktops, keyboard input, and mouse clicks.

The user’s device and the remote desktop can exchange data efficiently over this dedicated network channel, allowing real-time collaboration and productivity. RDP also uses encryption to protect data in transport, making connections over the public Internet even more secure. With RDP, users may confidently access and use desktop resources remotely over port 3389 and strict security standards. Also, if you are looking to buy RDP, you can visit this page.
Why You Should Change the RDP Default Port?
Some administrators may want to change the default RDP port from 3389 for the following reasons:
- Safety Measures: One way to reduce the vulnerability to brute force and password-spraying attacks is to change the default RDP port. Changing the port number makes it more difficult for attackers to identify the listening port, adding a layer of protection. Port 3389 is a common target for hackers to access remote desktops.
- Protection Against Automated Attacks: Administrators may lessen the possibility that automated scanning programs will find and exploit vulnerabilities by using non-standard port numbers for RDP. As a result, there are fewer chances of security breaches and illegal access attempts.
- Firewall Configuration: For security purposes, some firewall settings might restrict communication on port 3389. Administrators can bypass these limits and provide constant remote desktop access while keeping the network safe by changing the RDP port.
- Lower Risk Exposure: Changing the default RDP port lowers computers’ vulnerability exposure to known issues with port 3389. In addition to reducing the likelihood of exploitation by malicious actors, this preventative step may improve system security in general.
- Security through Complexity: Changing the RDP port number adds a layer of complexity to the network environment, but it’s not a 100% secure solution. Attackers’ difficulties recognizing and exploiting RDP services operating on non-standard ports may reduce the probability of successful intrusion attempts.
conclusion
Ultimately, one of the most important security measures you can take to protect your Windows system from attackers is to change the default RDP port (3389) to another port. This easy-to-understand solution may improve users’ systems’ security and make them more resistant to brute-force assaults. Protecting sensitive information accessible via Remote Desktop sessions requires prioritizing security measures such as port adjustment.
The Author Robert Smite
Hello! I'm Robert, specializing in virtual servers and cloud technology. With expertise in managing and optimizing virtual servers, my focus is on delivering understandable and practical content in this field. My goal is to enhance knowledge and assist individuals in selecting the best virtual services for their needs.
More from Robert Smite