How to Install PHP On IIS Windows VPS Server?
Installing PHP on Windows VPS Server 2022 is an essential step for developing and managing websites and applications. PHP is a programming language suitable for generating dynamic web pages and is used in conjunction with web servers such as IIS or Apache.
Windows Server 2022 has many features that we are going to advance as part of IIS for installing PHP and also introduce other methods so that you can choose the most optimal method for your installation of the PHP method.
Now we continue the article to do the easiest way to install PHP on Windows Server
Note: This method is applicable in all versions of Windows Server and you can use it
How to Install and Test IIS Web Server In Windows Server?
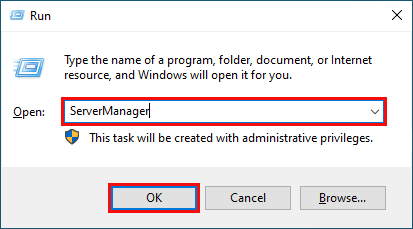
Step 1- After you have purchased your Windows VPS server and run it, open the Run section by using the Windows + R shortcut button and type “ServerManager” to open the settings section.
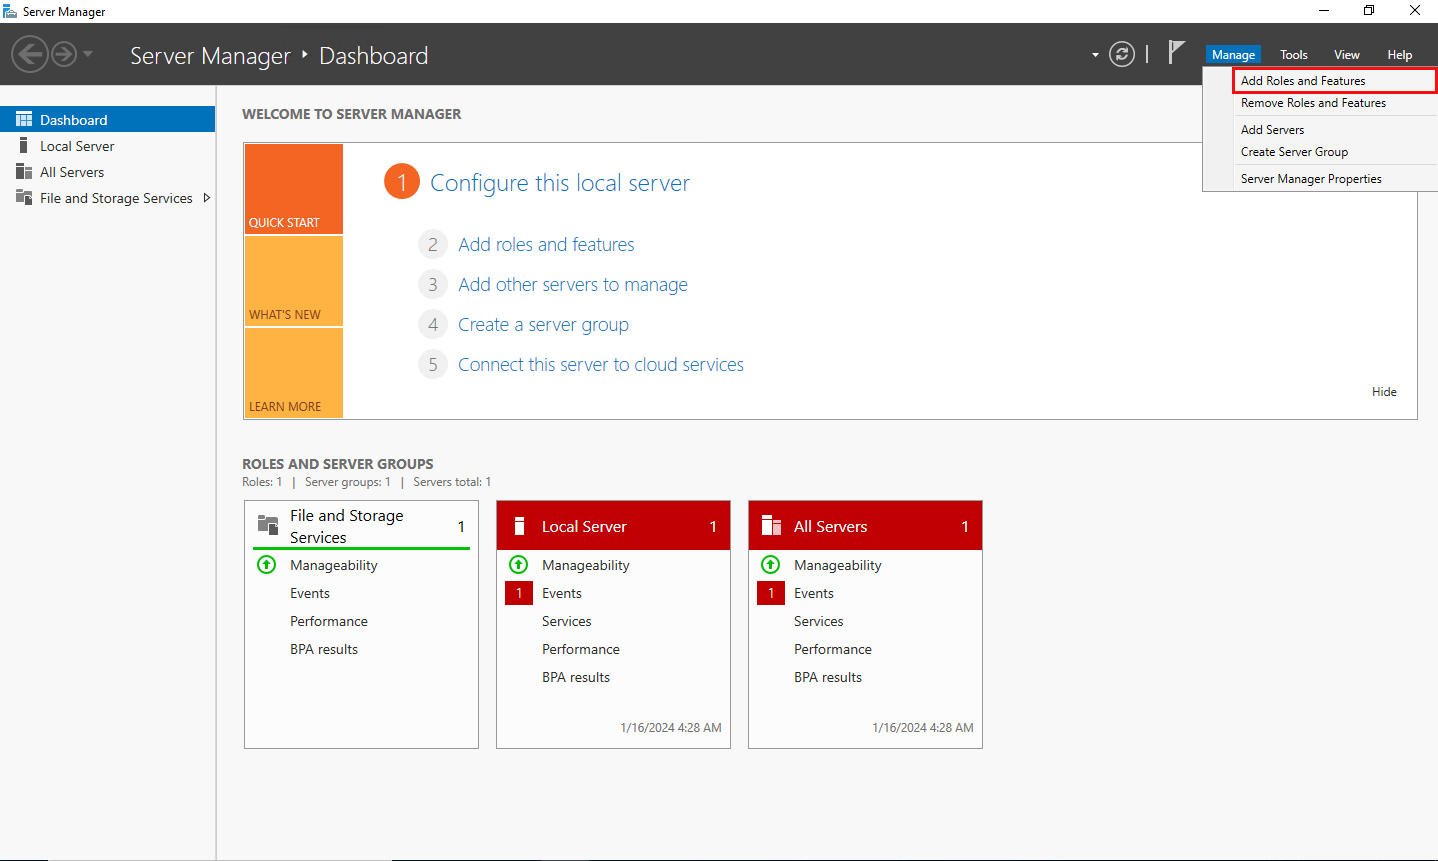
Step 2- In the top menu and in the manager section, select “Add Roles and Features“.
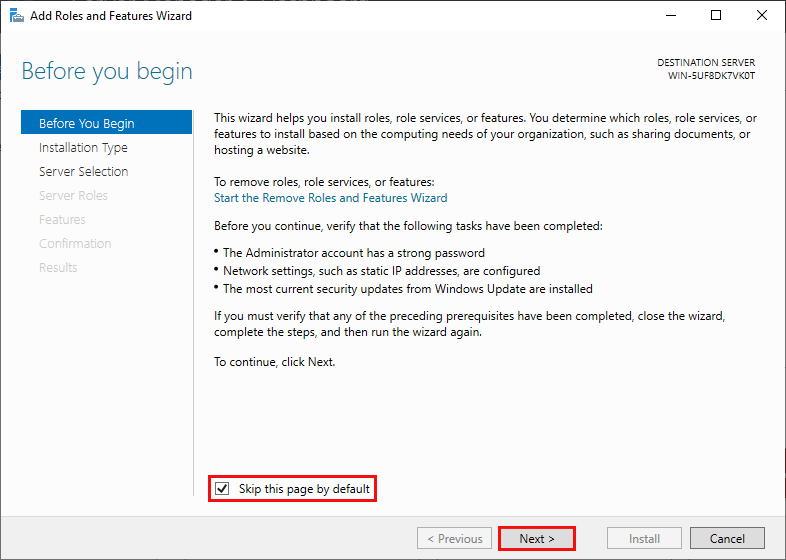
Step 3- In the opened window, there is a Before You Begin section that you can read, then check the “Skip this page by default” so that this section will no longer appear for you and click Next.
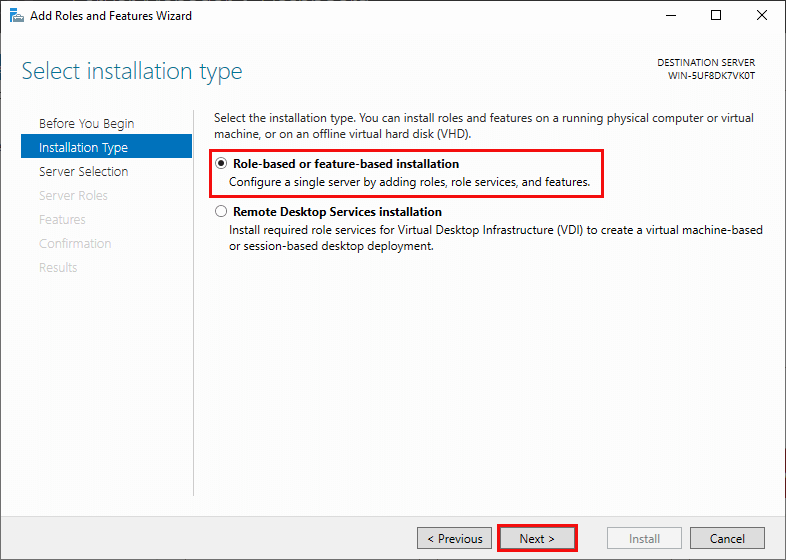
Step 4- To select the type of installation, select the “Role-based…” option and click on Next.
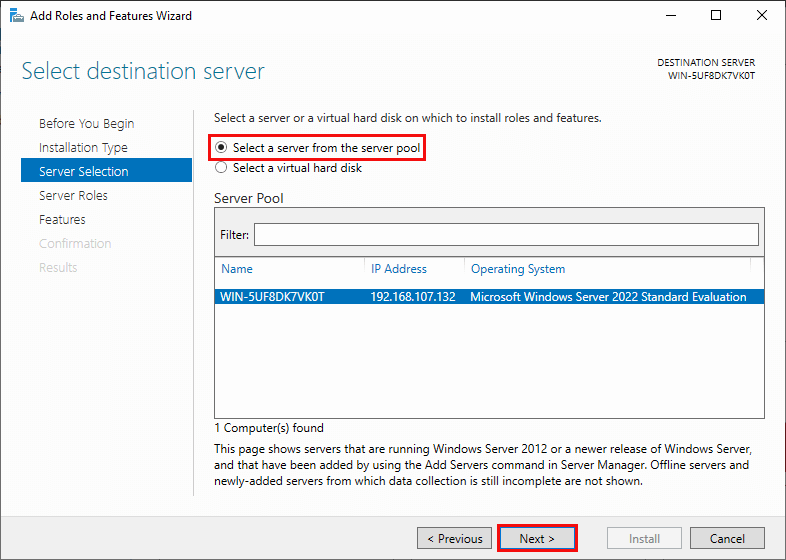
Step 5- Now we have to select the server name on which we want the rules to be applied, then we select the “Select a server from the server pool” option and click Next.
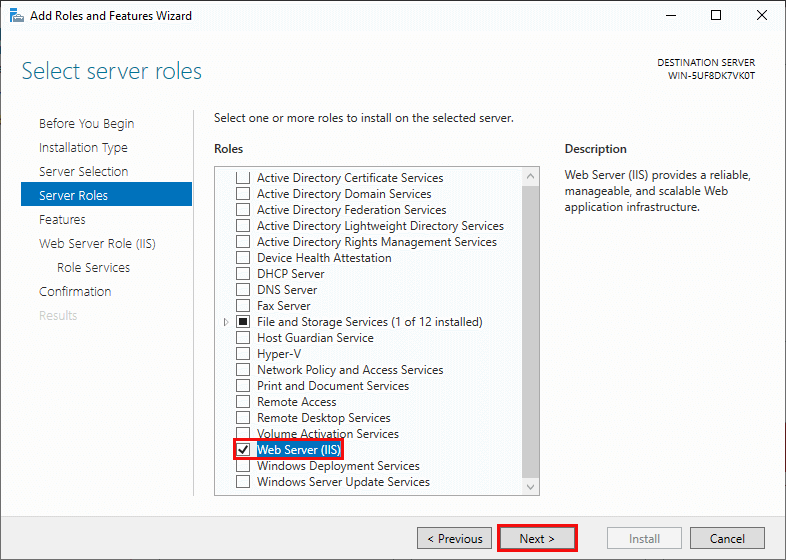
Step 6- In the server rules section, we must Enable the “web server (IIS)” option so that we can apply the settings we need.
Step 7- There is no setting in the Features section and you can click Next.
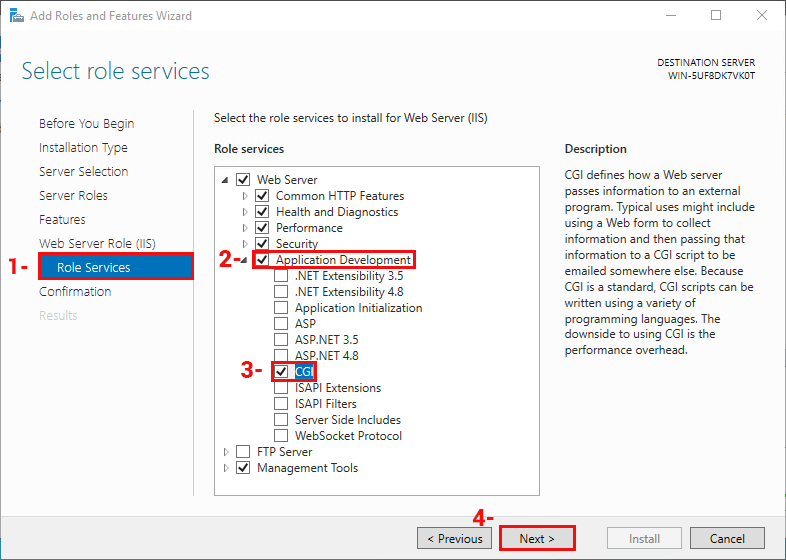
Step 8- Now you need to enable CGI (Common Gateway Interface) from Role services > Application > CGI and click Next.
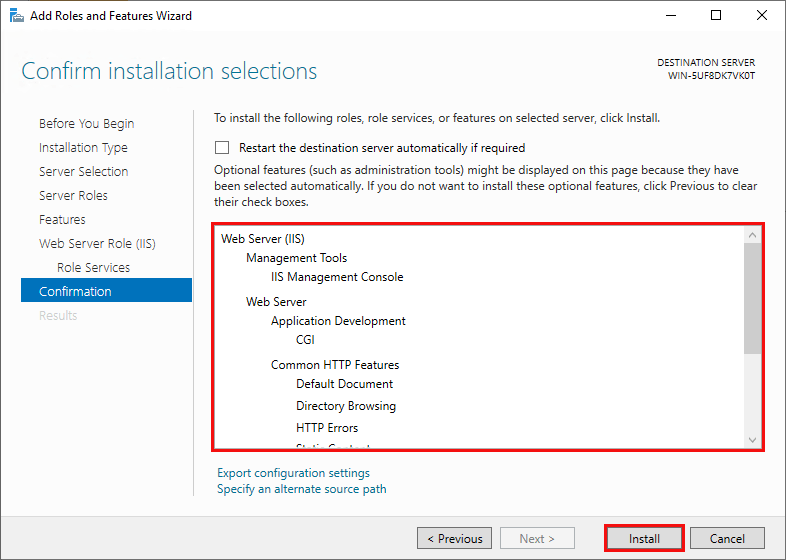
Step 9- In the confirmation section, you can check the settings made and then press the install button.
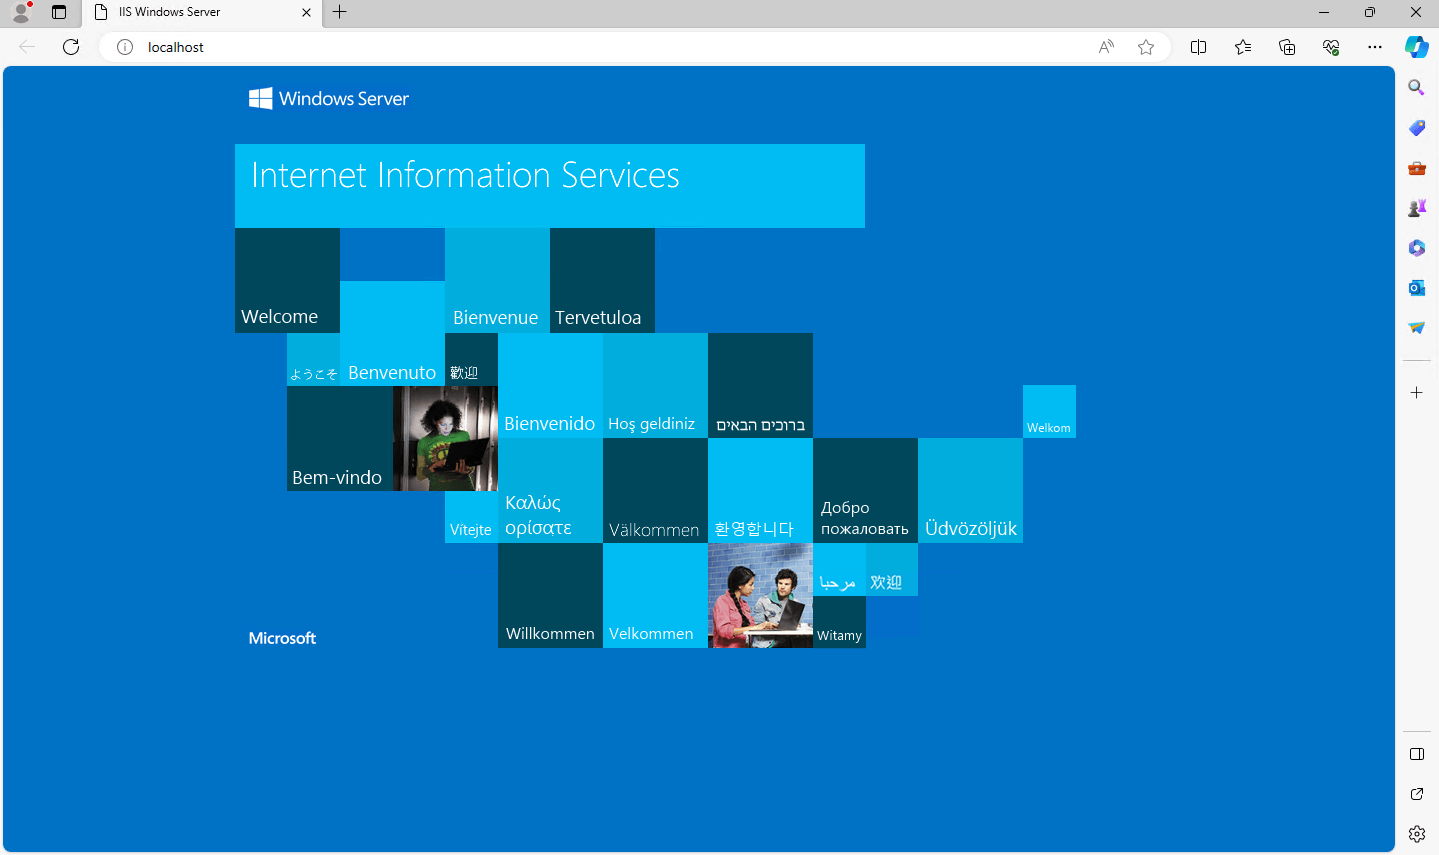
 Step 10- After the installation is complete, you can see the default page of the IIS server by entering “http://localhost” in the browser.
The setup of IIS on Windows Server is finished successfully and now we need to install PHP on the IIS web server.
How to Manually Install and Test PHP on IIS Without Web Platform Installer?
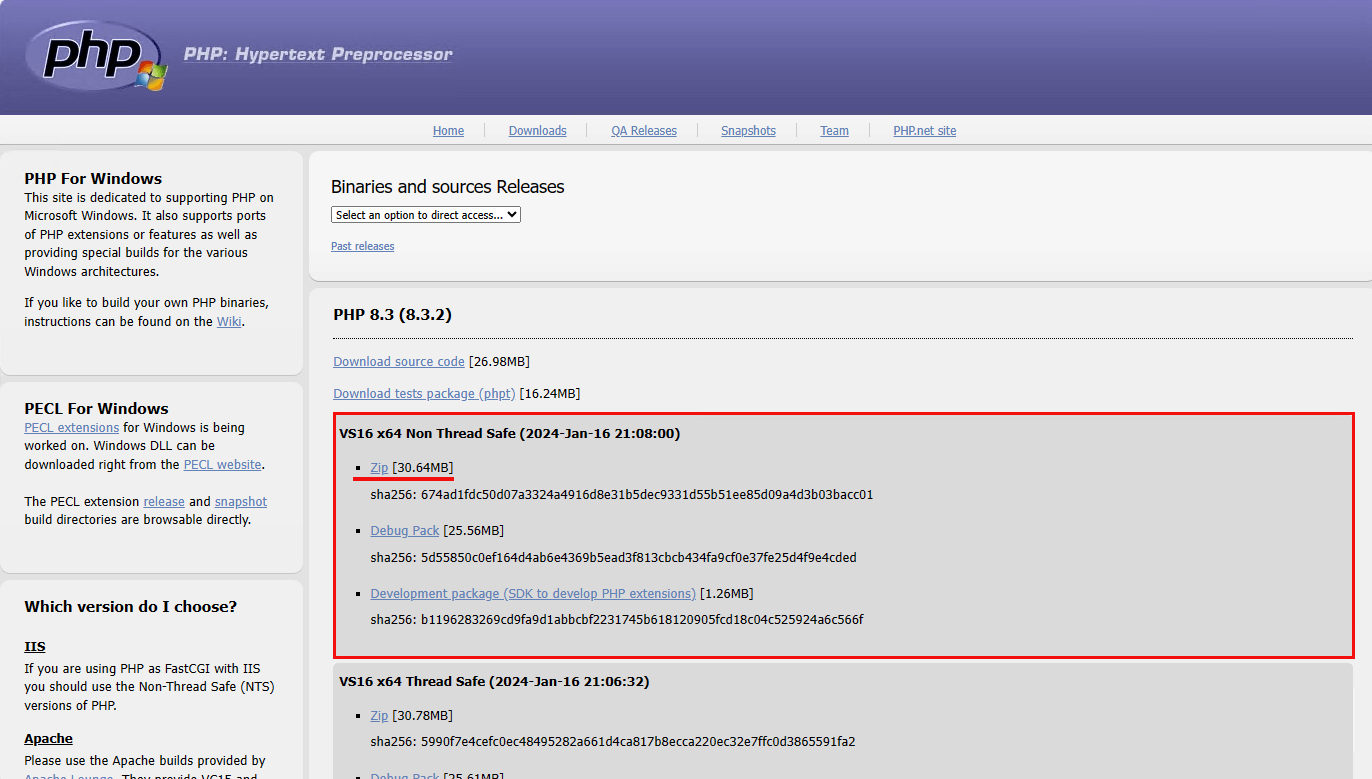
We download the version we need for Windows from the official PHP website.
Step 1- Because we need it for IIS, we chose the “thread-safe version“.
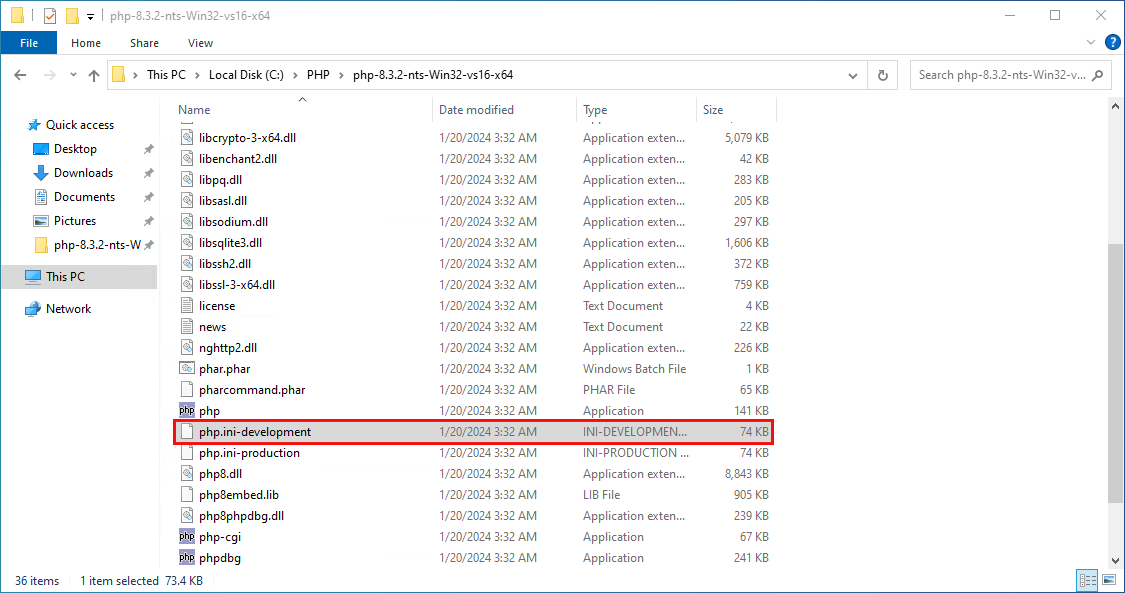
Step 2- Extract the downloaded ZIP file to a location on your Windows server, for example, C:\PHP.
Step 3- Inside the PHP folder, find the php.ini-production file and rename it to “php.ini“.
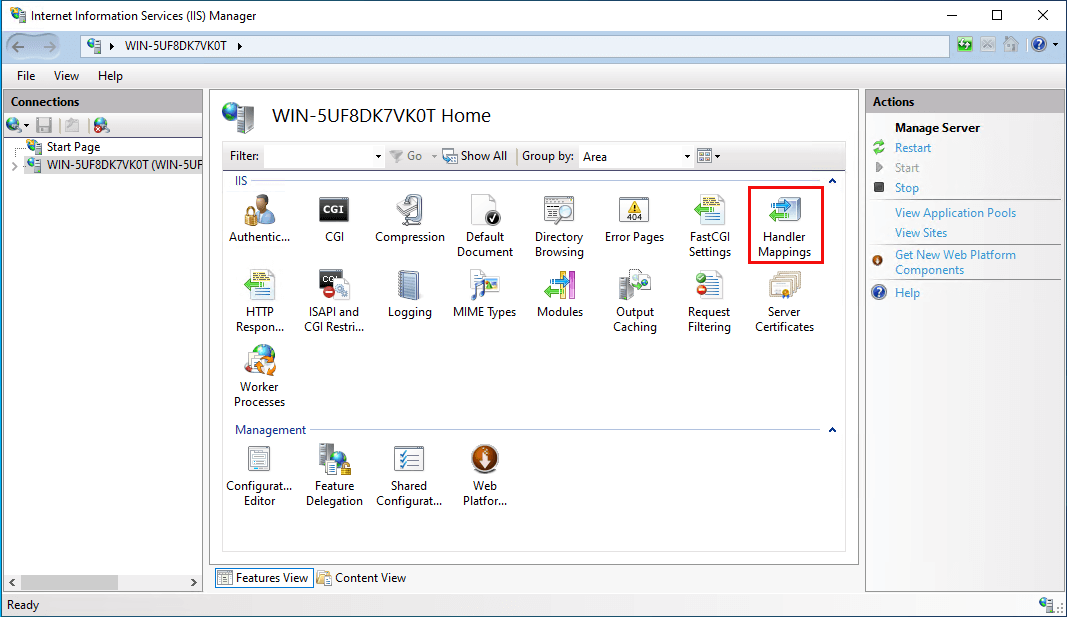
Step 4- To configure IIS, you need to open the IIS Manager on your server.
If you don’t know how to follow the steps Start > Control Panel > Administrative Tools > Internet Information Services (IIS) Manager.
Click on the server name in the Connections pane.

Step 5- Double-click on “Handler Mappings” in the middle IIS pane.
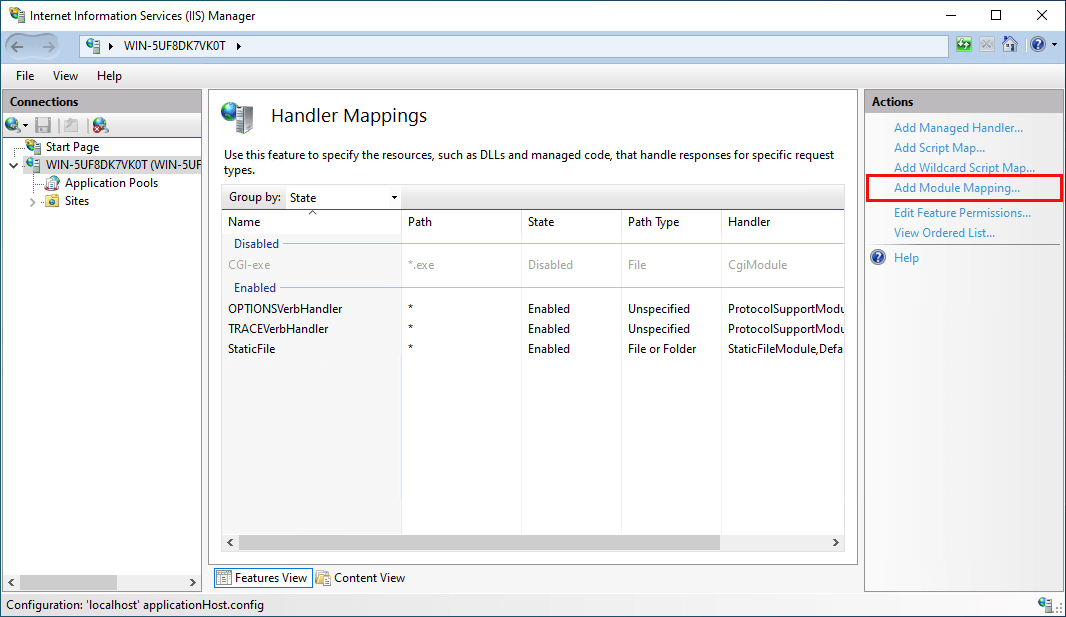
Step 6- In the Actions pane on the right, click on “Add Module Mapping…“.
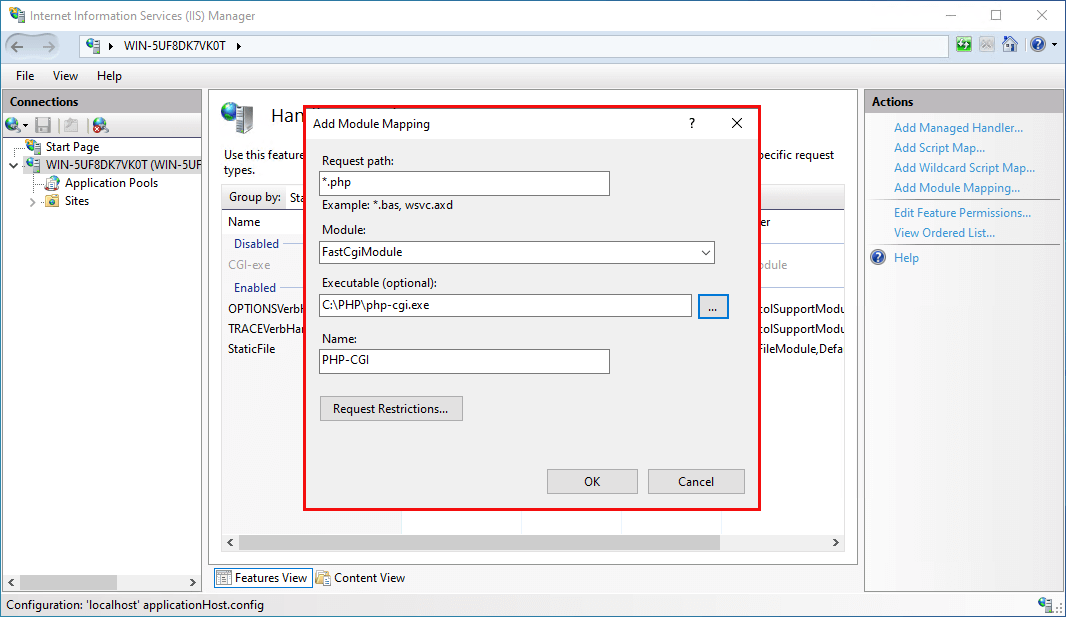
Step 7- In the window that opens, enter the values to tell IIS that PHP files should be executed by php-cgi.exe by FastCGI and select OK.
How to install and configure PHP Manager on IIS?
To manage PHP in IIS, we use the PHP Manager extension.
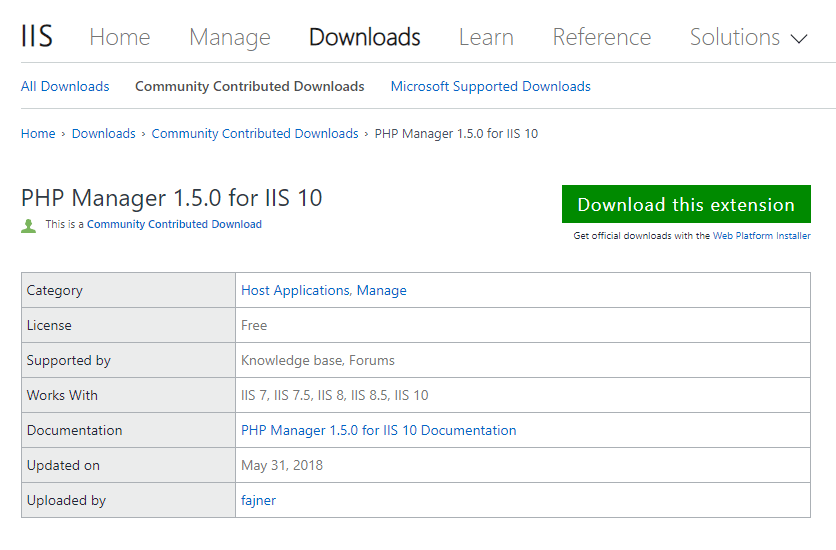
Step 1- First, we Download the PHP Manager extension from Microsoft’s website, which is for IIS.
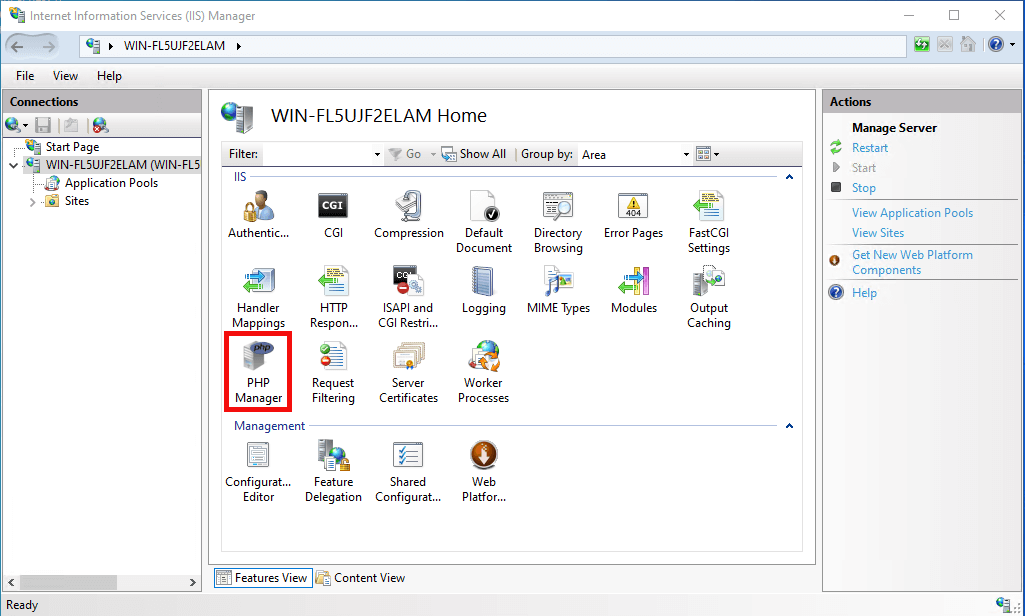
Step 2- We install the downloaded file with a few simple clicks and then exit the Internet Information Services (IIS) Manager and enter again to see the PHP Manager icon and double-click.
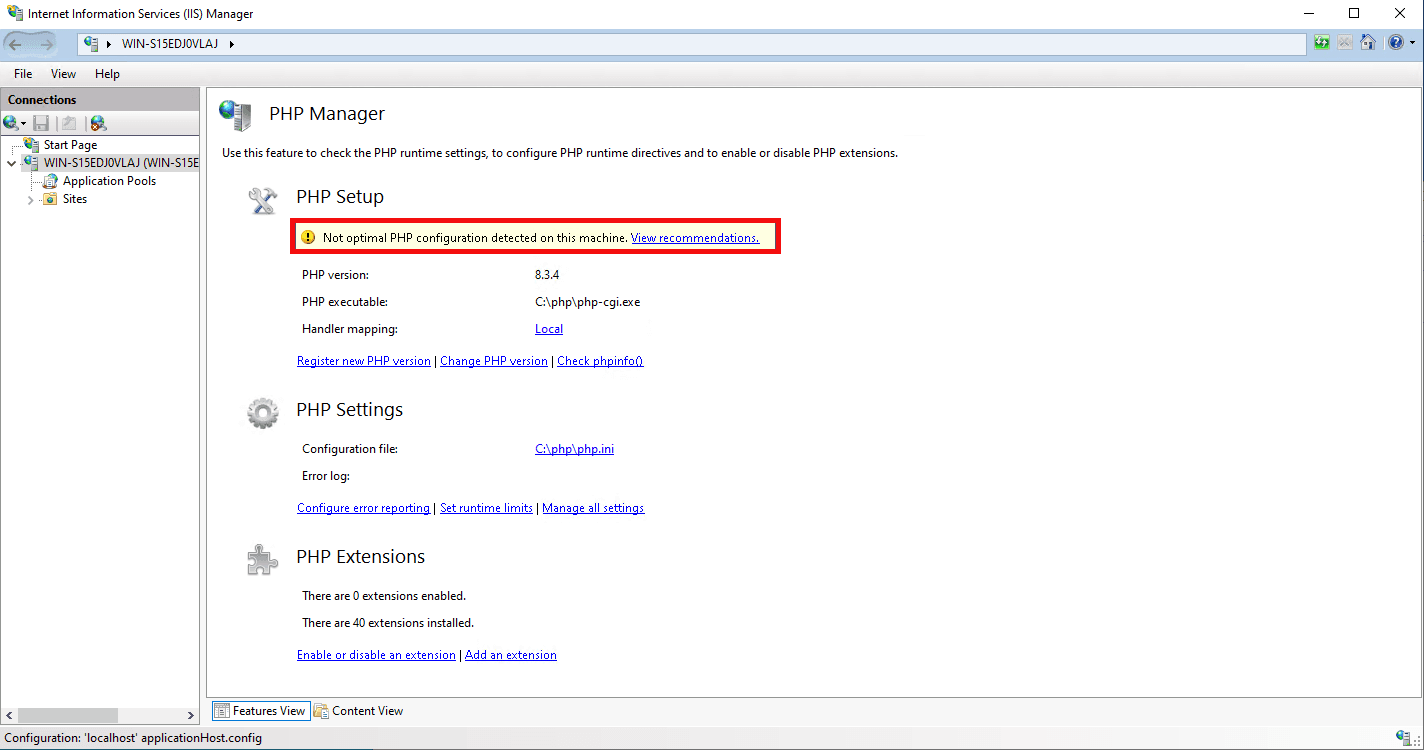
Step 3- After entering the PHP Manager, you will encounter a php.ini error. You can find suitable solutions to solve it by using the “View Recommendations” option.
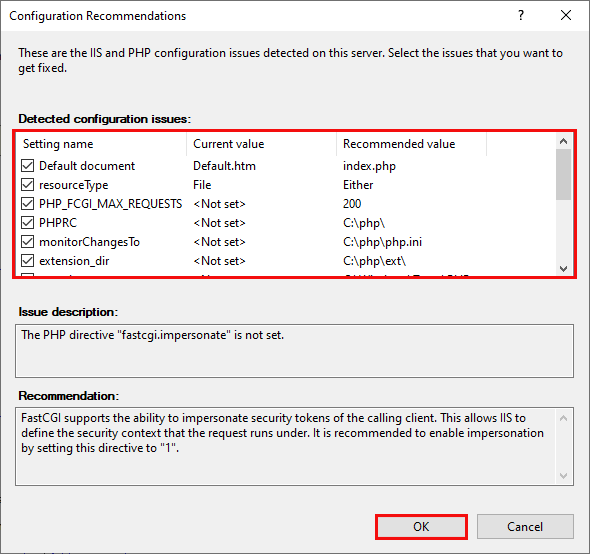
Step 4- It is recommended to tick all the “Detected Configuration issues” boxes and then click OK to install all the prerequisites for PHP settings automatically.
Congratulations, you have successfully installed your PHP.
Note: If you need other settings or want to change them in your PHP, you should do it from the php.ini file.
Testing PHP Installation
PHP successfully installed on IIS Now it’s time to test it with a few simple steps:
Step 1- You should create a new file name phpinfo.php in C:\inetpub\wwwroot path with any text editor you want and put the following command line in it and save it.
<?php

phpinfo();

?>
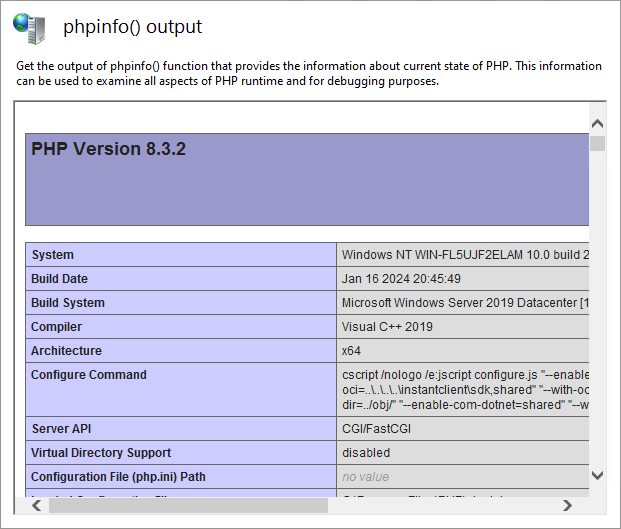
Step 2- Now you can test your program by entering the address http://localhost/phpinfo.php in the web browser or through the check phpinfo.php section in PHP Manager.
Step 3- There is another way to test PHP, you can enter the following command in your Windows server CMS.
php -v
Summary
In this article, we reviewed how to install and configure PHP in Windows Server 2022, 2019, and 2016. If you have any questions about this tutorial, you can share it with us.
You can also read the article “How to open port on Windows VPS” for more security to run PHP to create a new port to run PHP.
The Author Richard.M
Richard started out as a member of the support team and is now a full-stack web developer and support team lead at VPS Makers. He is passionate about providing people with top-notch technical solutions based on his 5 years of experience in web hosting, but as much as he enjoys coding and creating new works, he secretly dreams of becoming a sports star.
More from Richard.M