How to install XAMPP on Ubuntu Server?
You can install XAMPP web server software package on your local computer or Linux VPS server. It comes with Apache, MySQL/MariaDB, PHP, and Perl already pre-configured, so you can start building and testing websites without manual setup.
Installing XAMPP on Ubuntu Desktop and Server is a little bit different visually, but the core process is the same. You can follow this article to install XAMPP on your Ubuntu server or your Ubuntu desktop. And if you want a graphical interface on your Linux server, you can install a graphical interface on your Ubuntu server.
Install XAMPP on Ubuntu Server Using Terminal
To start the installation, you need to access your Ubuntu server via SSH using the PuTTY application, then follow the steps below.
Download XAMPP on Ubuntu server using terminal
To download XAMPP, you can use wget to download it directly from the Apache Friends website. Alternatively, you can download it manually from the official website using a Windows computer and transfer it to your Linux server using FileZilla, or if your Linux server has a graphical interface, you can download it directly there as well.
Download using wget command:
wget "https://sourceforge.net/projects/xampp/files/XAMPP%20Linux/8.0.30/xampp-linux-x64-8.0.30-0-installer.run"
Now, after running this command, the file will be downloaded and stored with the name shown on the screen for you:

Grant execute permission to the file
To continue the installation process, you need to grant execute permission on this file to users. If you don’t know how to set permissions for users in Linux, you can learn it from the following article: How to set user permissions in Linux
sudo chmod +x xampp-linux-x64-8.0.30-0-installer.run
Now you need to start the installation.
Install XAMPP on Ubuntu Server 24.04 using terminal
In this step, you need to run the installer file with sudo access with the following command:
sudo ./xampp-linux-x64-8.0.30-0-installer.run
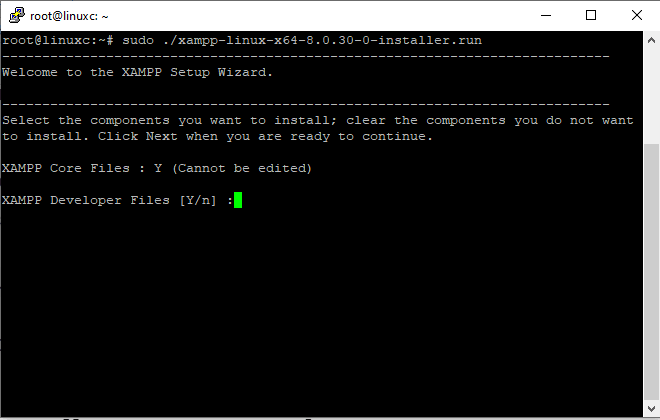
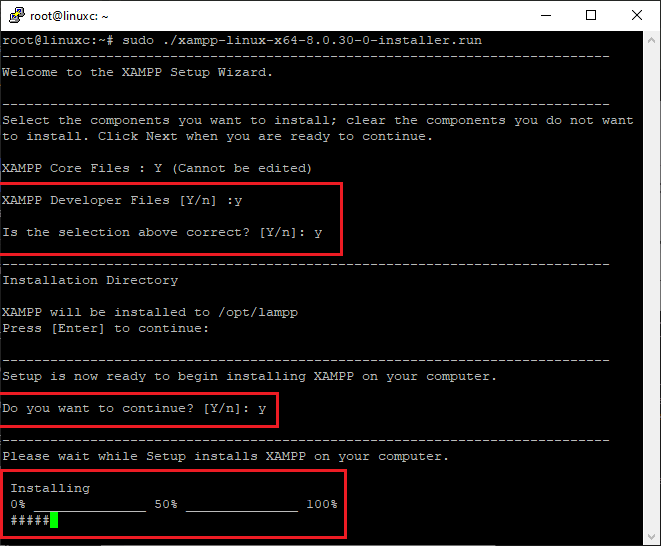
Now you will be asked to install XAMPP developer files. Type “Y” and press Enter to continue.
It will show the destination folder where it will be installed, “/otp/lampp”. Press Enter to continue.
The installation will start now. Wait until it ends.
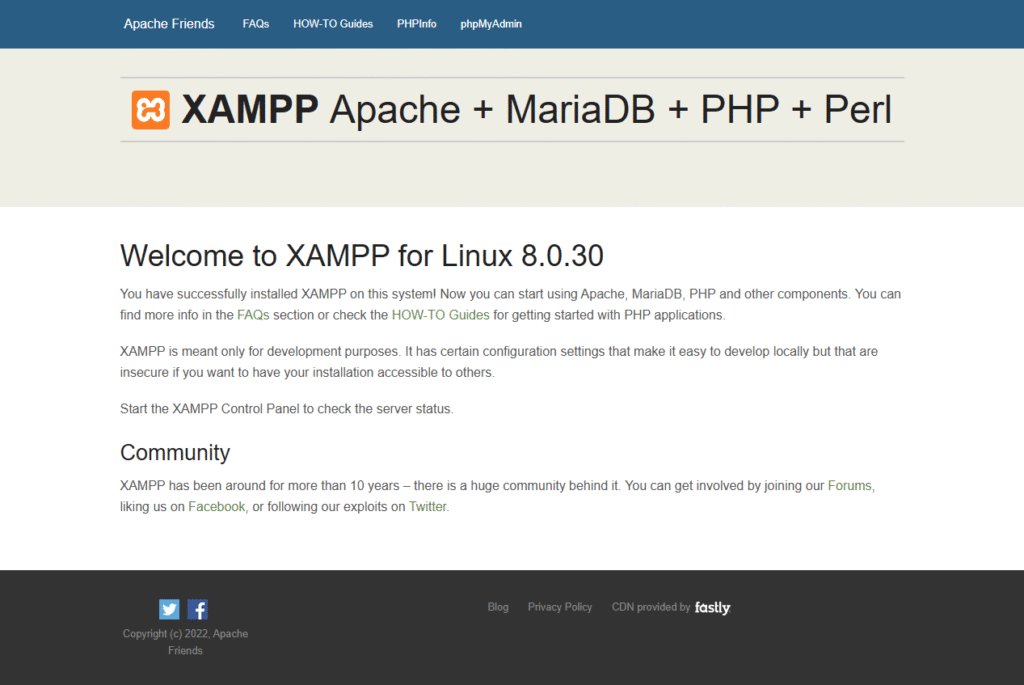
Access the XAMPP Control Panel from a browser
After installation ends, you can access your XAMPP control panel via a browser like Chrome or Firefox by entering your server IP
http://Server-IP
What is XAMPP?
XAMPP is a free and open-source web server available on Windows, Linux, and macOS that provides a complete local web server environment for developers. It allows you to run and test web applications on your own computer or VPS server.
XAMPP is commonly used for PHP development and makes it easy to run PHP applications. If you are using Windows Server too, you can install PHP on IIS too, which provides the same development environment in Windows.
Components included in XAMPP
XAMPP stands for X (cross-platform), A (Apache), M (MariaDB/MySQL), P (PHP), and P(Perl). which includes these important tools:
Apache: The web server that handles HTTP requests and serves the websites.
MariaDB(MySQL): A database system that is used to store and manage data for web applications, which is accessible with the phpMyAdmin panel.
PHP: Server-side scripting language used to develop web applications.
Perl: Another programming language included for additional scripts.
phpMyAdmin: A web-based tool for managing MariaDB and MySQL databases.
While installing XAMPP, all components are included automatically, and you don’t have the option to choose which ones to install. Instead, you can install a LAMP stack on your Ubuntu server, which is suitable for production environments and lets you choose which services to install.
Why is using XAMPP on Ubuntu better?
XAMPP is especially useful on Ubuntu because it makes setting up a web server simpler by installing needed packages automatically.
But you can download and install XAMPP on other operating systems like Windows, where, if you are using Windows, you can learn how to install XAMPP on Windows.
XAMPP in production environment
Using the XAMPP server in production environment is nor correct approach if you want a highly secure and flexible web server. It is designed for testing and developing web applications, not running them on the internet.
Its security is very low profile by default and easily accessible. This is very helpful for development, but very risky for production.
Alternatives for XAMPP on Linux Servers
For a production environment, it’s recommended to use a properly configured LAMP (Linux, Apache, MariaDB, MySQL, PHP) or LEMP with security handling, configuring your firewall on Linux, etc. This ensures that your server and applications are secure, scalable, and ready for safe use.
Conclusion
XAMPP is a powerful application for testing and developing applications on Linux servers or any other operating system. But it’s not designed for a production environment; you can instead install LAMP by installing each component separately on your Ubuntu server, which is safer.
The Author Richard.M
Richard started out as a member of the support team and is now a full-stack web developer and support team lead at VPS Makers. He is passionate about providing people with top-notch technical solutions based on his 5 years of experience in web hosting, but as much as he enjoys coding and creating new works, he secretly dreams of becoming a sports star.
More from Richard.M