How to Setup OpenVPN on MikroTik CLI?
To set up OpenVPN as a strong tunneling protocol in MikroTik, you have many options. In this article, you will learn how you can set up and use OpenVPN on your MikroTik Router.
If you want to use OpenVPN as a VPN service, it’s better to use a MikroTik VPS, which is much more secure than using a local router, and it provides a different public IP over the internet, which keeps you anonymous.
Setup OpenVPN Server On MikroTik With Command Line
You can Setup OpenVPN in MikroTik With Winbox application too, which provides a graphical interface and is better for beginners. Using CLI is a more advanced method.
To start OpenVPN configurations, you can connect to your MikroTik using SSH, or if you are using Winbox, you can open a new terminal in your Winbox.
Step 1 – Create OpenVPN Certificates in MikroTik
OpenVPN works with certificates, so you need to create 3 certificates in your MikroTik (CA, Server, Client). Use the commands below to create each certificate.
Create OpenVPN CA Certificate
Add a new certificate named CA:
/certificate add name=CA common-name=CA
Sign the CA certificate:
/certificate sign CA name=ca-cert
Create OpenVPN Server Certificate
Add a new server certificate named server-certificate:
/certificate add name=server-certificate common-name=server-certificate
Sign the server certificate:
/certificate sign server-certificate ca=ca-cert name=server-cert
Create OpenVPN Client Certificate
Add a new Client certificate named client-certificate
/certificate add name=client-certificate common-name=client-certificate
Sign the client certificate:
/certificate sign client-certificate ca=ca-cert name=client-cert
Trust OpenVPN Certificates in MikroTik
You need to enable the “trusted” option to mark these certificates as trusted.
/certificate set ca-cert trusted=yes
/certificate set server-cert trusted=yes
Step 2 – Create IP Pool in Mikrotik CLI
Create an IP pool for OpenVPN users to obtain a local IP address when connecting to the router. which is like setting up DHCP server in Mikrotik.
/ip pool add name=ovpn-pool range=192.168.100.10-192.168.100.40
You can replace the range with any range you want. Make sure you didn’t use these IPs in other services or configurations to interfere with them.
Step 3 – Create PPP Profile in MikroTik For OpenVPN
The PPP profile is the main template for your OpenVPN service.
Use the command below to create a PPP profile:
/ppp profile add name=ovpn-profile local-address=192.168.10.1 remote-address=ovpn-pool dns-server=8.8.8.8
Replace the local address with the address you want to use locally for your OpenVPN profile, but it should be outside your pool IP range. And in remote-address, enter the IP pool name you’ve created for OpenVPN.
Step 4 – Create User for OpenVPN in MikroTik
A PPP secret acts as a user for each client that is going to use the OpenVPN service or any other services. If you want to run a VPN service in large scale for user management, you can install MikroTik user-manager package on MikroTik.
/ppp secret add name=username password=password profile=ovpn-profile service=ovpn
name = specify a username for your user
Password: Set a password for your user
profile = write the name of the OpenVPN profile you’ve created (ovpn-profile)
service= For service, write “ovpn” to specify this user just for the OpenVPN service
Step 5 – Create OpenVPN Server MikroTik
This is the main server that will respond to all incoming connection requests.
/interface ovpn-server server add name=ovpn-server disabled=no port=1194 mode=ip netmask=24 certificate=server-cert auth=sha1 cipher=aes128-cbc require-client-certificate=yes default-profile=ovpn-profile
name: choose a name for your server
certificate: write the name of the server certificate you’ve created (server-cert)
default-profile: Enter the ovpn-profile name you have created.
Step 6 – Create NAT Rule in MikroTik for OpenVPN
To route the incoming connections for your VPN to the internet, you need to create a NAT rule. In src-address, enter your network subnet.
/ip firewall nat add chain=srcnat src-address=192.168.100.0/24 action=masquerade
Step 7 – Export OpenVPN Certificate MikroTik CLI
You need to export the CA and client certificates to generate the user config with them.
Export CA certificate:
/certificates export-certificate CA file-name=ca-certificate
Export client certificate:
/certificate export-certificate "client-certificate" file-name=client-certificate export-passphrase=StrongPassword
Replace StrongPassword with a password (at least 8 characters).
Step 8 – Export ovpn File MikroTik
You need to export your config to use it on the user side to connect to your VPN.
/interface ovpn-server server export-client-configuration ca-certificate=ca-certificate.crt client-certificate=client-certificate.crt client-cert-key=client-certificate.key server=ovpn-server server-address=YourServerPublicIP
The green parts in the command above should be replaced with your information. Enter your certificate file’s address and your server’s public IP in the server-address part.
Note: Make sure you enter the certificate names correctly, or you can use the TAB key on your keyboard while writing the command, which will help you and show the certificate list you have.
Step 9 – Download OpenVPN config file from MikroTik
Now you can download your file from your MikroTik server. You can use FTP or SFTP to transfer files from the command line, but for this you need to learn how to transfer files with the CLI.
FTP:
ftp yourServerIP
SFTP:
sftp admin@YourseverIP
An easier method is to use a graphical tool like FileZilla, which allows you to download files quickly and manage connections more easily. You can then use these files to connect to your VPN. Which here, we will use FileZilla.
Download and install the FileZilla application first, then follow the steps below:
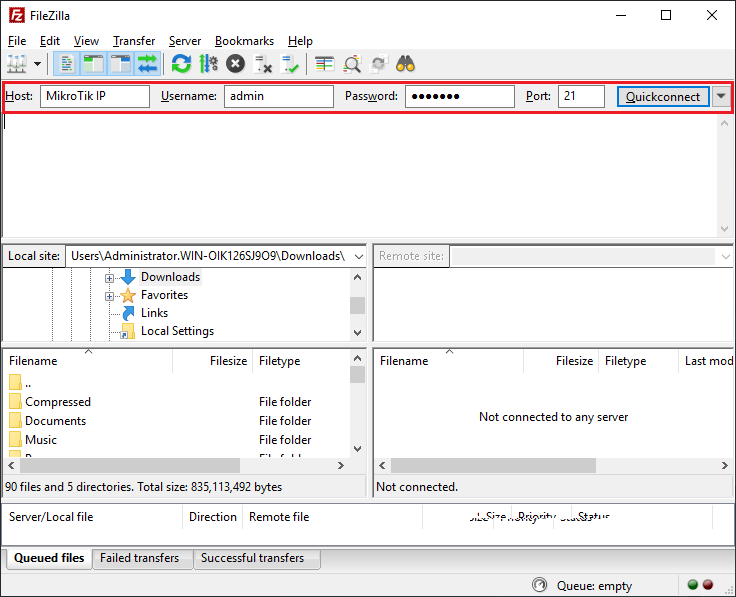
1- Connect to your MikroTIk using FileZilla
Enter your MikroTik VPS IP, enter admin as username, enter your password, and for port, enter 21, which is the default ftp port.
2- Download OpenVPN Config File
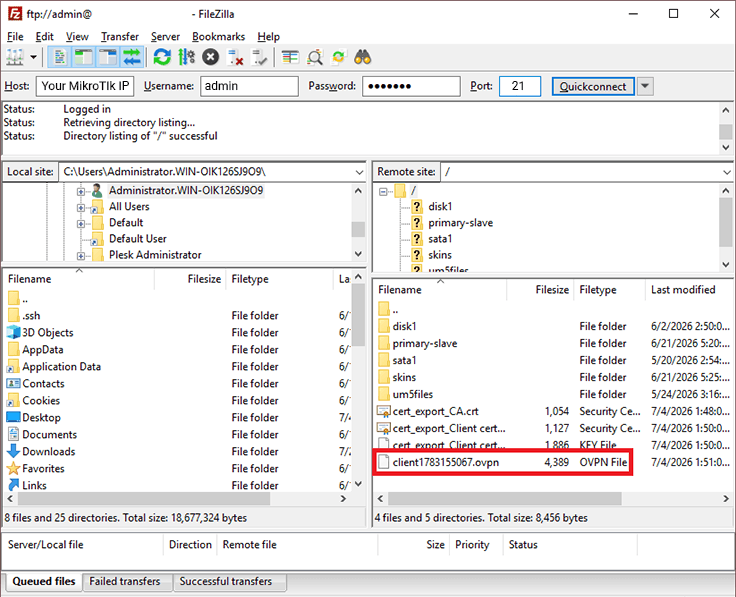
On the right side, you will find your MikroTik files. Locate the file ending with .ovpn and right-click on it, and click on download, or you can drag and drop the file in any location you want on the left side.
Connect OpenVPN In Windows
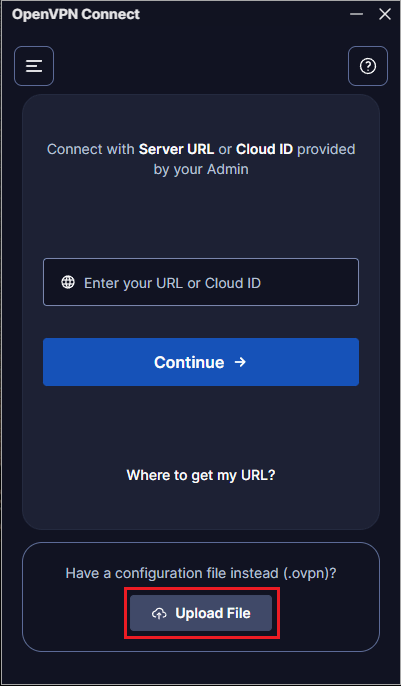
First, download OpenVPN from the OpenVPN official website. And import the downloaded ovpn file following steps below:
Upload the downloaded file by clicking on Upload File.
Enter Credentials to import your file. username (secret), password (password), and passphrase you’ve entered while exporting the client certificate.
Note: If you face connection problems in this step, review your certificates and make sure they are correct, export the config file again, and use the new one.
If you have done all the steps, you will now be connected to your VPN successfully.
Summery
To setup OpenVPN Server in a MikroTik router, first you need to create three certificates. These certificates act like an authentication system on both the client and server sides.
Next, you need to configure a PPP profile, create a PPP secret (user), and enable OpenVPN Server. After completing these steps, you are done with the main configuration steps.
You only need to setup NAT rule in the MikroTik firewall to route incoming connections to the internet. Once you’ve created a NAT rule, you can download and use your OpenVPN config file (.ovpn).
If you have any problems or questions, we will be happy to help you! You can contact us in the comments section.

The Author Jacob R
i am Jacob a developer and cybersecurity enthusiast with strong skills in web development and a passion for building practical digital solutions,Working on web development for 4 years. Hope my guides be helpful
More from Jacob R