How to Port Forward in Windows Server 2019?
Port forwarding in Windows server is like redirecting network traffic from one port to another. It’s a smart move for Windows users to securely connect to different services and programs using specific ports.
For port forwarding in Windows Server 2019, you’ve got a few ways, such as using the Command Line and Firewall with Advanced Security console. Remember, for effective port forwarding, the targeted port on the server must be open. So, as a first step, check out the list of open ports in Windows using the Firewall. For full guidance on how to do port forwarding in Windows Server 2019, stay on track!
How to Port Forward in Windows Firewall?
To set up port forwarding on Windows Server 2019 using the firewall, you need to configure the Firewall rules through the Advanced Security console. Generally, firewalls allow you to create new inbound rules for port forwarding to redirect incoming traffic to specific ports. This is super important for letting other users access server-hosted services or applications. So, after you log into your Windows VPS Server machine, find Windows Firewall with Advanced Security in the start menu and then follow these steps:
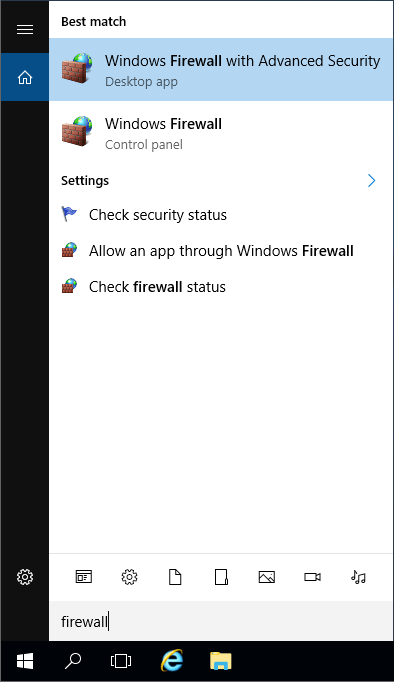
Step 1: Open Windows Firewall with Advanced Security
Simply search for firewall in the Start menu and start it up.
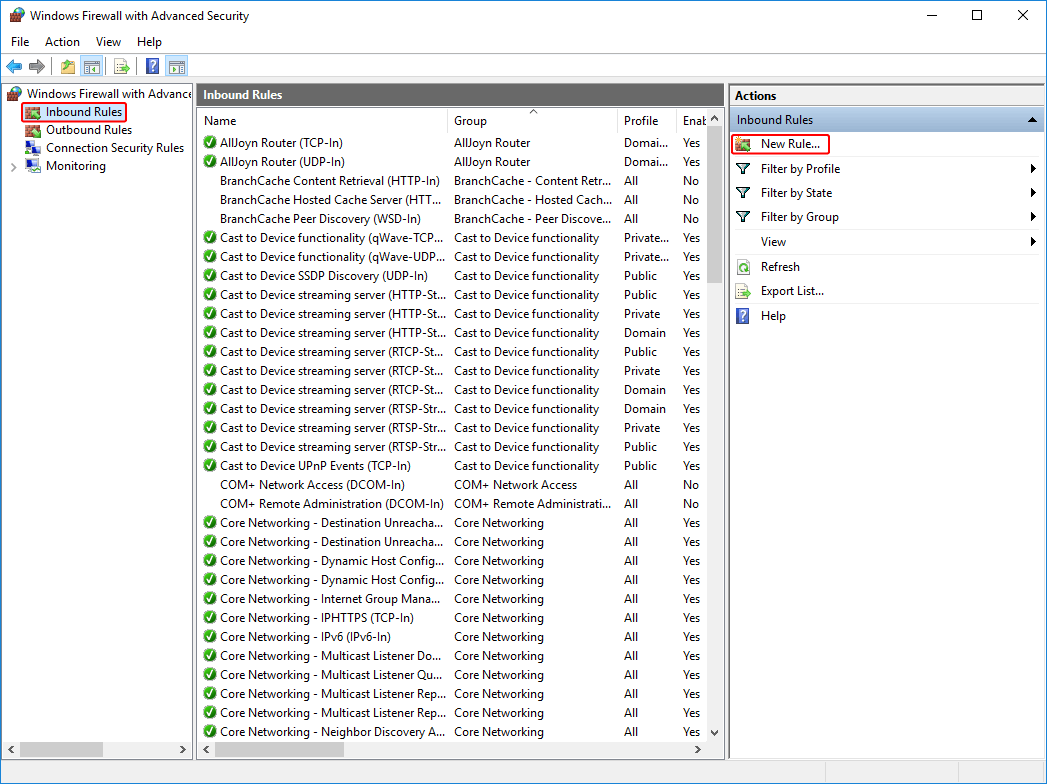
Step 2: Create an Inbound Rule
Start off by clicking “Inbound rules” on the left, then head over to the right side of the screen and hit “New Rule” to make one.
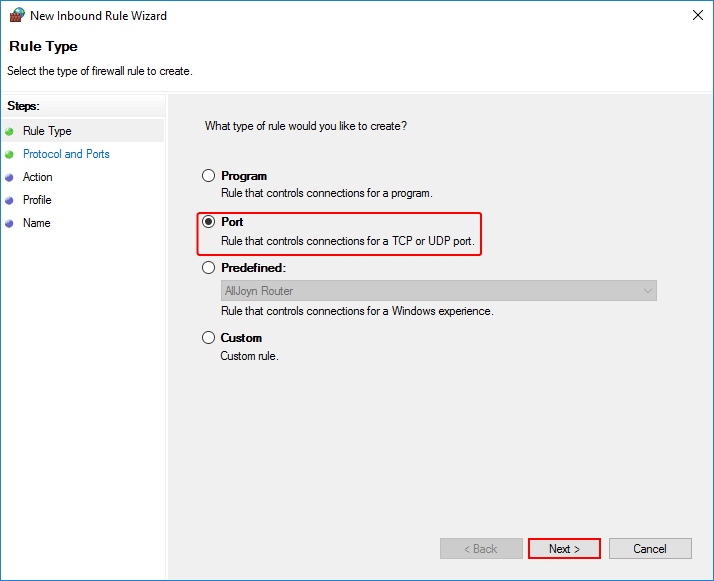
Step 3: Choose the Rule Type
On the Rule Type window, select the “Port“ option and click “Next“.
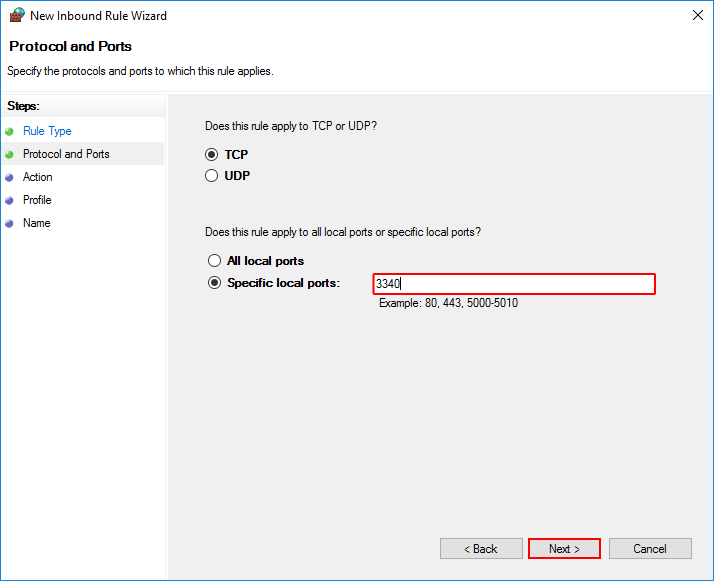
Step 4: Specify the Protocol & Port Number
Specify the traffic type (TCP, UDP, or both) for the port you want to forward. Then drop the port number in the specified local port field and hit Next when you’re done. And don’t forget to use commas when you’re listing multiple ports, or if you’re entering a range, just do it like X-Y. For example, we’re going with port 3340.
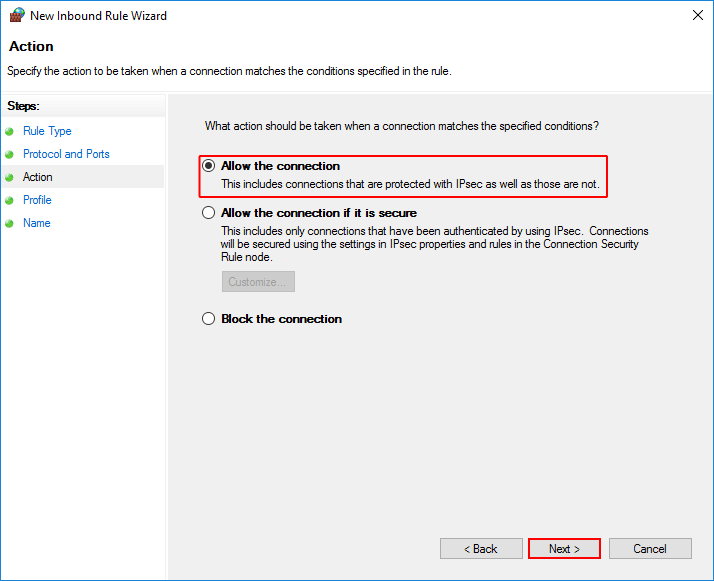
Step 5: Select the Action
Pick “Allow the connection” and proceed by clicking “Next“.
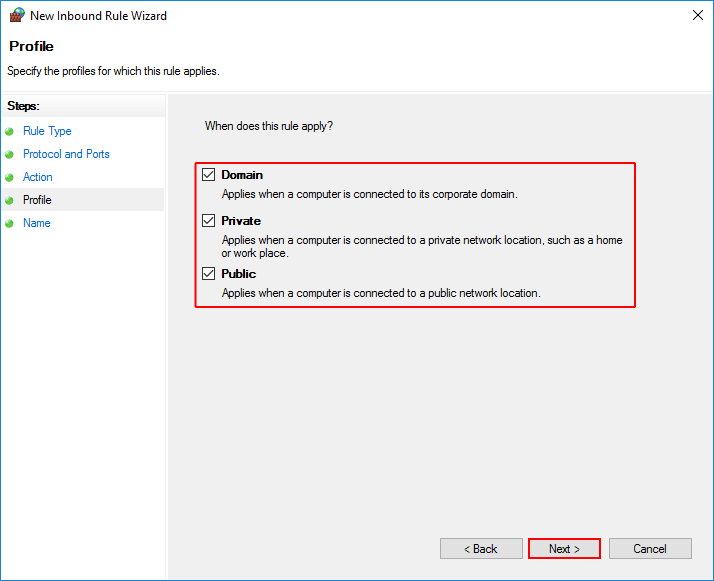
Step 6: Configure the Profile Setting
Decide when the rule applies (Domain, Private, Public), or leave it as default and tap “Next” to move on.
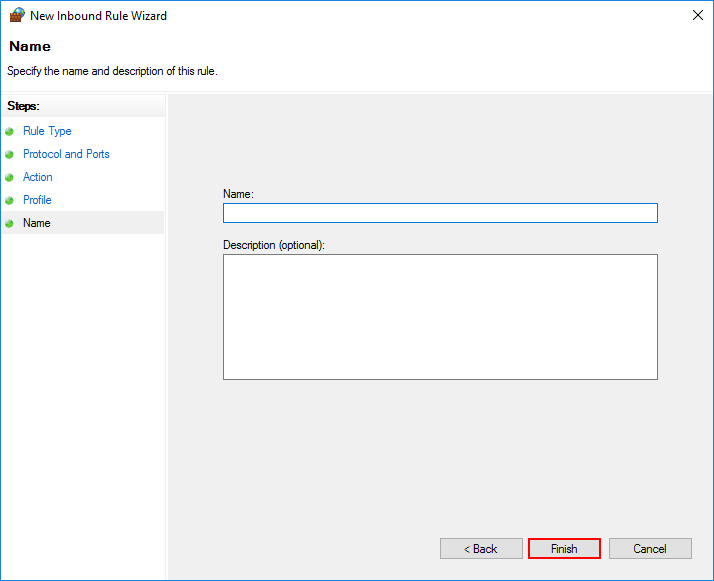
Step 7: Provide a Name and Description
Add a name and description for the rule to help you identify it later. Click “Finish” to create the rule and get it over with.
Now, the new rule is up and running in the Windows Firewall, making sure that any incoming connections on the chosen port get forwarded just the way you wanted.
Port Forwarding in Windows Server 2019 Using Command Line
The command line interface will provide administrators with a straightforward method to set up port forwarding rules in Windows without relying on graphical user interfaces, making it ideal for remote server administration scenarios.
You can start the port forwarding process directly from the command line using the “netsh” command. Here’s how to get it done:
Step 1: Open a Command Prompt as an Administrator
Type cmd in the search field of the Start menu and press Enter.
Step 2: Check Port Availability
Ensure that the local port you plan to use is not already being used by another service or process. Use the following command to do so and replace the port number with the actual one.
netstat -an | find "portnumber"
PowerShell is another option you can try to check if that port is open and get more details for the next move, like the remote and source address. Just enter the following in PowerShell
Test-NetConnection -Port "portnumber"
Step 3: Get the Port Forwarding Rule Running
To reroute traffic from one port, like 3340 TCP port, to another local port, like the default RDP port 3389, just run the command:
netsh interface portproxy add v4tov4 listenport=3340 listenaddress="sourceaddress" connectport=3389 connectaddress=remoteaddress
Note: Replace “listenaddress” with the actual IP address of your server or source address and put the remote IP address in where it says “connectaddress.”
Step 4: Confirming Port Forwarding
To double-check if the rule has been added successfully, use this command:
netsh interface portproxy show all
That’s it! Your port forwarding is all set up!
Conclusion
To sum up, port forwarding lets you direct incoming and outgoing traffic between remote servers and your local network, so you can easily send data through a specific port. This article has covered two effective methods for port forwarding in Windows Server 2019. Administrators can optimize network communication using firewall settings and the netsh port proxy command. Remember that port forwarding can impact security, so configure it carefully based on your specific requirements.
To enhance your networking capabilities further, consider investing in a Virtual Private Server (VPS) solution. By including a VPS into your setup, you can expand your control over port forwarding and optimize the flow of data between remote servers and your local network. So why wait? Buy VPS today!
The Author Sally.M
Hey, I'm Sally, and I'm here to break down the world of virtual servers and web hosting in a way that's super easy to understand. Whether you're a tech guru or just starting out, I've got you covered.
More from Sally.M