How to enable audio on Windows Server 2019?
If your Voice over Internet Protocol (VoIP) application is failing to detect your microphone input or audio output while using Remote Desktop Protocol (RDP), fret not!in this article we learn How to enable audio on Windows Server 2019? We shall delve into the intricacies of RDP client settings to address this issue and optimize your communication experience. Follow the steps below to unlock the full potential of your audio peripherals during remote sessions.
Step By Step How do I enable audio on Windows Server 2019?
This method fixes the most common cause of Windows Server 2019 microphone not working issues over Remote Desktop the RDP client isn’t configured to share your local audio devices with the remote session.
Before you begin
Before following either method, make sure of the following:
- You are logged in with an administrator account on the Windows Server 2019 machine.
- You are connecting via Remote Desktop Connection (RDP) from a Windows client — audio redirection is not supported on all RDP clients.
- Your local machine’s microphone and speakers are working correctly before the remote session.
Note: This guide applies to Windows Server 2019. The same steps also work on Windows Server 2016 and Windows Server 2022, with minor visual differences in Server Manager.
Step 1: Open advanced RDP settings
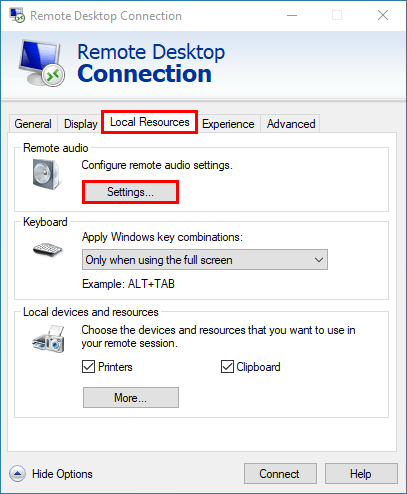
Open the Remote Desktop Connection app on your local computer. Before connecting, click “Show Options” at the bottom of the window to expand the full settings panel.

Step 2: Navigate to remote audio settings
Go to the “Local Resources” tab. Under the “Remote audio” section, click the “Settings…” button to open the remote desktop audio settings.
Step 3: Enable playback and recording
In the audio settings window, set “Remote audio playback” to “Play on this computer.” Then, under “Remote audio recording,” select “Record from this computer.” This tells RDP to forward your local microphone as a remote audio device to the server session. Click OK to save.
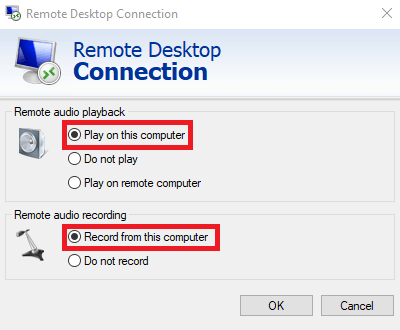
After applying these settings, reconnect to your server and check your VoIP or voice recorder / Windows Sound Recorder app. The microphone and speakers should now appear as available input/output devices.
Step 4: Add Remote Desktop Services roles (if still not working)
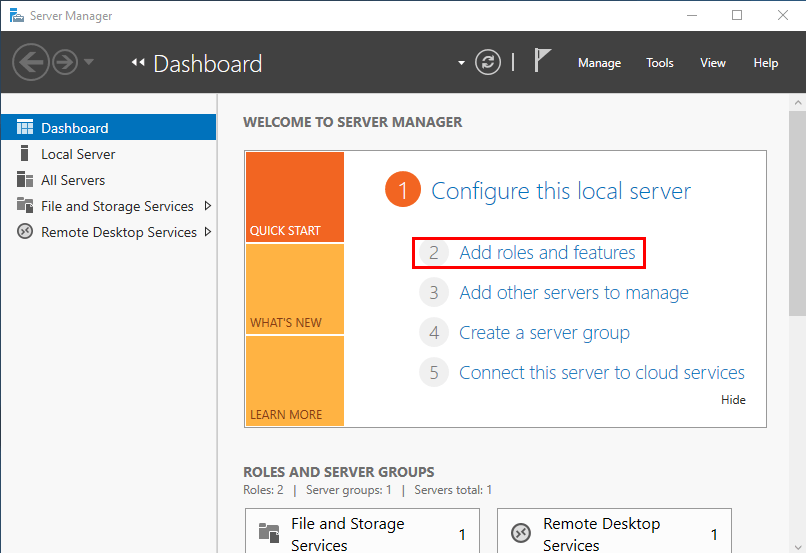
If the remote audio device still doesn’t appear, the required server roles may not be installed. Open Server Manager and click “Add roles and features.”
Step 5: Choose installation type
The Add Roles and Features wizard will open. Click “Next” on the “Before you begin” screen. On the “Installation Type” screen, select “Role-based or feature-based installation” and click Next.

Step 6: Select Remote Desktop Services
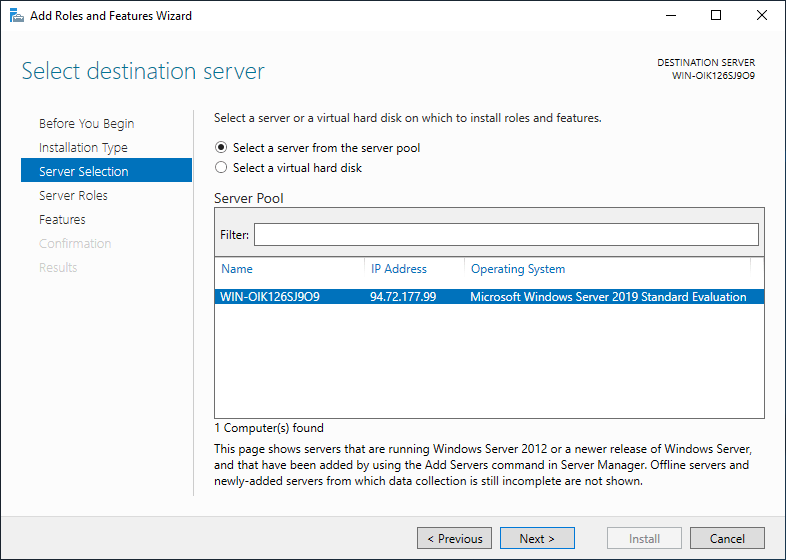
On the “Server Selection” screen, make sure “Select a server from the server pool” is chosen. Your local server should appear in the list — select it and click Next.
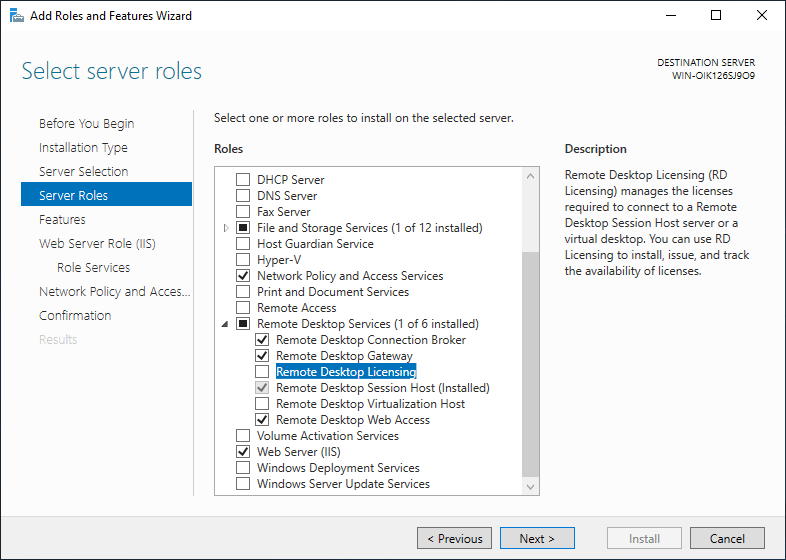
In the roles list, select “Remote Desktop Services” and click Next. On the role services screen, enable the following: Remote Desktop Connection Broker, Remote Desktop Gateway, Remote Desktop Session Host, and Remote Desktop Web Access..
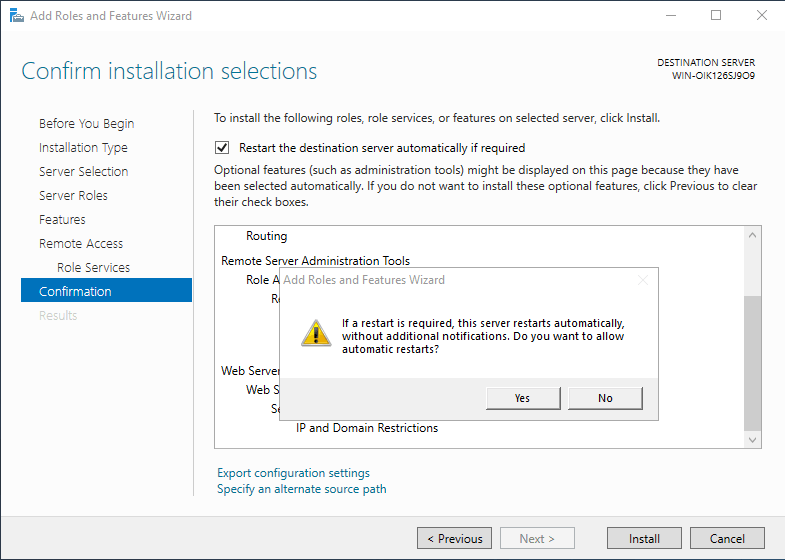
Step7: Install and restart
Click “Install” and wait for the process to complete. Once done, restart the server so the role changes take effect.
After rebooting, reconnect via RDP and test your audio again.
How to enable audio on Windows Server 2019?
If the sound icon in your taskbar has a red X, the Windows Audio service is likely stopped or disabled. Here’s how to enable it.
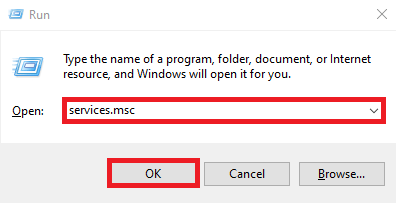
Step 1: Open Services via Run
Press Win + R to open the Run dialog. Type services.msc and press Enter
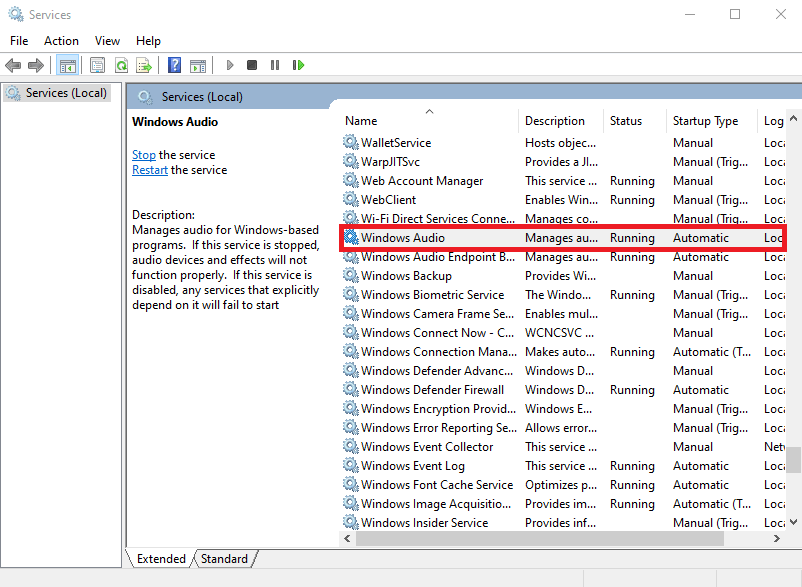
Step 2: Find Windows Audio
Scroll down the list to find “Windows Audio.” Double-click it to open its properties.
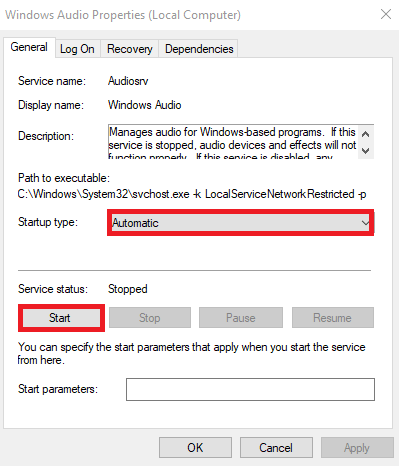
Step 3: Enable and start the service
In the Windows Audio Properties window, set the “Startup type” to Automatic. Then click “Start” under Service Status to start the service Windows Audio immediately. Click OK to confirm
Note: Alternatively, if you see a taskbar notification asking whether to enable the Windows Audio Service, you can click “Yes” directly from there — no need to open Services manually.
Conclusion
To fix Windows Server 2019 microphone not working or missing Windows Server sound, you have two paths: adjust your RDP client’s remote desktop audio settings to share your local audio devices, or enable the Windows Audio service via Services. In most cases, Method 1 resolves RDP microphone issues, while Method 2 handles cases where audio is disabled at the OS level.
Once audio is enabled, apps like your VoIP client, voice recorder, or Windows Sound Recorder should detect your microphone and speakers correctly over the Remote Desktop Connection.
FAQ
Why is Windows Server sound disabled by default?
Windows Server is optimized for stability and performance rather than multimedia. Audio services are disabled by default to reduce resource usage and the attack surface. You need to enable them manually, as shown in Method 2 above.
How do I enable the Windows Audio service automatically on startup?
Open services.msc, find “Windows Audio,” double-click it, and set the Startup type to “Automatic.” This ensures the Windows Audio service starts every time the server reboots without manual intervention.
My Windows Server 2019 microphone is not working in Teams or Zoom – what should I do?
This is almost always an RDP microphone redirection issue. Follow Method 1 in this guide, specifically Step 3, where you enable “Record from this computer” in the remote desktop audio settings. After reconnecting, your remote audio device should appear as an input option in Teams or Zoom.
Can I use Windows Sound Recorder or Voice Recorder on Windows Server 2019?
Yes, once audio is enabled using either method above, apps like Windows Sound Recorder and Voice Recorder will work normally on the server, including through an RDP session with audio redirection enabled.
Does this work on Windows Server 2016 and 2022?
Yes. The steps for enabling remote desktop audio settings and the Windows Audio service are essentially the same on Windows Server 2016 and Windows Server 2022. The interface appears slightly different in Server Manager, but the options are in the same locations.
The Author Robert Smite
Hello! I'm Robert, specializing in virtual servers and cloud technology. With expertise in managing and optimizing virtual servers, my focus is on delivering understandable and practical content in this field. My goal is to enhance knowledge and assist individuals in selecting the best virtual services for their needs.
More from Robert Smite