How to enable Remote Desktop Services in Windows Server?
We’ll concisely and precisely explain how you can enable Remote Desktop Services (RDS) on Windows Server 2019. The Remote Desktop (RDP) is disabled by default in Windows 2019, which means we have to turn it on if we tend to use it.
There are several methods to turn on Remote Desktop Services (RDS) on Windows Server 2019. Here, we have picked up five methods and will clarify how users can turn on RDS by Server Manager, PowerShell, Group Policy, Control Panel, and Command-Line.
How to enable Remote Desktop on Windows Server 2019 using Server Manager
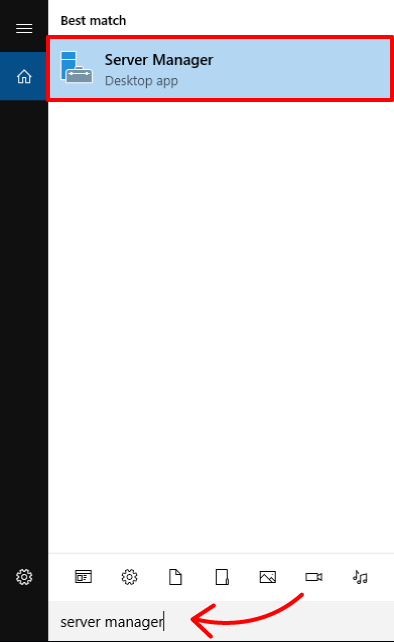
Step 1: Click the “Start” button and type “Server Manager” in the search bar and open the Server Manager.
Note: If you don’t have the server manager software installed on your computer, you can install it by typing install server manager on Windows 10.
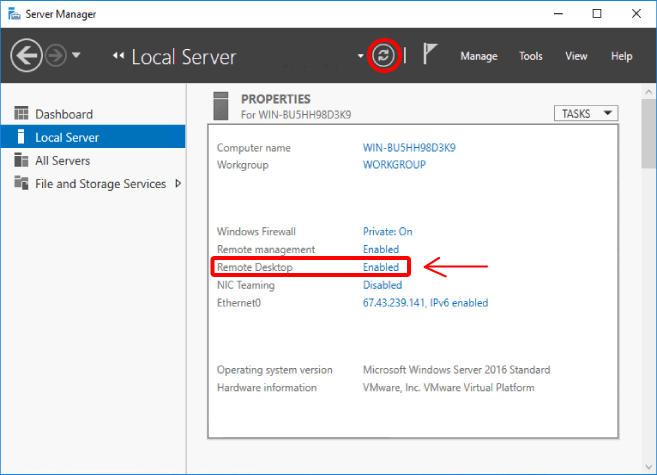
Step 2: click the “Local Server” on the left side. Then, click “Disable” next to the “Remote Desktop“.
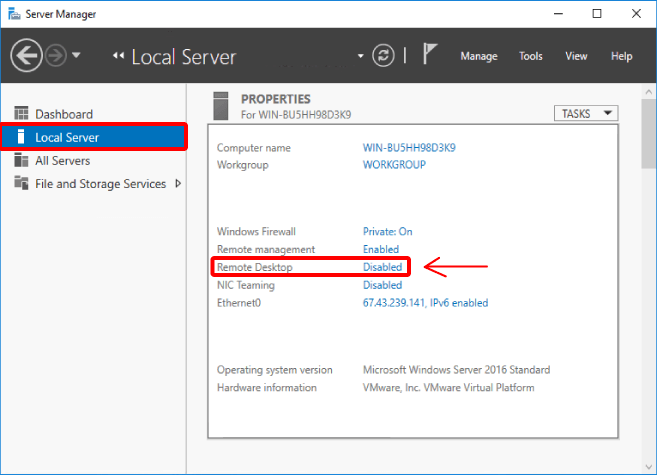
Note: The Remote Desktop is disabled on Windows Server 2019 due to security reasons.
Step 3: Clicking the “Disabled” will open the “System Properties” window. On this window, go to the “Remote” tab.
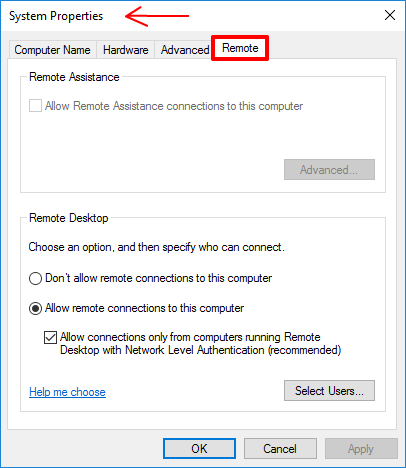
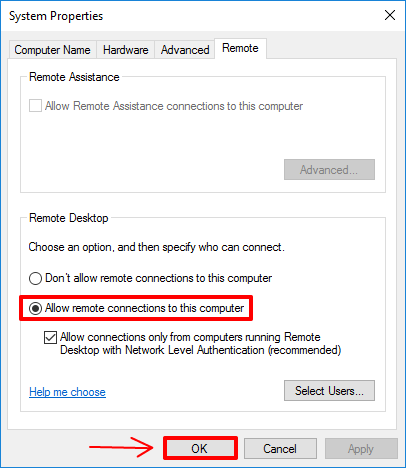
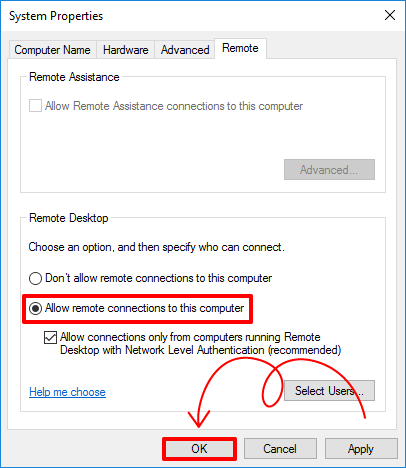
Step 4: In the “Remote” tab, click the “Allow remote connections to this computer” and then “Ok” button.
Step 5: A warning message will appear about firewall rules that allow remote desktop traffic from selected source addresses. Click the “OK” to proceed. To change the status of the Remote Desktop to “Enabled“, you can “Refresh” or press “Control+F5“.
How to Enable Remote Desktop on Windows Server 2019 Using PowerShell
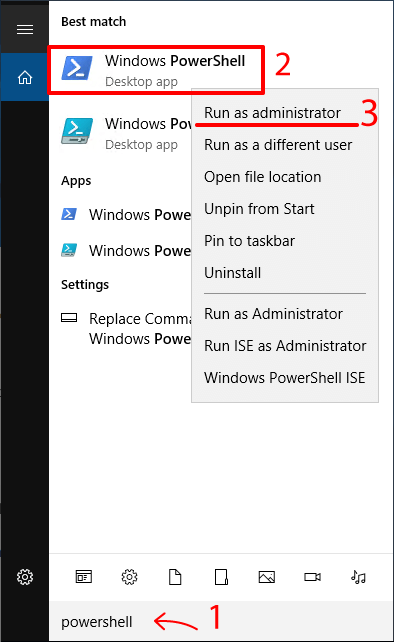
Step 1: Click the “Start” button and type “PowerShell” in the search bar. Then select “Run as Administrator“.
Step 2: Type the following command and then press “Enter“.
Set-ItemProperty-Path 'HKLM:SystemCurrentControlSetControlTerminal Server' -name "fDenyTSConnections" -value 0
Step 3: Windows firewall has blocked the Remote Desktop connections by default. To enable remote desktop connections execute the following command to configure the firewall.
Enable-NetFirewallRule -DisplayGroup "Remote Desktop"
How to enable Remote Desktop on Windows Server 2019 using Group Policy
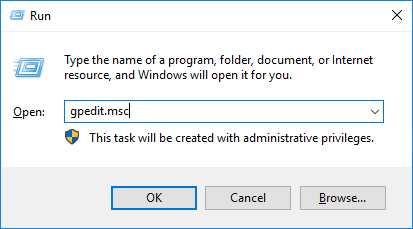
Step 1: Press “Win + R” buttons and enter “gpedit.msc” to open group policy (Or simply type “gpedit.msc” in the “start menu” and click the “gpedit.msc” in the program list).
Step 2: After “Local Group Policy Editor” opens, go through this navigation.
Computer Configuration\Administrative Templates\Windows Components\Remote Desktop Services\Remote Desktop Session Host\Connections
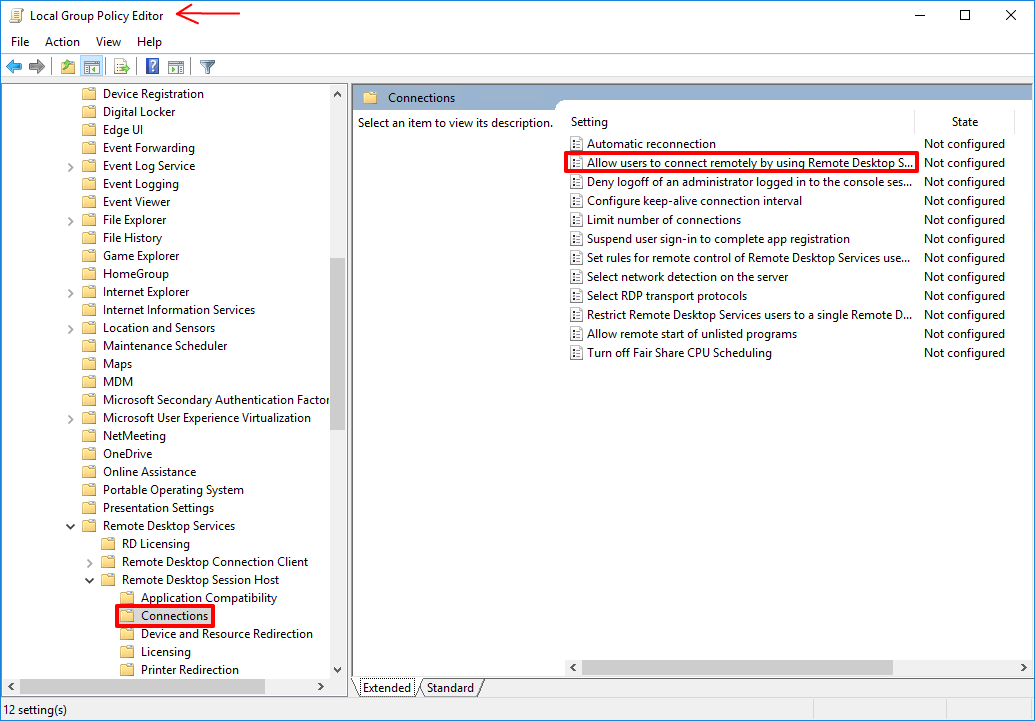
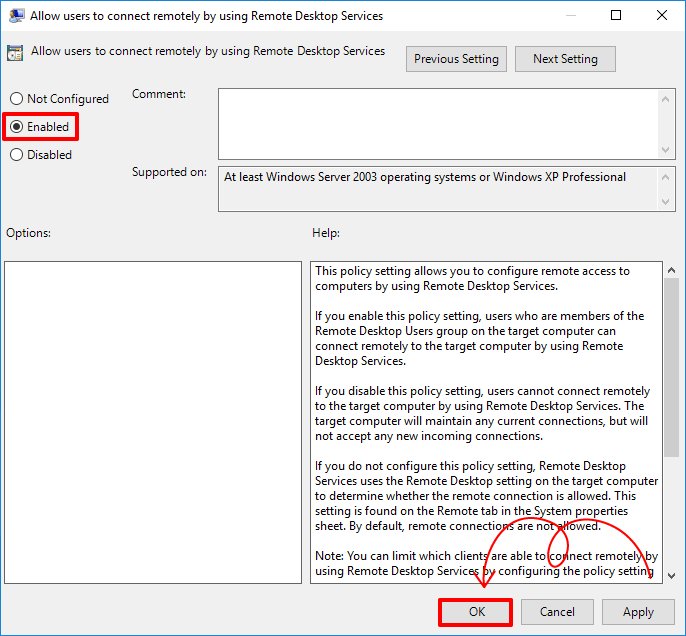
Step 3: On the right side, click “Allow users to connect remotely by using Remote Desktop Services“, and then select “Enabled” and click on “OK“.
How to enable Remote Desktop on Windows Server 2019 using Control Panel
One of the easiest options to enable Remote Desktop on Windows Server 2019 is using the control panel.
Step 1: Open the “Control Panel” (or type “Control Panel” in the search bar of the “Start“).
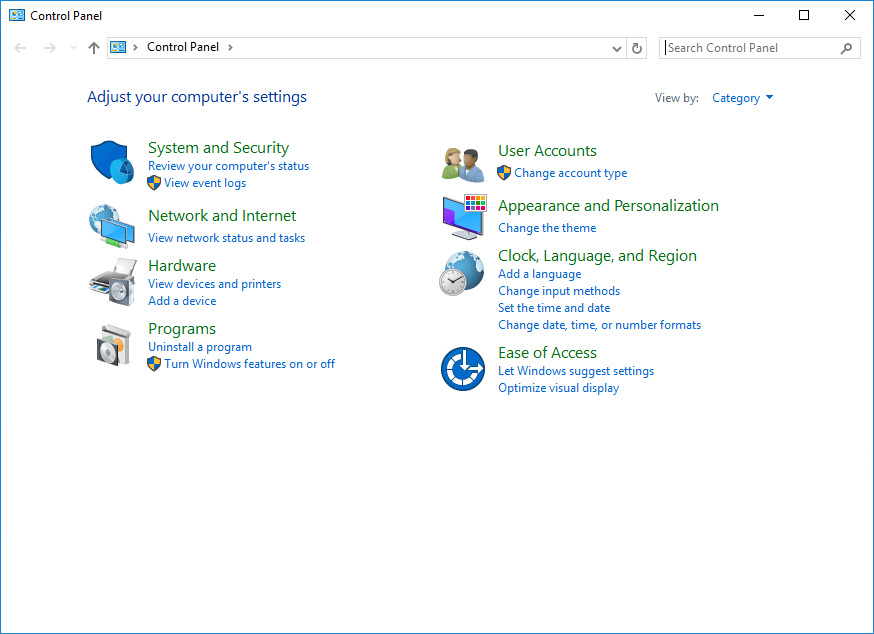
Step 2: In the Control Panel, select “System and Security“.

Step 3: In the “System” section, select “Allow remote access“.

Step 4: The System Properties window will pop up.
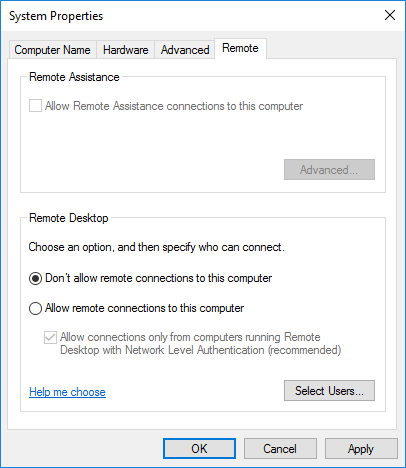
Step 5: Locate on the “Remote” tab of System Properties. Tick “Allow Remote Assistance connections to this computer” in the “Remote Assistance” section. Select “Allow remote connections to this computer” in the “Remote Desktop” section. Click “Apply” and then “OK“.
How to enable Remote Desktop on Windows Server 2019 using Command Line
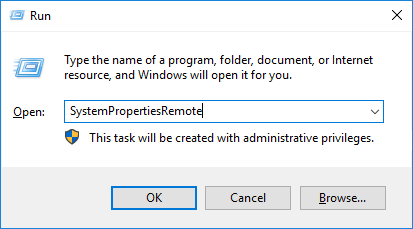
Step 1: Press Win + R to open the “Run” and then type “cmd” in the search box of “Run” for opening Command prompt (or simply Type “cmd” in the search bar of the “Start” and select “Run as Administrator” to open Command Prompt).
Step 2: In the Command Prompt, type “SystemPropertiesRemote” and then press “Enter”.
Step 3: “System Properties” window will appear. Locate on the “Remote” tab and then select “Allow remote connections to this computer” in the “Remote Desktop” section.

What is Remote Desktop?
A Remote Desktop is a software or an operating system feature that allows users to connect to or interact with a computer from another location through the internet. In other words, RD captures the mouse and keyboard inputs from the local computer (client) and sends them to the remote computer (host).
What is the difference between RDS and RDP?
RDS and RDP are two words used interchangeably. But, they are not the same thing. RDP a shortened form of Remote Desktop Protocol, is a protocol that enables users to connect to a geographically remote desktop. However, RDS is an umbrella term for features of Microsoft Windows Server that allow users to access remote desktops and applications.
There are also some differences between RDP and VPS that you can read in the RDP VS VPS article.
Summary
In this how-to guide, we named five methods and explained each method’s step-by-step process of enabling Remote Desktop Services in Windows Server 2019. If you want to make the process easier and faster, you can utilize third-party software like AnyViewer, AnyDesk, TeamViewer, and so on, which can give you an engaging experience.
Our expert team at VPSMakers is online 24/7 to help Windows Server users choose the fastest and most affordable Windows VPS for their personal use or business. Customers can research and buy the quickest and most cost-effective RDP Online servers among our different plans.
