How to Backup Mikrotik Configuration via Winbox?
Backing up your Mikrotik VPS is an important task to ensure the safety and security of your configuration and data. In case of system failure or data loss, having a backup can help you restore your VPS and recover important configuration files. In this guide, we will provide a step-by-step tutorial on how to back up a Mikrotik VPS using several different methods.
Backup MikroTik Configuration Using Winbox
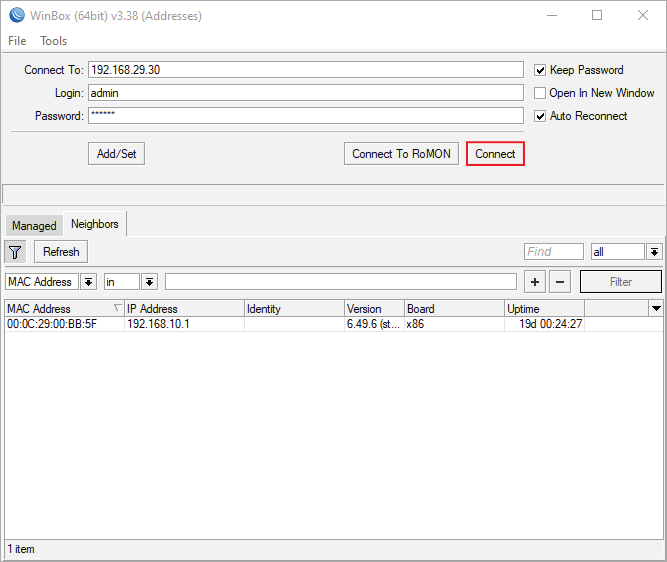
Step 1: Open Winbox and connect to your MikroTik VPS
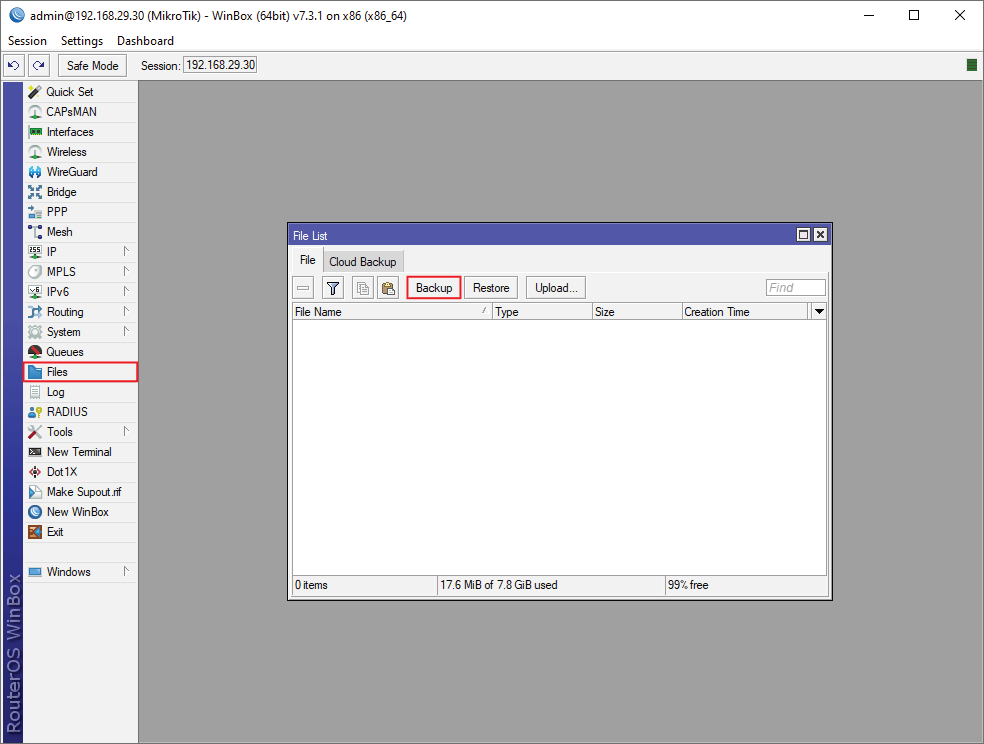
Step 2: After logging in, go to the Files section in the Winbox menu and click on the Backup option.
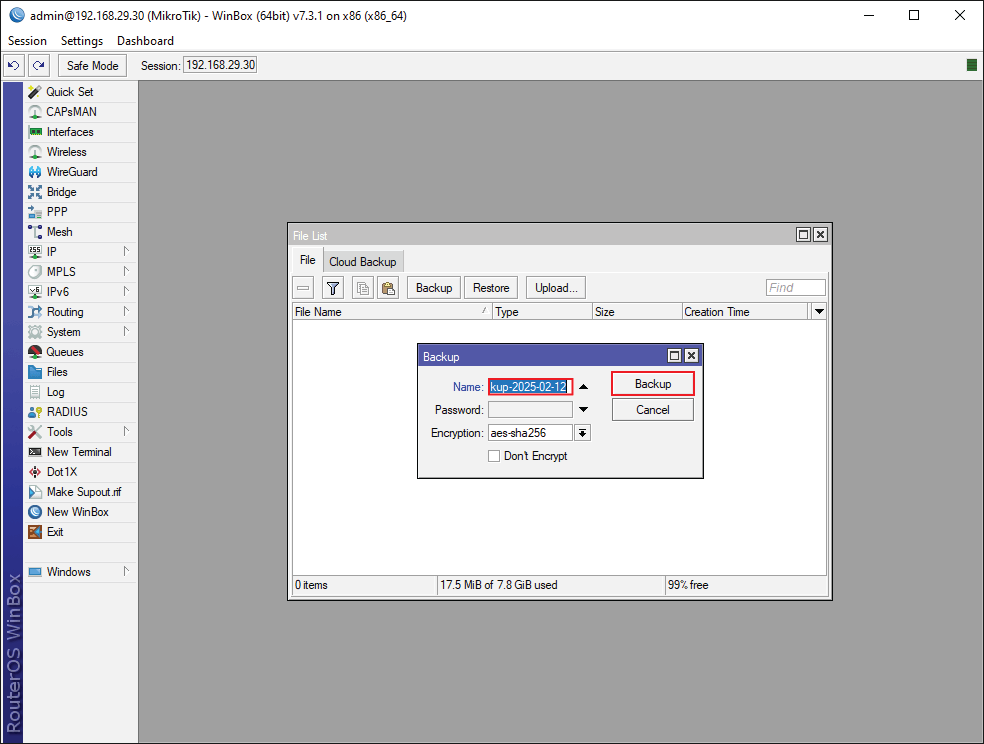
Step 3: In the backup window, you’ll see options to name the backup file and add a password (optional). Enter a descriptive name for your backup file (e.g., router-backup-2025-02-05). If you don’t want to encrypt the backup, check the “Don’t Encrypt” box. To save the settings, click the Backup button.
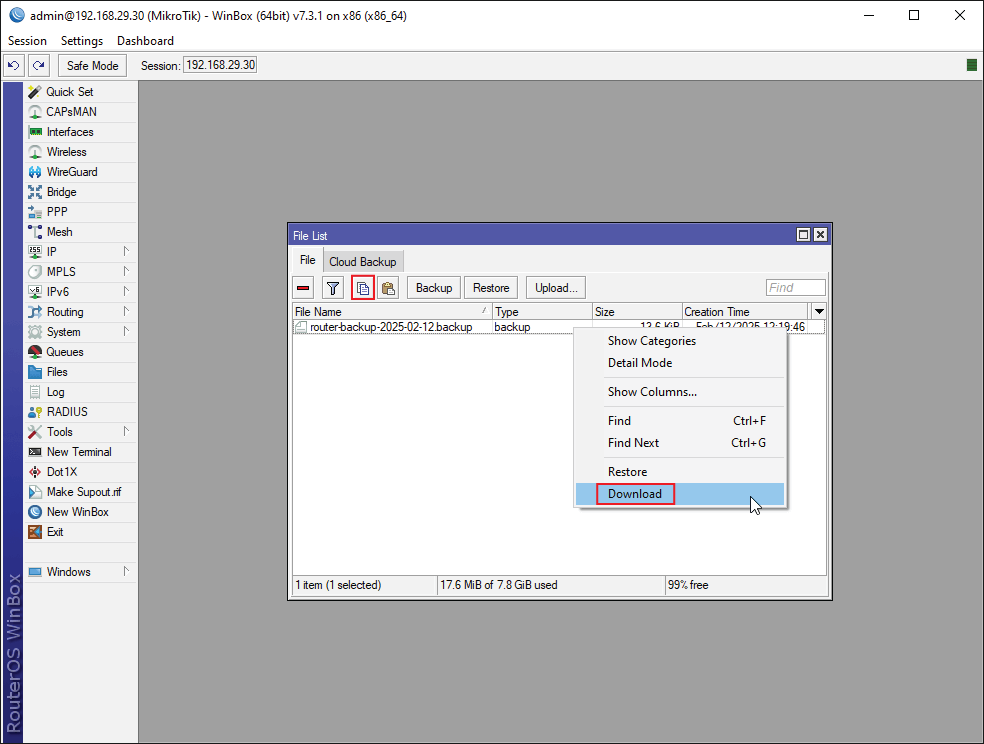
Step 4: You have the option to copy or Download the backup file. To download, right-click and select the Download option. Save the downloaded backup file to a secure location such as an External Drive, Cloud Storage, or a Dedicated Backup Server.
Note: Ensure you have multiple copies in different locations for redundancy.
Set Up Automatic Backups on MikroTik
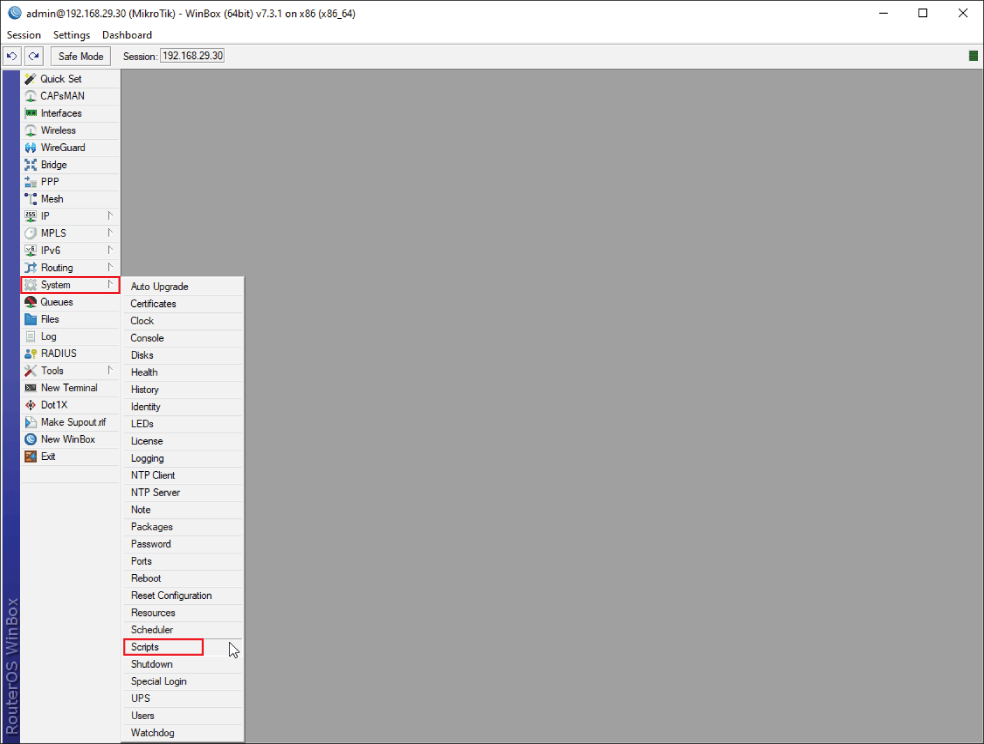
Step 1: Go to the System menu in Winbox and click on the Scripts option.
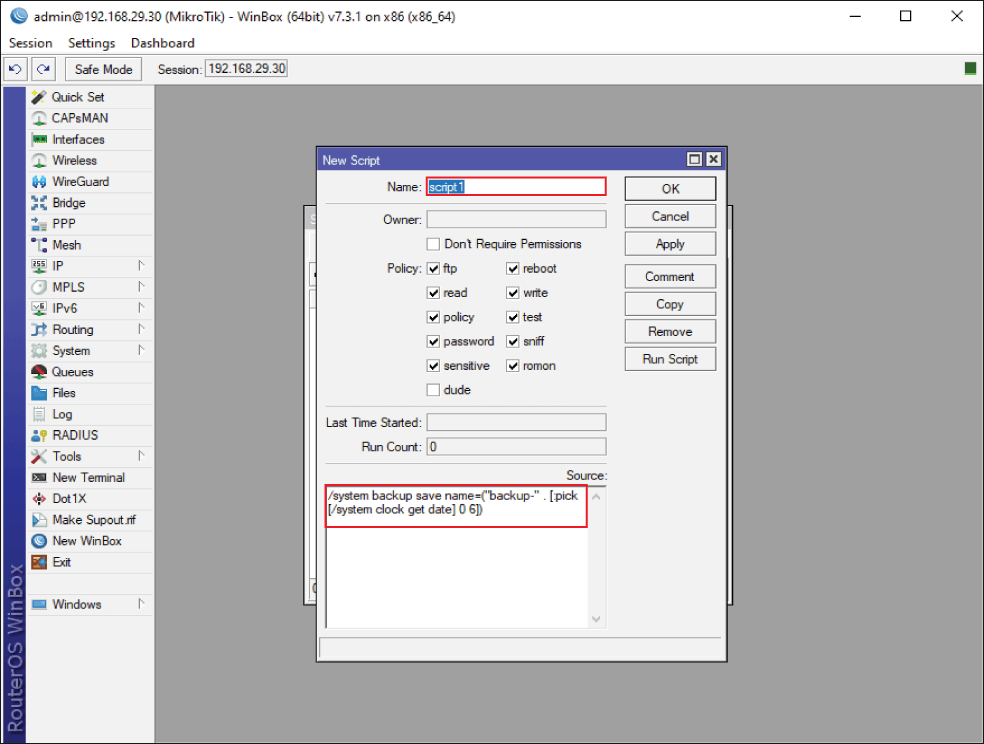
Step 2: Click the (+) button to create a new script

Step 3: Provide a Name for the script and input the following script code into the Source field. Once you’ve done this, click OK to proceed.
/system backup save name=("backup-" . [:pick [/system clock get date] 0 6])
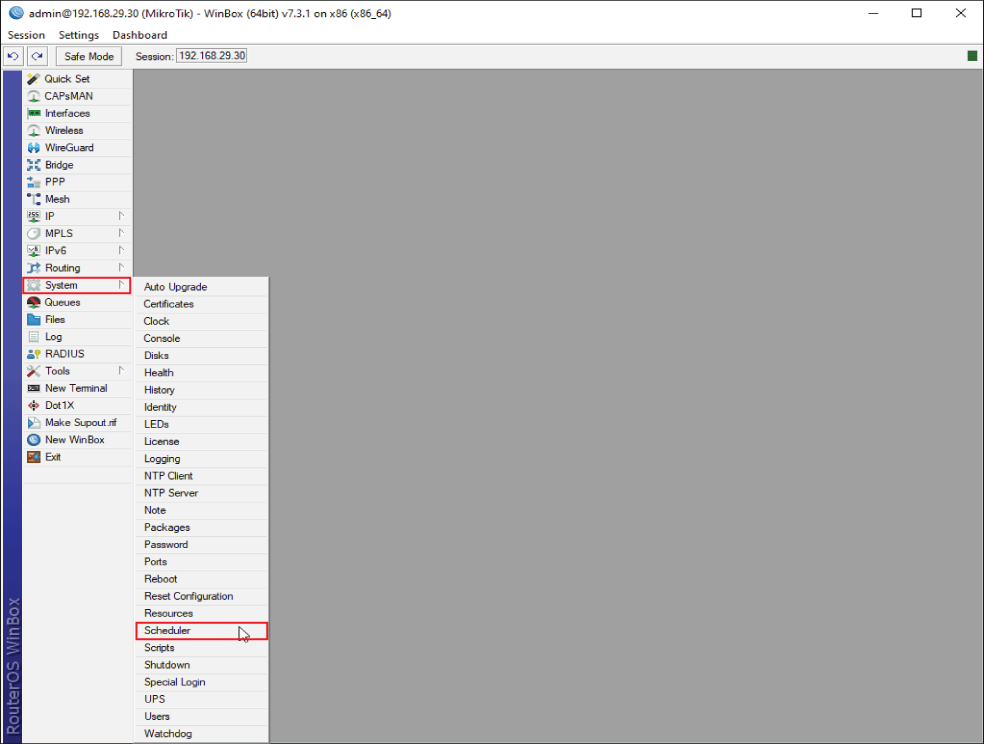
Step 4: Go to the System menu in Winbox and click on the Scheduler option.
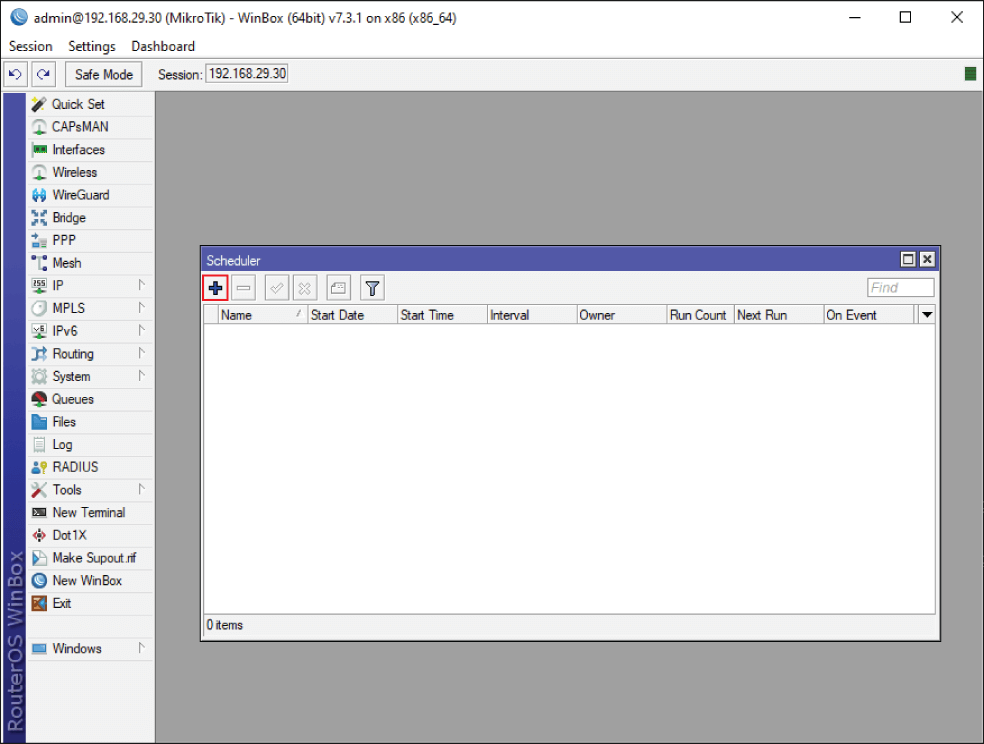
step 5: Click the (+) button to create a new scheduler task.
Step 6: Name the task (e.g., Auto Backup). Set the daily backup interval to 1d or adjust it to your desired frequency (e.g., 168:00:00=7d for a weekly backup). In the On Event section, enter the name of the script you created earlier. Click OK to save the scheduler task

The backup will now run automatically according to the specified schedule.
How to Upload and Restore a MikroTik Configuration from a Backup
Upload Mikrotik Backup File
1. Open Winbox and log in to your router.
2. Go to the Files section
3. click Upload to upload the support file.

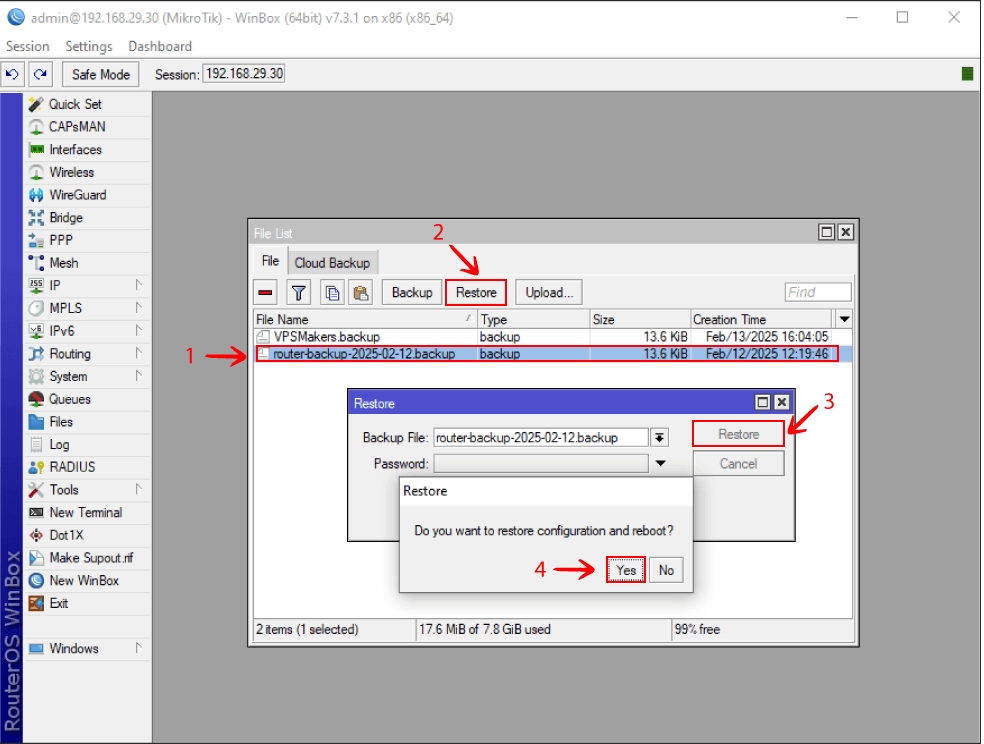
Restore Mikrotik Backup File
1. Select the Backup file and
2. click the Restore button.
3. Wait for router to reboot.
Conclusion
Backing up your MikroTik configuration with Winbox is crucial for network security and quick recovery. Best practices include storing backups in multiple locations, keeping them updated, and creating backups before making changes. Use Winbox to manually save configurations or automate the process with scripts and scheduling. Regularly test the restoration process to ensure backups work. By following these steps, you can protect your network settings, ensure quick recovery, and maintain a stable, secure network.
The Author Richard.M
Richard started out as a member of the support team and is now a full-stack web developer and support team lead at VPS Makers. He is passionate about providing people with top-notch technical solutions based on his 5 years of experience in web hosting, but as much as he enjoys coding and creating new works, he secretly dreams of becoming a sports star.
More from Richard.M