How to Change Winbox Port Number?
The security of your Virtual Private Server (VPS) is of utmost importance, and changing the Winbox port is an effective way to increase security. In this article, we will show you how to change your Winbox port on Mikrotik VPS.
Why Change Port Number is importance?
- Security: The default port (usually 8291) is well-known and often targeted by hackers. Changing it adds an extra layer of security.
- Customization: You can choose a port that’s easier to remember or aligns with your server setup.
- Compliance: Some organizations require non-default ports for compliance with security policies.
How to Change Winbox Port with GUI
Changing the default port on your MikroTik VPS is an important step to increase security and protect your server from unauthorized access. In this step-by-step guide, we’ll show you how to change the MikroTik port using both Winbox and Terminal to keep your server secure.
Step 1: Access MikroTik via Winbox or WebFig
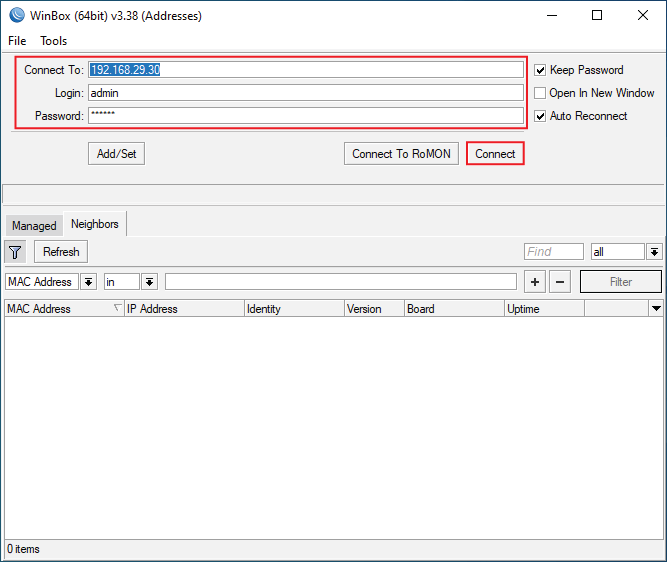
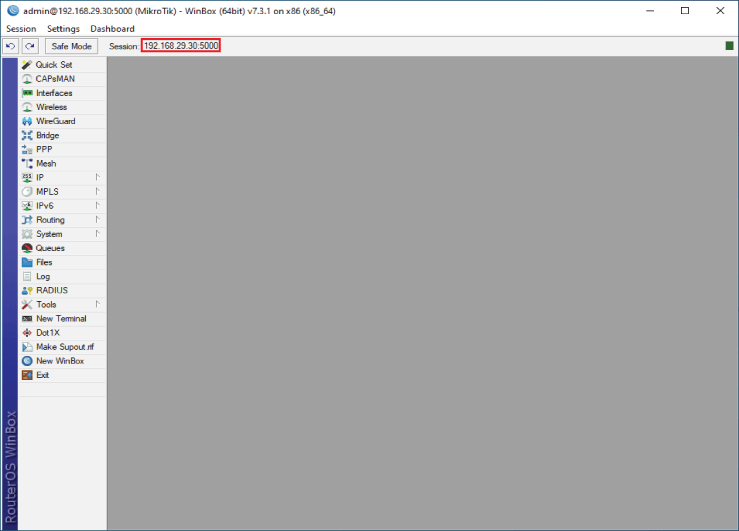
- Open free Winbox or your preferred browser to access WebFig.
- After you buy MikroTik VPS, the login details will be sent to you. Once you receive your MikroTik VPS IP address, enter it along with your username and password.
- Click Connect to log in to the MikroTik interface.
Step 2: Navigate to IP Services
1. On the left-hand menu, click on IP. Select Services from the dropdown menu.
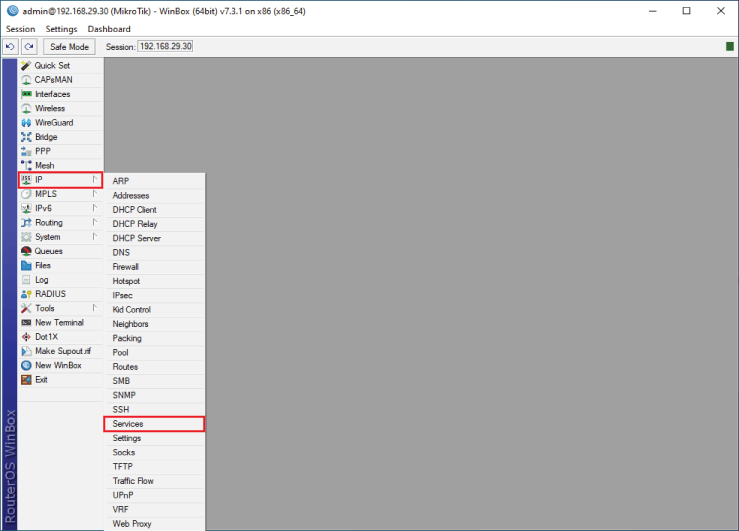
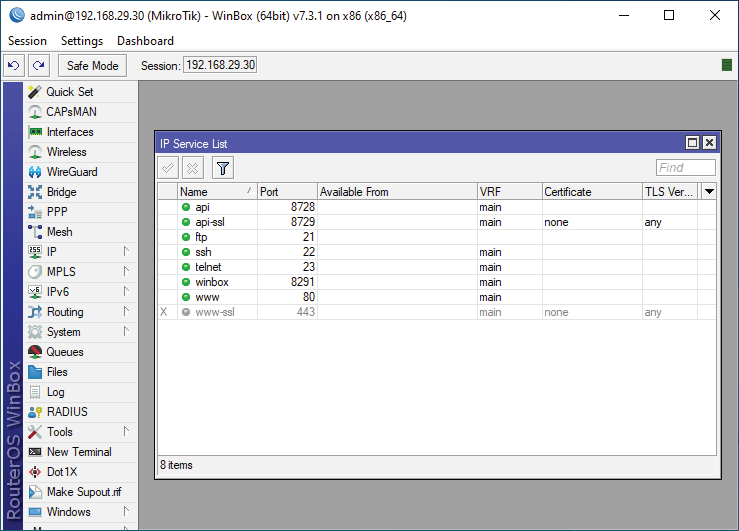
2. You’ll see a list of services and their associated ports (e.g., Winbox, SSH, FTP).
Step 3: Change the Default Port
1. Locate the service you want to modify (e.g., Winbox). Double-click on the service to open its settings
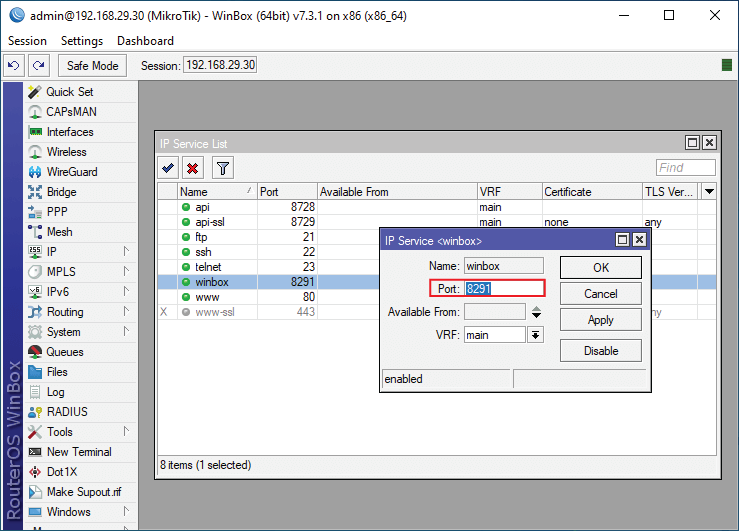
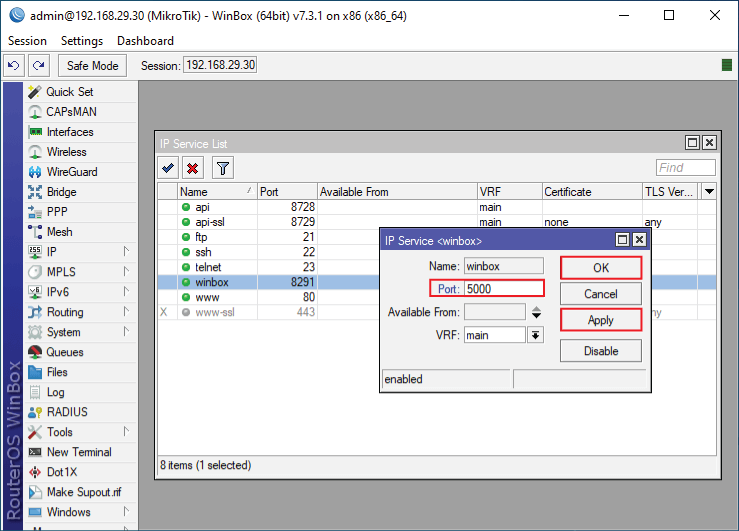
2. In the Port field, replace the default port number (e.g., 8291) with your desired port number (e.g., 5000).
Click OK to save the changes.
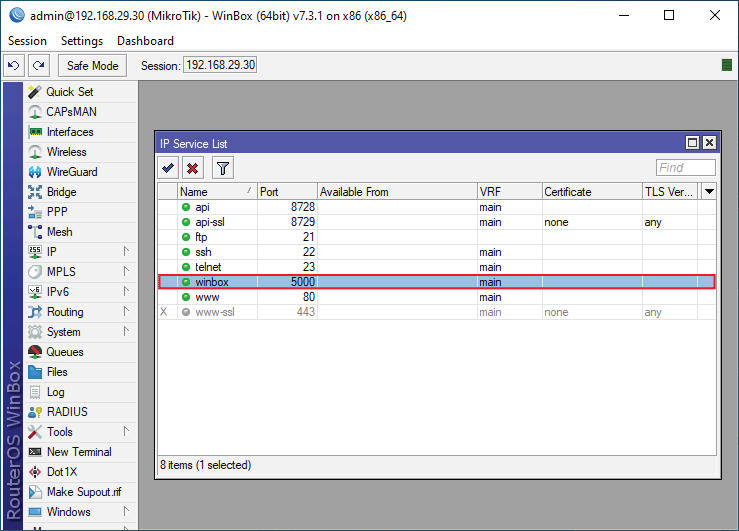
Port number 8291 will be changed to 5000.
Step 4: Update Firewall Rules (Optional)
If you have a firewall configured, make sure to update the rules to allow traffic on the new port:
Go to IP > Firewall.

Edit the relevant firewall rules to include the new port number. Save the changes.

Step 5: Test the New Port
Disconnect from the current session.
Reconnect to your MikroTik VPS using the new port number.
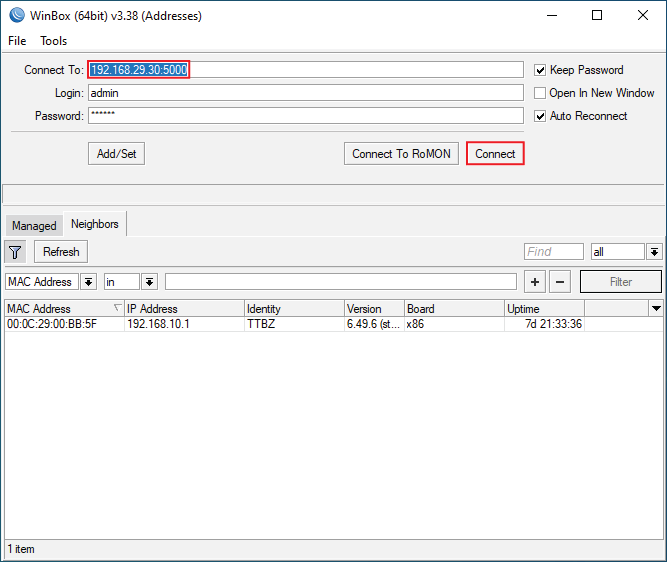
Verify that the connection is successful.
How to Change Winbox Port Using Mikrotik Terminal:
Changing the MikroTik port via the terminal is a good way to increase the security of your server and customize its settings. These step-by-step instructions will guide you through the process and make it easy to understand and implement, even for beginners.
Step 1: Connect to MikroTik via Terminal
Open your Mikrotik terminal in winbox
Alternatively, you can connect to your MikroTik VPS using PuTTY (on Windows), Linux, or macOS. Enter the following command to connect to your MikroTik VPS with ssh:
ssh admin@your-vps-ip -p 22
- Replace your-vps-ip with your VPS IP address.
- Replace admin with your MikroTik username.
- If your SSH port is not 22, replace it with the correct port number.
Step 2: Check Current Services
Once connected, run the following command to view the current services and their ports:
/ip service print
You’ll see an output similar to this:
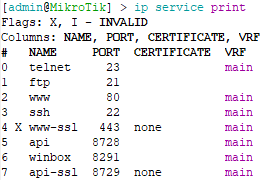
Here, the Winbox service is using port 8291 by default.
Step 3: Change the Winbox Port
To change the Winbox port, use the following command:
/ip service set winbox port=5000
Verify the change by running the print command again:
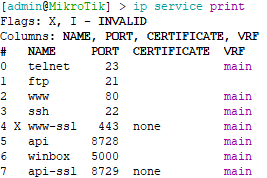
You should now see the Winbox port updated to 5000.
Top Tips for Changing MikroTik Port
Choose a non-standard port: Avoid common port numbers (e.g. 8080, 8888) to reduce the risk of attacks.
Document the change: Make a note of the new port number for future reference.
Use strong passwords: Combine port changes with strong passwords for maximum security.
Update MikroTik regularly: Make sure your MikroTik RouterOS is up to date to benefit from the latest security patches.
Conclusion
Changing the MikroTik port on your VPS is a simple but effective way to improve server security. By following this step-by-step guide, you can customize the port settings and protect your server from potential threats. Don’t forget to test the new configuration and update your firewall rules if necessary.
FAQs
1. Why is it important to change the default port?
Changing the default port reduces the risk of automated attacks on known ports.
2. Can I use any port number?
Yes, but avoid using ports that are reserved for other services (e.g. 80 for HTTP, 443 for HTTPS).
3. What if I have forgotten the new port number?
You can reset the port number by accessing your VPS via the console or by contacting your hosting provider.
4. Does changing the port affect performance?
No, changing the port has no effect on performance. It only increases security.
The Author Robert Smite
Hello! I'm Robert, specializing in virtual servers and cloud technology. With expertise in managing and optimizing virtual servers, my focus is on delivering understandable and practical content in this field. My goal is to enhance knowledge and assist individuals in selecting the best virtual services for their needs.
More from Robert Smite